
DTS V8-4.6L VIN Y (2006)
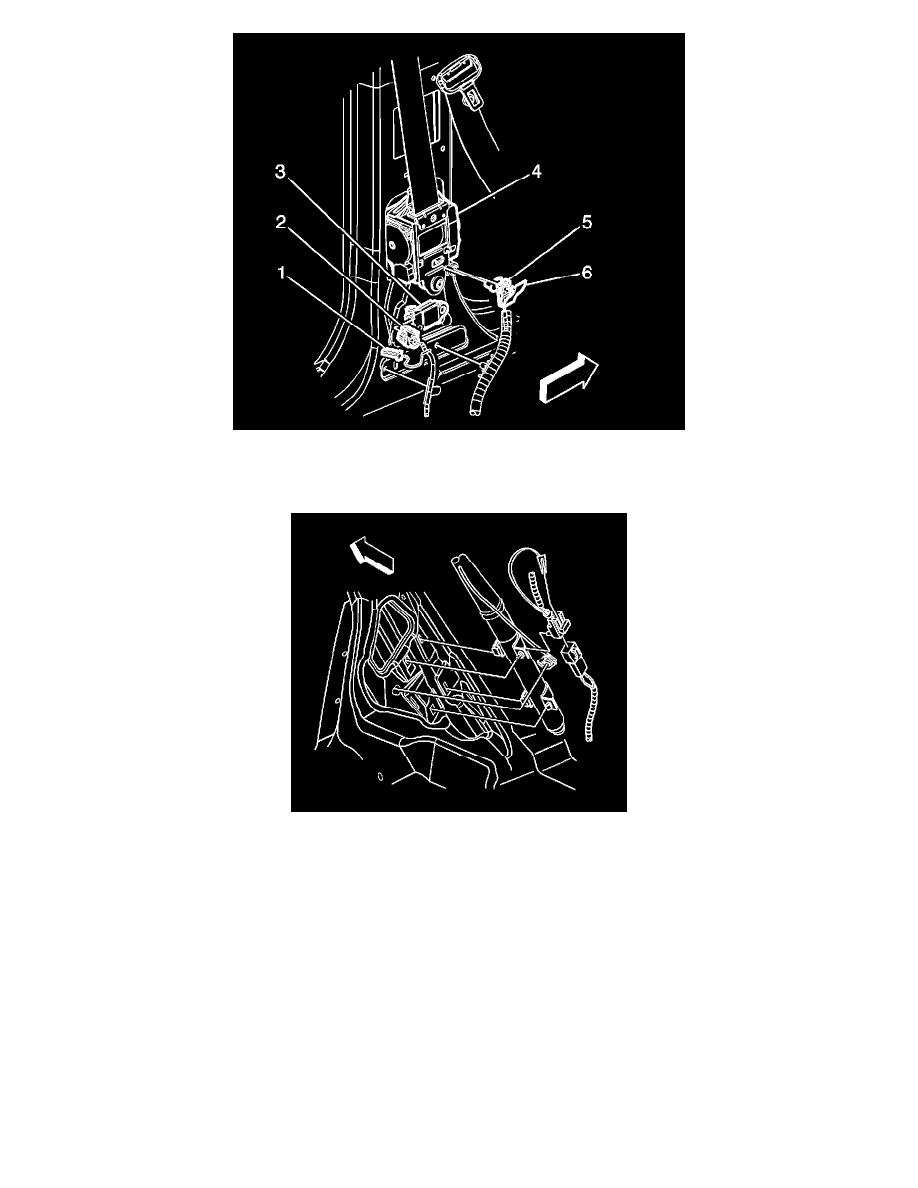
12. Connect the seat belt retractor pretensioner - LF connector (5) to the seat belt retractor pretensioner - LF (4).
13. Install the CPA (6) to the seat belt retractor pretensioner - LF connector (5).
14. Install the lower center pillar trim.
15. Connect the roof rail module - left connector to the vehicle harness connector.
16. Install the CPA to the roof rail module - left connector.
17. Install the trim molding to the rear quarter pillar.
18. Install both Air Bag Fuses, one in the underhood fuse center and one in the interior fuse center.
19. Replace both fuse center covers.
20. Install the rear seat.
21. Use caution while reaching in and turn the ignition switch to the ON position.The AIR BAG indicator will flash then turn OFF.
22. Perform the Diagnostic System Check - Vehicle if the AIR BAG warning indicator does not operate as described. Refer to Diagnostic System
Check - Vehicle. See: Powertrain Management/Computers and Control Systems/Testing and Inspection/Diagnostic Trouble Code Tests and
Associated Procedures
SIR Disabling and Enabling Zone 7
SIR DISABLING AND ENABLING ZONE 7
DISABLING PROCEDURE
1. Turn the steering wheel so that the vehicles wheels are pointing straight ahead.
2. Place the ignition in the OFF position.