
Eldorado V8-350 5.7L DSL (1984)
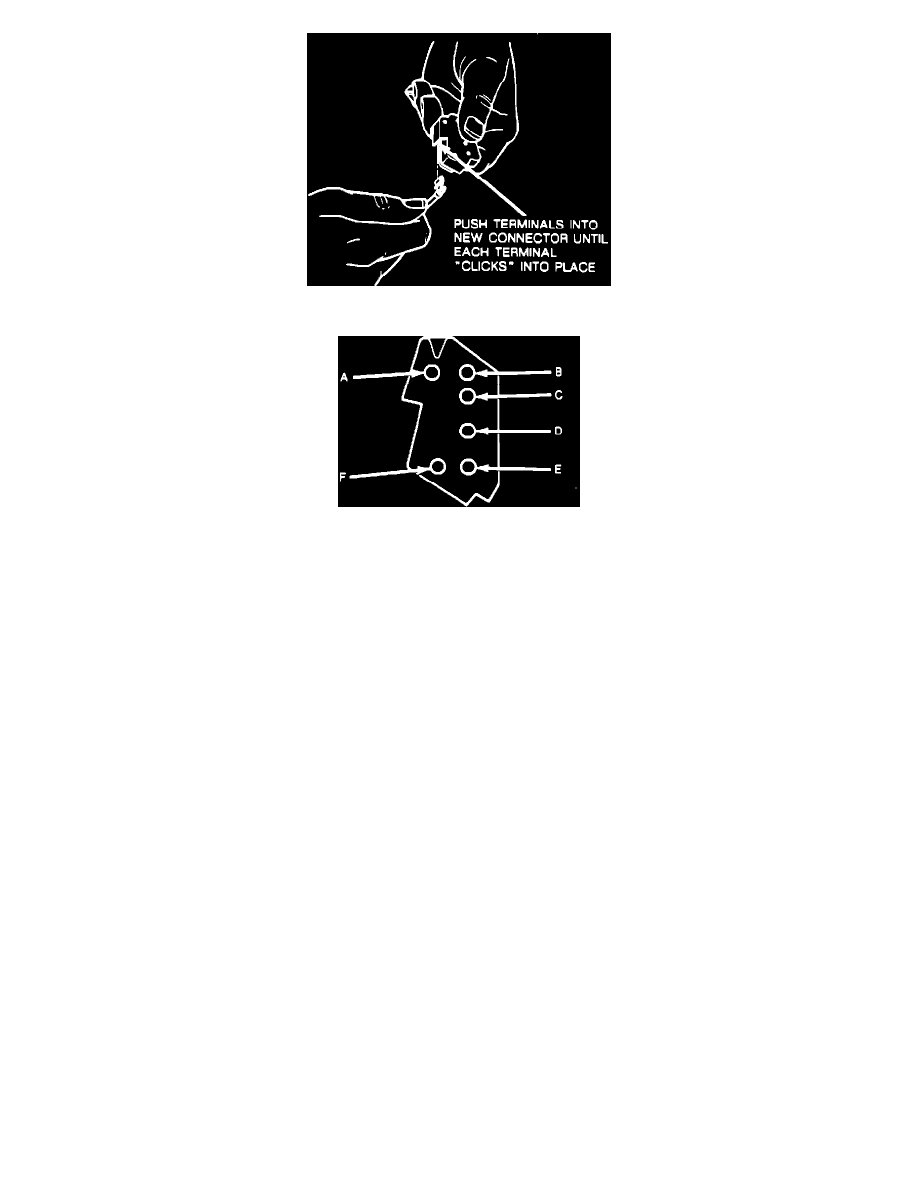
FIGURE 2 - INSERTING TERMINALS
FIGURE 3 - CONNECTOR INDEXING
b.
Insert the metal terminals into the two new connectors (P/N 12048027) until each terminal "clicks" into place. (See Figure 2.) Be certain
to insert the correct terminals into the correct connector cavities by referring to the table below and Figure 3.
Front Window Switch Connector
Cavity
Wire Color
Circuit No.
A
Pink
76
B
Dark Blue/White
166
C
Tan
167
D
Brown
165
E
Dark Blue
164
F
Black
150
Rear Window Switch Connector
Cavity
Wire Color
Circuit No.
A
Pink
76
B
Purple
169
C
Dark Green
168
D
Light Green
170
E
Purple/White
171
F
Black
150
6.
Connect both connectors to switches.
7.
Install armrest trim plate.
8.
Reconnect negative battery cable.
9.
Install Campaign Completion Label.
CAMPAIGN COMPLETION LABEL
Upon completion of this campaign, a white campaign label (Cat. No. S-1015) should be affixed on a clean, dry surface of the radiator support tie bar in
an area clearly visible when the hood is raised. Each label provides space to print in ink (or type) campaign number 85-C-4 and your five-digit Cadillac