
Eldorado V8-4.6L VIN Y (1994)
possible.
7.
Important:
Ensure the center seam of the center insert is aligned with the center seam of the trim cover. Stitch the two piece center insert assembly to the
trim cover.
8.
Install the seat trim cover (back/cushion). Refer to the appropriate seat trim cover installation procedure in the Seats sub-section of the Service
Manual.
9.
Attach the seat back assembly to the seat cushion assembly.
^
Install the hinge bolts.
^
Install the roll pins that retain the reclining actuator to the seat back hinge.
^
Connect the electrical connectors between the seat back and the seat cushion.
10.
Place the seat assembly inside the vehicle and connect the electrical connectors. DO NOT install at this time.
11.
Verify the seat heat function is operational.
12.
Complete the seat assembly installation. Refer to Seat Replacement in the Seats sub-section of the appropriate Service Manual for the installation
procedure.
Seville/Eldorado
If a sublet trim repair facility is used, please provide a copy of this bulletin to the repair shop.
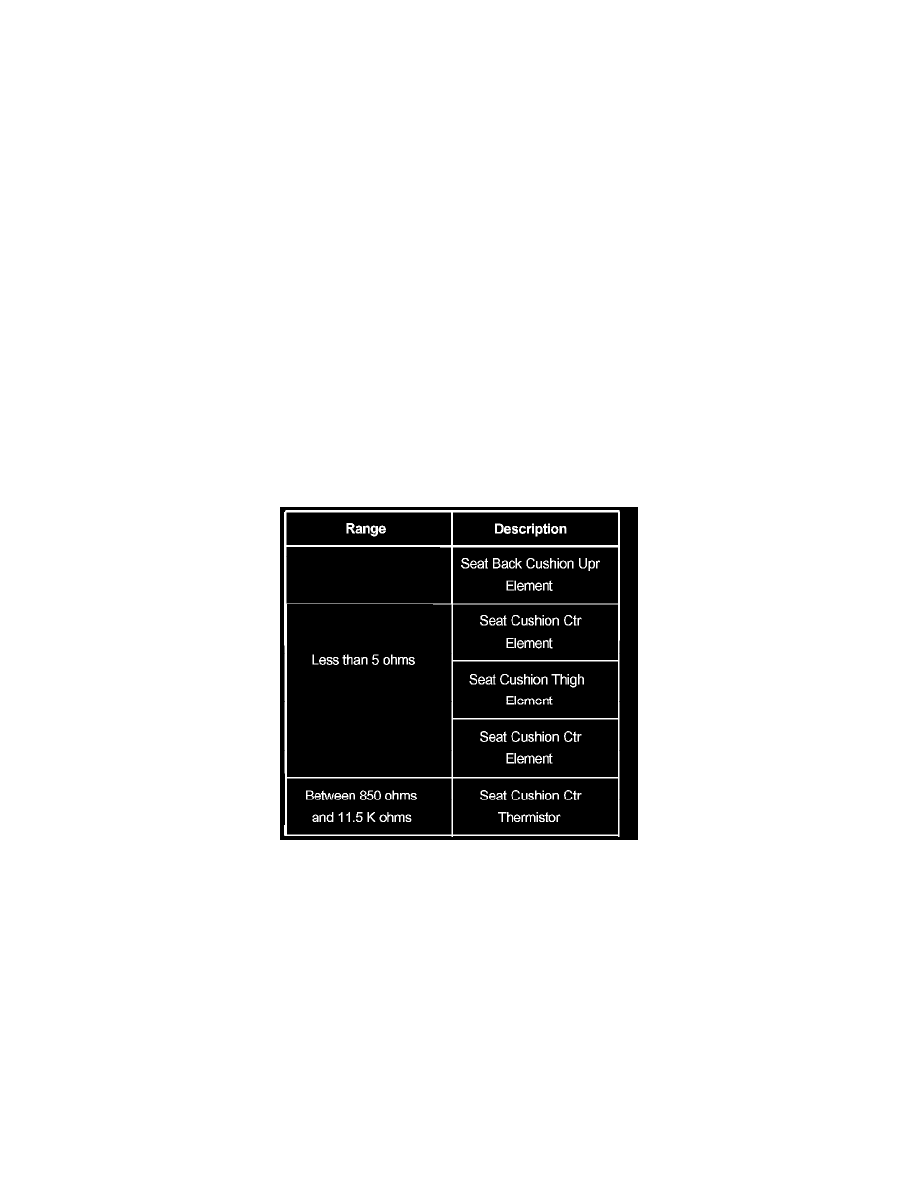
Important:
Before installing the service heat element, verify that the resistance values are within the specified range. Refer to the table shown.
Important:
DO NOT attempt to remove the factory heat elements from the seat trim cover. The service heat element is to be installed between the existing
factory heat element and the seat trim cover.
Back Cushion Center Installation (Cushion Center Similar)
Seville/Eldorado
1.
Separate the seat back assembly from the seat cushion assembly.
^
Disconnect the electrical connectors between the seat back and the seat cushion.
^
Remove the roll pins retaining the reclining actuator to the seat back hinge.