
Escalade ESV RWD V8-6.2L (2010)
*
A cross hatched (knurled) core crimp that provides the necessary contact integrity for sensitive low energy circuits.
1. Use the connector end view to identify the correct terminated lead.
2. The terminated lead package should include a DuraSeal splice sleeve. If not, use the chart to identify the correct part.
3. Open the harness by removing any tape:
Use a sewing seam ripper, or a comparable tool, to cut open the harness, to avoid wire insulation damage.
4. Depending on how many terminals need repairs, cut the terminal and wire back at least 40 mm. Try to keep the harness wire length the same.
If more than one terminated lead is required, stagger the lengths by 40 mm. This helps reduce the bundle size of the wire harness.
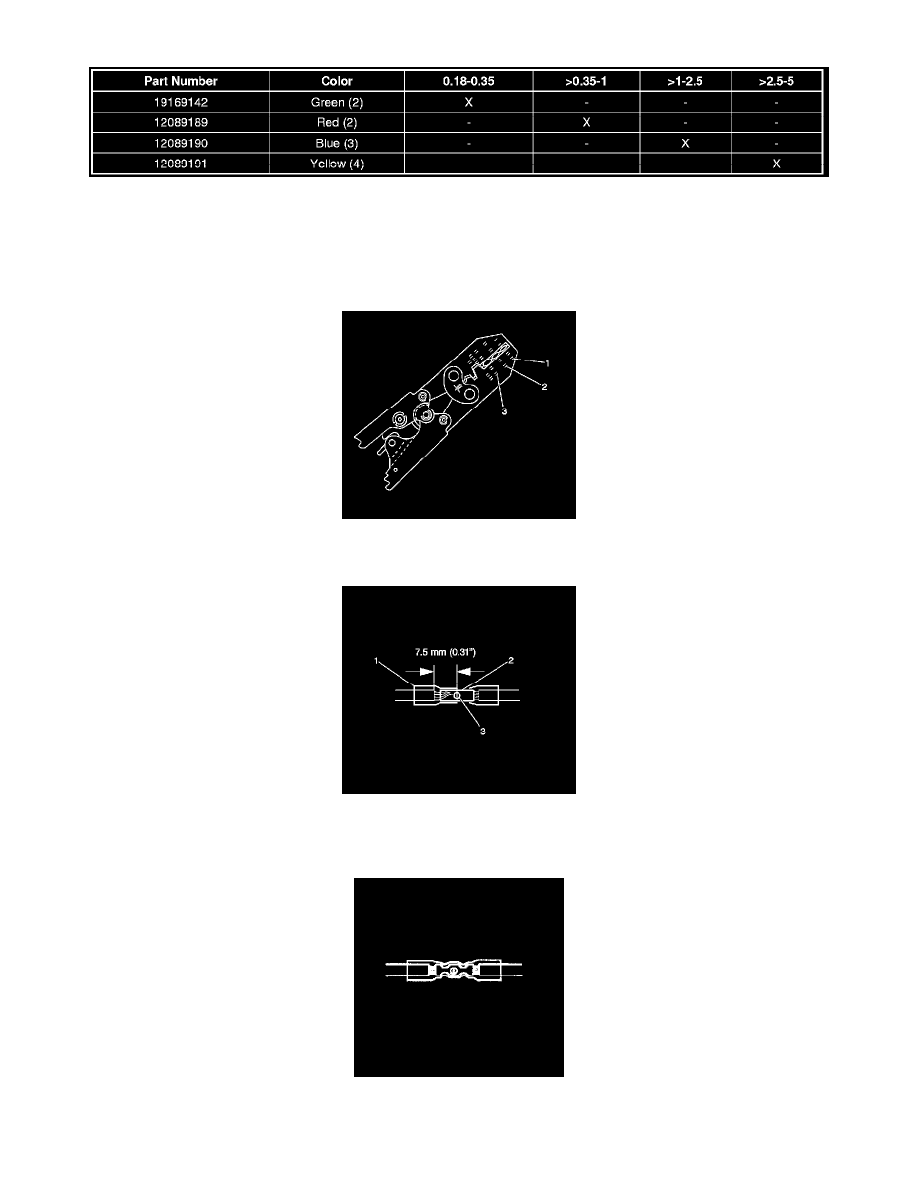
5. Use the EL-38125-10 - tool in order to position the DuraSeal splice sleeve in the proper color nest of the splice sleeve crimp tool. The crimp tool
has four nests, one for each color.
6. Place the DuraSeal splice sleeve in the nest. Ensure that the crimp falls midway between the end of the barrel and the stop. The sleeve has a stop
(3) in the middle of the barrel (2) in order to prevent the wire (1) from going further. Close the hand crimper handles slightly in order to firmly
hold the DuraSeal splice sleeve in the proper nest.
7. Insert the wire into the splice sleeve barrel until the wire hits the barrel stop.
8. Tightly close the handles of the crimp tool until the crimper handles open when released.
The crimper handles will not open until you apply the proper amount of pressure to the DuraSeal splice sleeve. Repeat steps 4 and 5 for the