
Escalade V8-5.7L VIN R (2000)
Brake Proportioning/Combination Valve: Service and Repair
Removal Procedure
1. Prior to replacement of the combination valve, note the identification code on the valve. It is necessary to have the proper code when replacing the
valve.
2. Remove the combination valve electrical connector.
3. Remove the front and rear brake pipes.
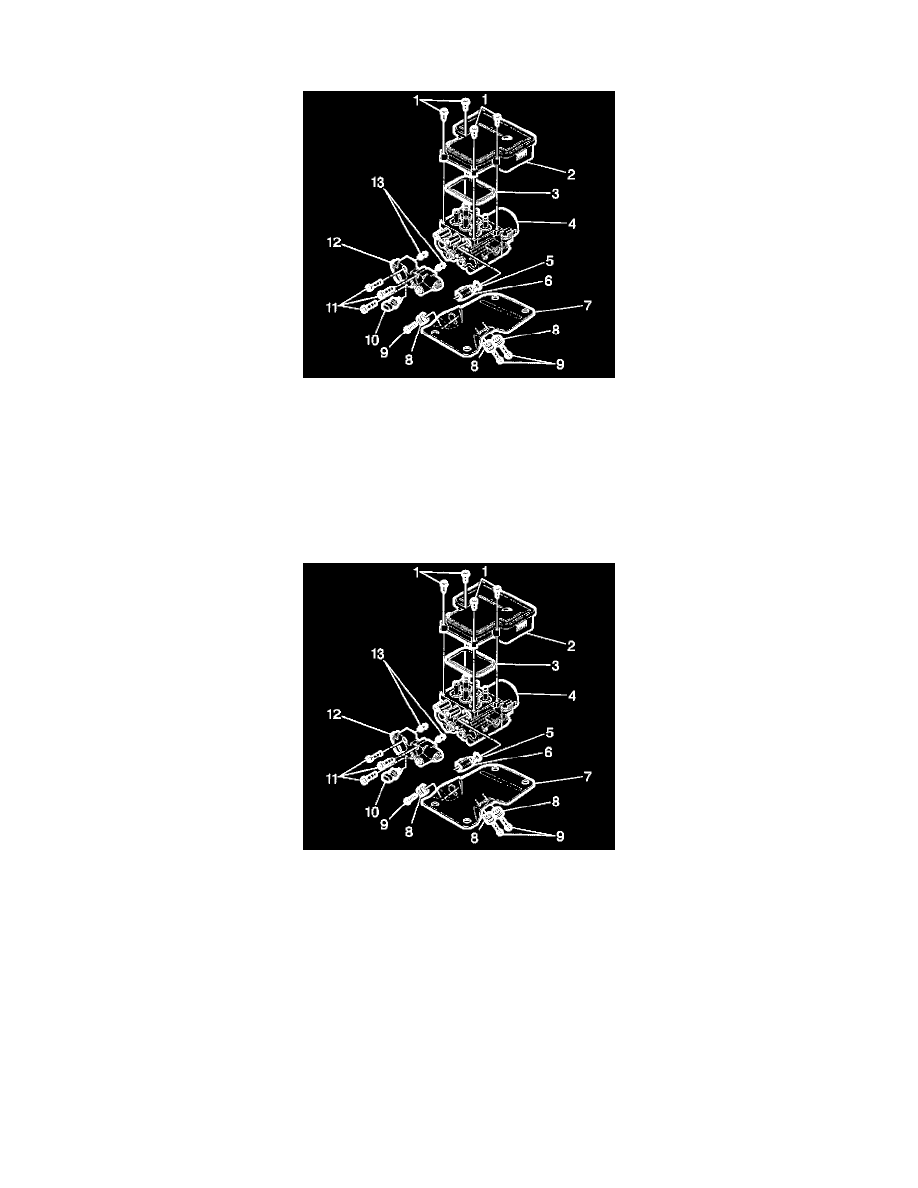
4. Remove three alien bolts (11) securing combination valve (12) to the BPMV.
5. Remove the combination valve (12) from the BPMV.
6. Remove two transfer tubes (13).
Installation Procedure
Important: Do not reuse the transfer tubes. Always install new transfer tubes with a new combination valve.
Verify that the replacement combination valve has the same pin punched identification code as the code found on the old part.
1. Install two new transfer tubes (13) into the combination valve until fully seated.
2. Install combination valve (12) to BPMV.
Notice: Refer to Fastener Notice in Service Precautions.
3. Install three combination valve bolts (11).
^
Tighten bolts first to 8 Nm (6 ft. lbs.), then to 16 Nm (12 ft. lbs.).
4. Front and rear brake pipes to combination valve.
^
Tighten brake pipe fittings to 24 Nm (18 ft. lbs.).