
Escalade V8-5.7L VIN R (2000)
Fuel Gauge Sender: Service and Repair
REMOVAL PROCEDURE
TOOLS REQUIRED
^
J 34730-1A Fuel Pressure Gauge
^
J 39765 Fuel Sender Lock Nut Wrench
CAUTION: Refer to Battery Disconnect Caution in Service Precautions.
1. Disconnect the negative battery cable.
2. Relieve the fuel system pressure. Refer to the Fuel Pressure Relief Procedure. See: Engine, Cooling and Exhaust/Engine/Cylinder Head
Assembly/Fuel Pressure Release/Service and Repair
3. Drain the fuel tank. Refer to Fuel Tank Draining Procedure. See: Powertrain Management/Fuel Delivery and Air Induction/Fuel Tank/Service and
Repair/Procedures
4. Remove the fuel tank.
5. Remove the fuel sender assembly.
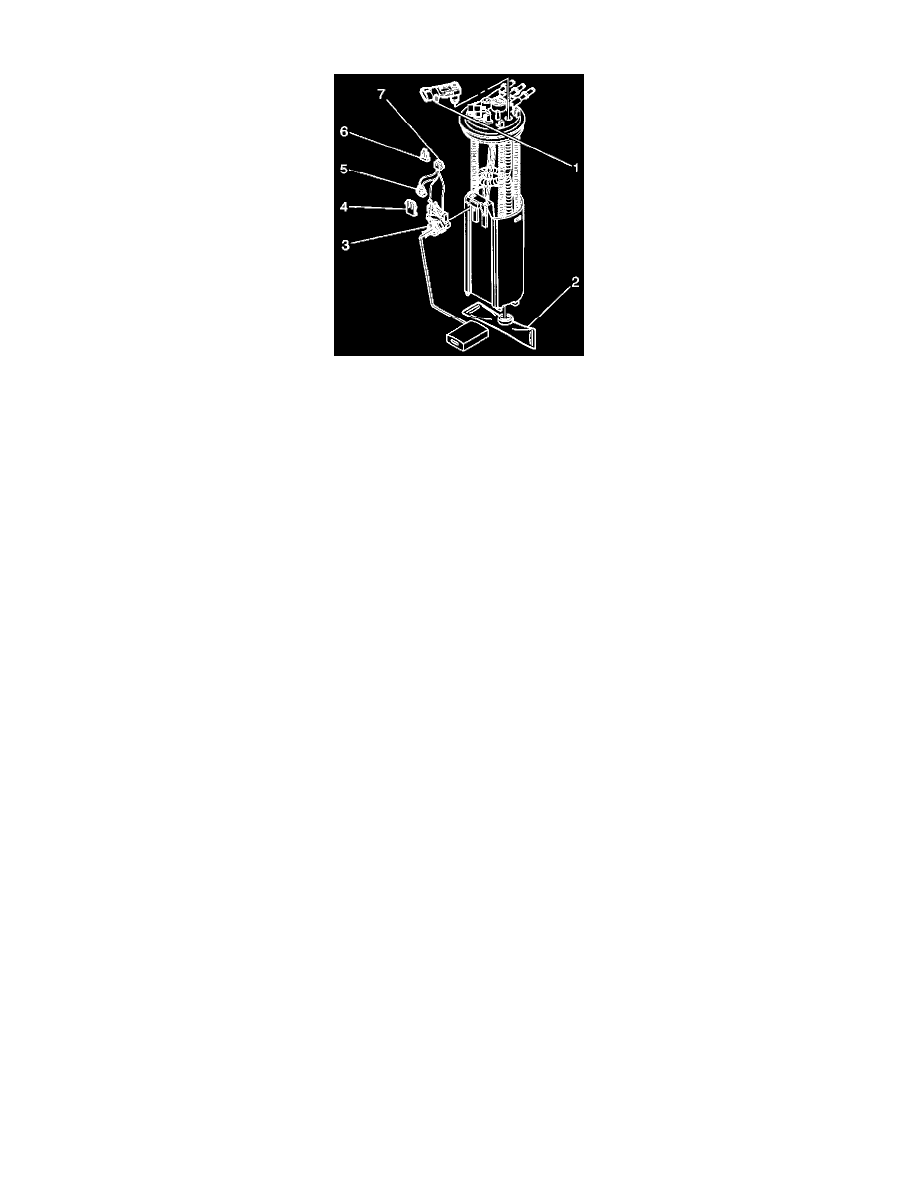
6. Disconnect the fuel pump electrical connector (5).
7. Remove the fuel level sensor electrical connector retaining clip (6).
8. Disconnect the fuel level sensor electrical connector (7) from under the fuel sender cover.
9. Remove the fuel level sensor retaining clip (4).
10. Squeeze the locking fangs and remove the fuel level sensor (3).
INSTALLATION PROCEDURE
1. Install the fuel level sensor (3).
2. Install the fuel level sensor retaining clip (4).
3. Connect the fuel level sensor electrical connector (7).
4. Connect the fuel level sensor electrical connector retaining clip (6).
5. Connect the fuel pump electrical connector (5).
6. Install the fuel sender assembly.
7. Install the fuel tank.
8. Refill the fuel tank.
9. Install the fuel filler cap.
10. Connect the negative battery cable.
11. Inspect for leaks.
11.1. Turn ON the ignition for 2 seconds.
11.2. Turn OFF the ignition for 10 seconds.
11.3. Turn ON the ignition.
11.4. Inspect for fuel leaks.