Escalade V8-6.0L VIN N (2002)

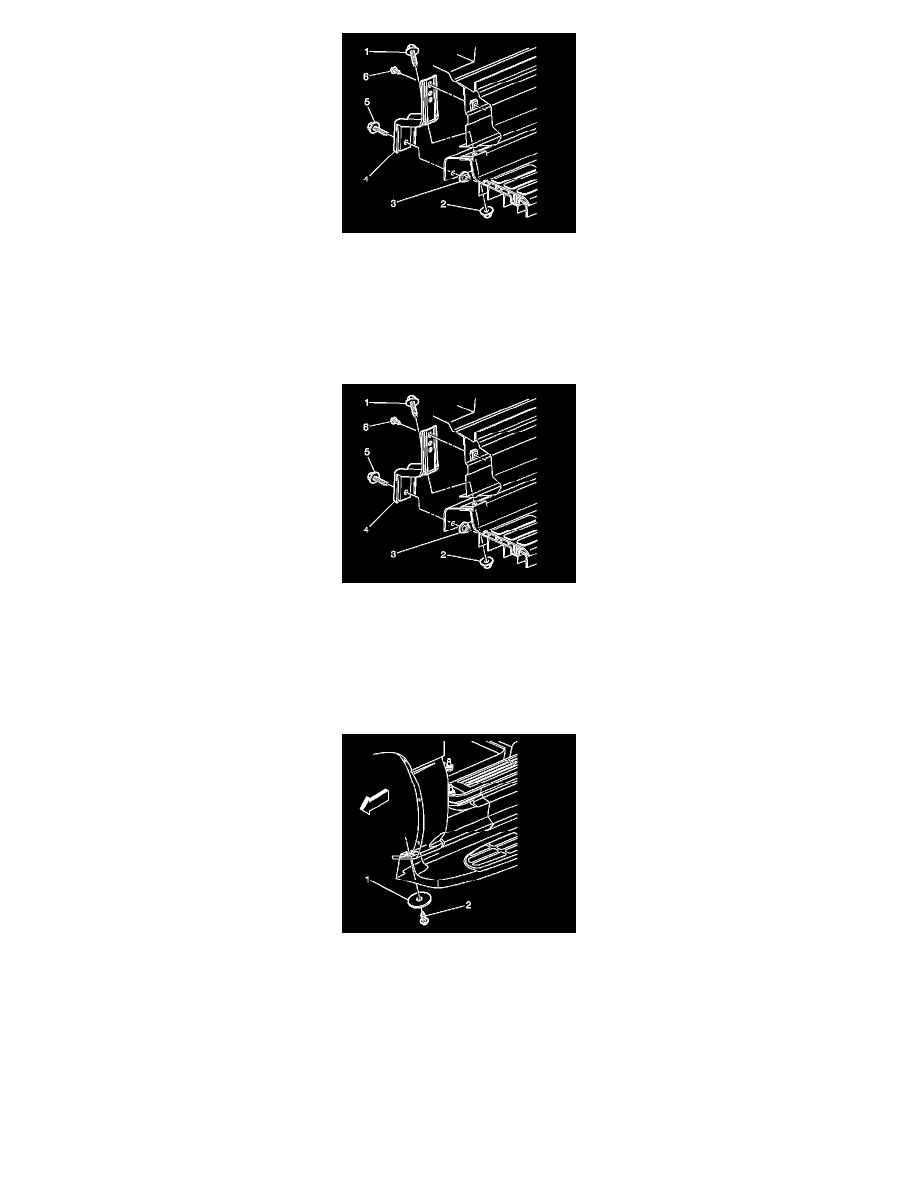
6. With an assistant, remover the bolts (3,1) from the assist step brackets.
7. Remove the assist step from the vehicle.
8. Remove the heater and A/C tubes retaining nuts from the studs, if equipped.
9. Remove the assist step bolts (6) from the brackets.
10. Remove the brackets from the vehicle.
Installation Procedure
Important: Use the thread locker GM P/N 12345382 to all bolt threads prior to assembly.
1. Install the assist step brackets to the vehicle.
2. Install the bolts (6) to the brackets and ensure that the brackets are seated securely to the inner rocker panel.
3. Install the heater and A/C tubes retaining nuts to the studs, if equipped..
4. With an assistant, install the assist step to the vehicle.
5. Install the bolts (3,1) to the assist step bracket, and leave the bolts loose.
6. Install the bottom fender bolt (2) and the washer to the vehicle.
Notice: Refer to Fastener Notice in Service Precautions.
7. Tighten the assist step fasteners in the following sequence:
1. Tighten the front fender bolt to 25 N.m (18 lb ft).
2. Tighten the bracket bolt to 25 N.m (18 lb ft).
3. Tighten the assist step bracket bolt (2) to 9 N.m (80 lb in).
4. Tighten the assist step to the bracket bolt to 9 N.m (80 lb in).
