
Escalade AWD V8-6.0L Hybrid (2010)
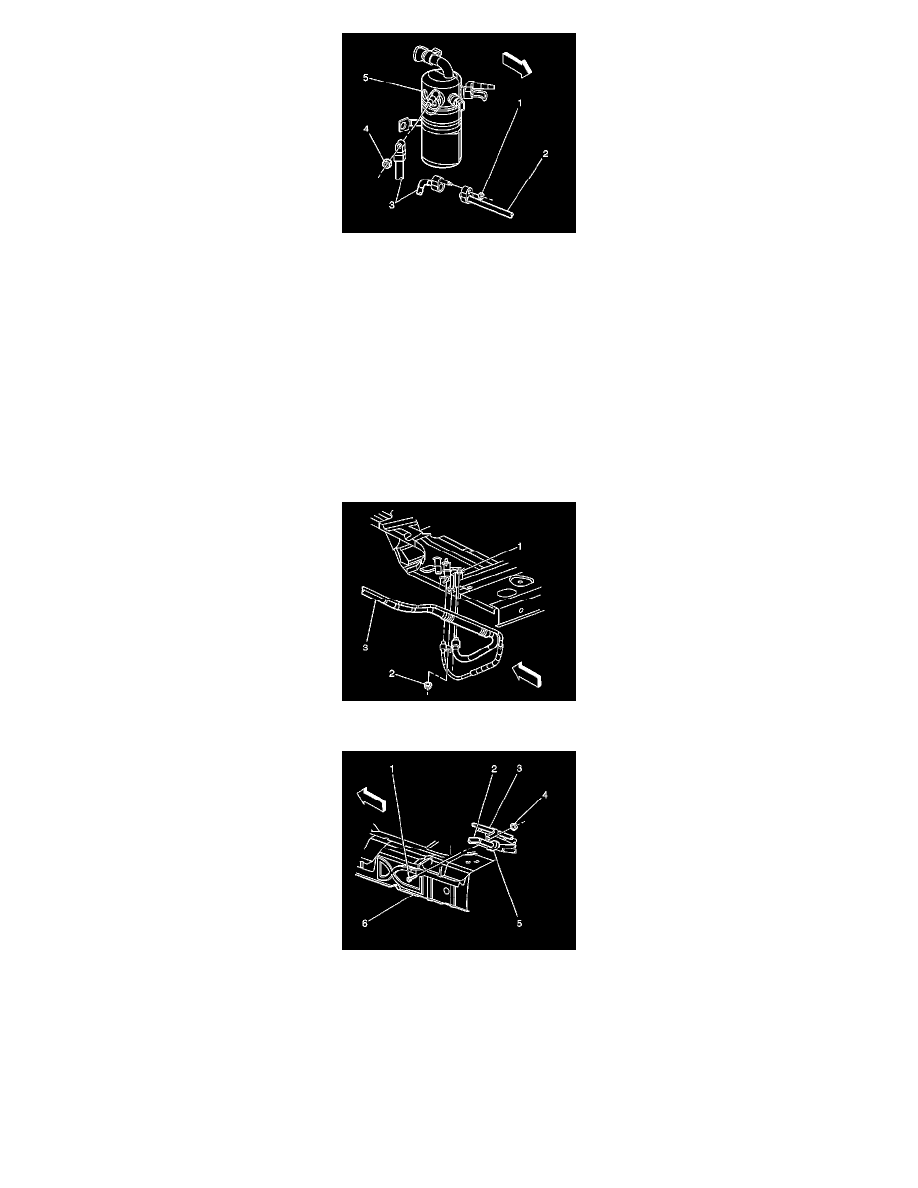
2. Remove the auxiliary A/C evaporator tubes (3) from the condenser tube (2) and the accumulator (5).
3. Loosen the right front wheelhouse to gain access to the clamp behind the wheelhouse.
4. Raise the vehicle. Refer to Lifting and Jacking the Vehicle (See: Maintenance/Vehicle Lifting/Service and Repair).
5. Remove the right assist step. Refer to Assist Step Replacement (Z71) (See: Body and Frame/Auxiliary Step / Running Board/Service and
Repair/Assist Step Replacement (Z71))Assist Step Replacement (Power BRS) (See: Body and Frame/Auxiliary Step / Running Board/Service
and Repair/Assist Step Replacement (Power BRS))Assist Step Replacement (Chevrolet HP2) (See: Body and Frame/Auxiliary Step / Running
Board/Service and Repair/Assist Step Replacement (Chevrolet HP2))Assist Step Replacement (GMC Denali XL) (See: Body and
Frame/Auxiliary Step / Running Board/Service and Repair/Assist Step Replacement (GMC Denali XL)).
6. Remove the front wheelhouse liner. Refer to Front Wheelhouse Liner Replacement - Right Side (See: Body and Frame/Fender/Front
Fender/Front Fender Liner/Service and Repair/Front Wheelhouse Liner Replacement - Right Side).
7. Remove the rear wheelhouse liner. Refer to Rear Wheelhouse Panel Liner Replacement (RPO HP2) (See: Body and Frame/Fender/Rear
Fender/Rear Fender Liner/Service and Repair/Rear Wheelhouse Panel Liner Replacement (RPO HP2))Rear Wheelhouse Panel Liner Replacement
(RPO X88 Chevrolet, RPO O88 GMC) (See: Body and Frame/Fender/Rear Fender/Rear Fender Liner/Service and Repair/Rear Wheelhouse
Panel Liner Replacement (RPO X88 Chevrolet, RPO O88 GMC)).
8. Remove the retaining nut (2) and the auxiliary A/C evaporator tubes (3) from the auxiliary HVAC module.
9. Remove the heater/A/C tubes retaining nut (4) from the stud (1) at the frame (6).
10. Remove the auxiliary A/C evaporator tubes (3) from the clamps (5).
11. Remove the auxiliary A/C evaporator tubes from the vehicle.
Installation Procedure
Note: The replacement A/C and heater pipes are shipped in two sections and spliced together upon installation. Refer to Auxiliary Heater and Air
Conditioning Pipe Repair (See: Procedures).
1. Install the auxiliary A/C evaporator tubes to the vehicle.