
Escalade AWD V8-6.2L (2009)
Caution: Refer to Fastener Caution (See: Service Precautions/Vehicle Damage Warnings/Fastener Caution).
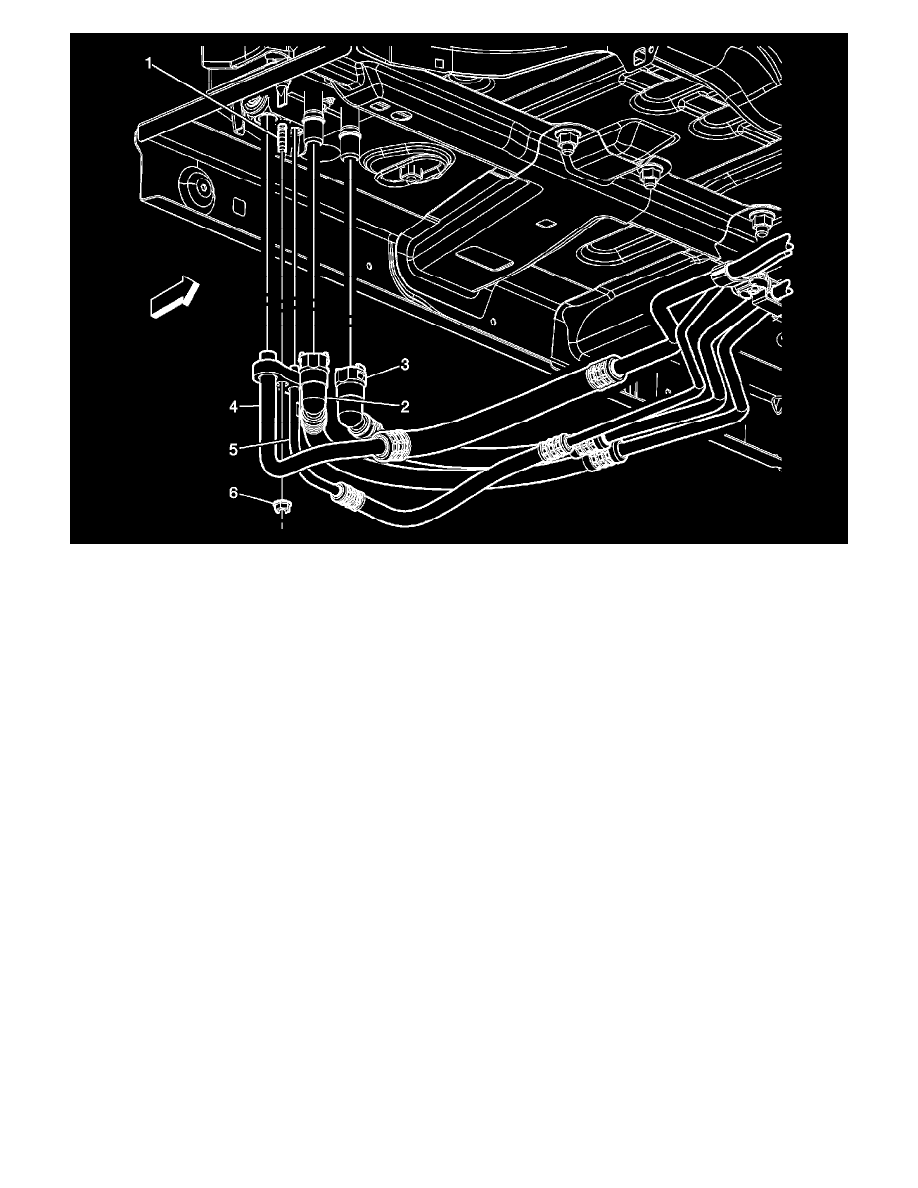
7. Install the nuts (6) that secure the auxiliary HVAC module to the vehicle and tighten to 9 Nm(80 lb in).
8. Install the air conditioning lines (4, 5) and the nut to the auxiliary HVAC module and tighten to Tighten the nut to 16 Nm(12 lb ft).
9. Install the heater lines (2, 3) to the auxiliary HVAC module at the underside of vehicle.
10. Lower the vehicle.
11. Fill the engine coolant. Refer to Cooling System Draining and Filling (Static Fill) (See: Engine, Cooling and Exhaust/Cooling System/Service
and Repair).
12. Recharge the refrigerant to the system. Refer to Refrigerant Recovery and Recharging (HP2) (See: Service and Repair/Procedures/Refrigerant
Recovery and Recharging)Refrigerant Recovery and Recharging (Non-HP2) (See: Service and Repair/Procedures/Refrigerant Recovery and
Recharging).
13. Leak test the fittings of the component using the J 39400-A .