
Escalade EXT AWD V8-6.2L (2009)
Control Module HVAC: Service and Repair
Auxiliary HVAC Module Replacement (Extended Wheelbase)
Auxiliary HVAC Module Replacement (Extended Wheelbase)
Special Tools
J 39400-A Halogen Leak Detector
Removal Procedure
1. Recover the refrigerant from the A/C system. Refer to Refrigerant Recovery and Recharging (HP2) (See: Heating and Air Conditioning/Service
and Repair/Procedures/Refrigerant Recovery and Recharging)Refrigerant Recovery and Recharging (Non-HP2) (See: Heating and Air
Conditioning/Service and Repair/Procedures/Refrigerant Recovery and Recharging).
2. Drain the engine coolant. Refer to Cooling System Draining and Filling (Static Fill) (See: Engine, Cooling and Exhaust/Cooling System/Service
and Repair).
3. Raise the vehicle. Refer to Lifting and Jacking the Vehicle (See: Maintenance/Vehicle Lifting/Service and Repair).
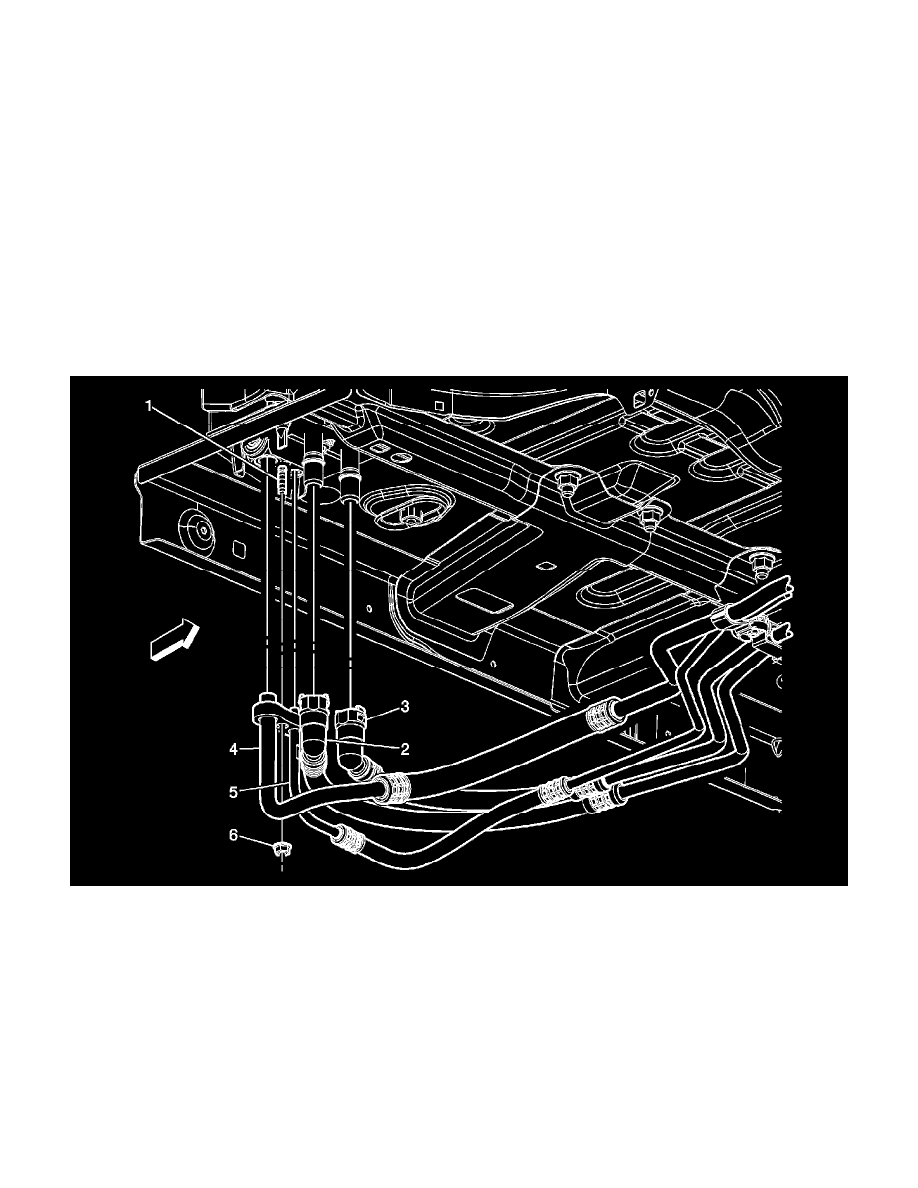
4. Disconnect the heater lines (2, 3) from the auxiliary HVAC module at the underside of the vehicle.
5. Disconnect the air conditioning lines (4, 5) from the auxiliary HVAC module at the underside of the vehicle.
6. Remove the nuts (6) from the studs (1) that secure the auxiliary HVAC module to the underside of the vehicle.
7. Lower the vehicle.
8. Remove the right rear quarter trim panel. Refer to Rear Quarter Trim Panel Replacement - Right Side (Standard Wheelbase) (See: Body and
Frame/Interior Moulding / Trim/Trim Panel/Service and Repair)Rear Quarter Trim Panel Replacement - Right Side (Extended Wheelbase) (See:
Body and Frame/Interior Moulding / Trim/Trim Panel/Service and Repair).
9. Disconnect the electrical connectors from the auxiliary HVAC module.