
Fleetwood V8-252 4.1L VIN 8 FI (1983)
Water Pump: Service and Repair
V8-250
1.
Disconnect battery ground cable, then drain cooling system.
2.
On DeVille and Brougham models, remove two screws, one from each side at radiator end of support rods. Loosen screws at strut end of support
rods and move support rods aside.
3.
Remove screws from upper fan shroud, then remove wiring harness from upper fan shroud clamps.
4.
Remove screws securing power steering pump reservoir to upper fan shroud, then remove reservoir.
5.
Remove staples securing upper fan shroud to lower shroud and remove upper shroud.
6.
Remove fan assembly.
7.
Loosen generator mounting screws and remove drive belt.
8.
Remove AIR pump drive belt.
9.
Remove lower power steering pump mounting bolt and loosen the remaining bolt. Remove the vacuum pump drive belt.
10.
Remove A/C compressor drive belt.
11.
Remove air conditioning compressor from engine mounting brackets and position aside. Do not remove high and low pressure lines from
compressor.
12.
Remove generator and support bracket from engine.
13.
Remove power steering pump pulley using special tools or remove power steering pump.
14.
Loosen clamp and disconnect coolant reservoir to water pump hose at pump.
15.
Loosen clamps and disconnect water pump inlet and outlet hoses at pump.
16.
Remove water pump and crankshaft pulleys.
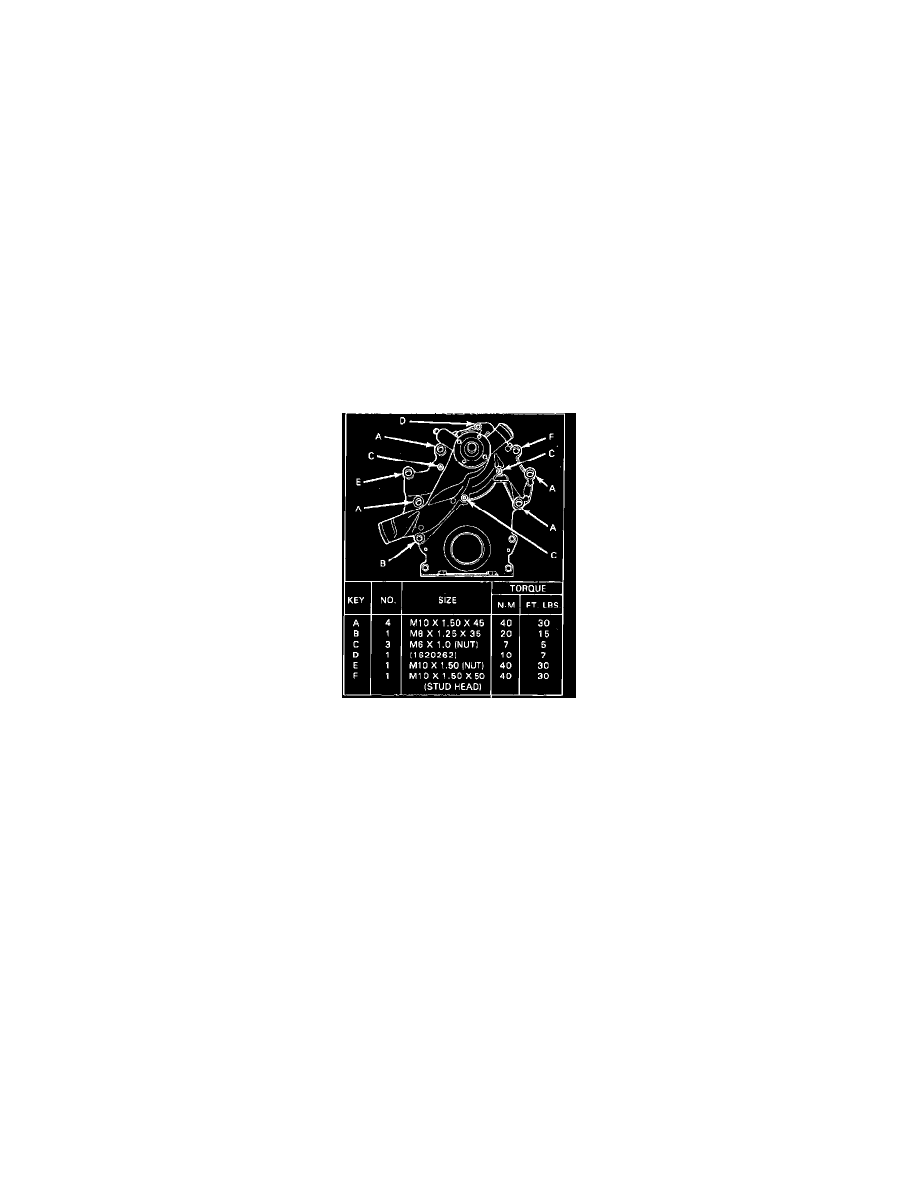
Fig. 18 Water pump attaching screws. V8-250
17.
Remove A/C compressor bracket.
87.
Remove timing mark tab.
19.
Remove screws and nuts securing water pump, Fig. 18, to engine front cover and remove pump. Discard gasket and clean gasket surfaces.
20.
Reverse procedure to install.