
Fleetwood V8-252 4.1L VIN 8 FI (1983)
Timing Chain: Service and Repair
TIMING CHAIN
Removal
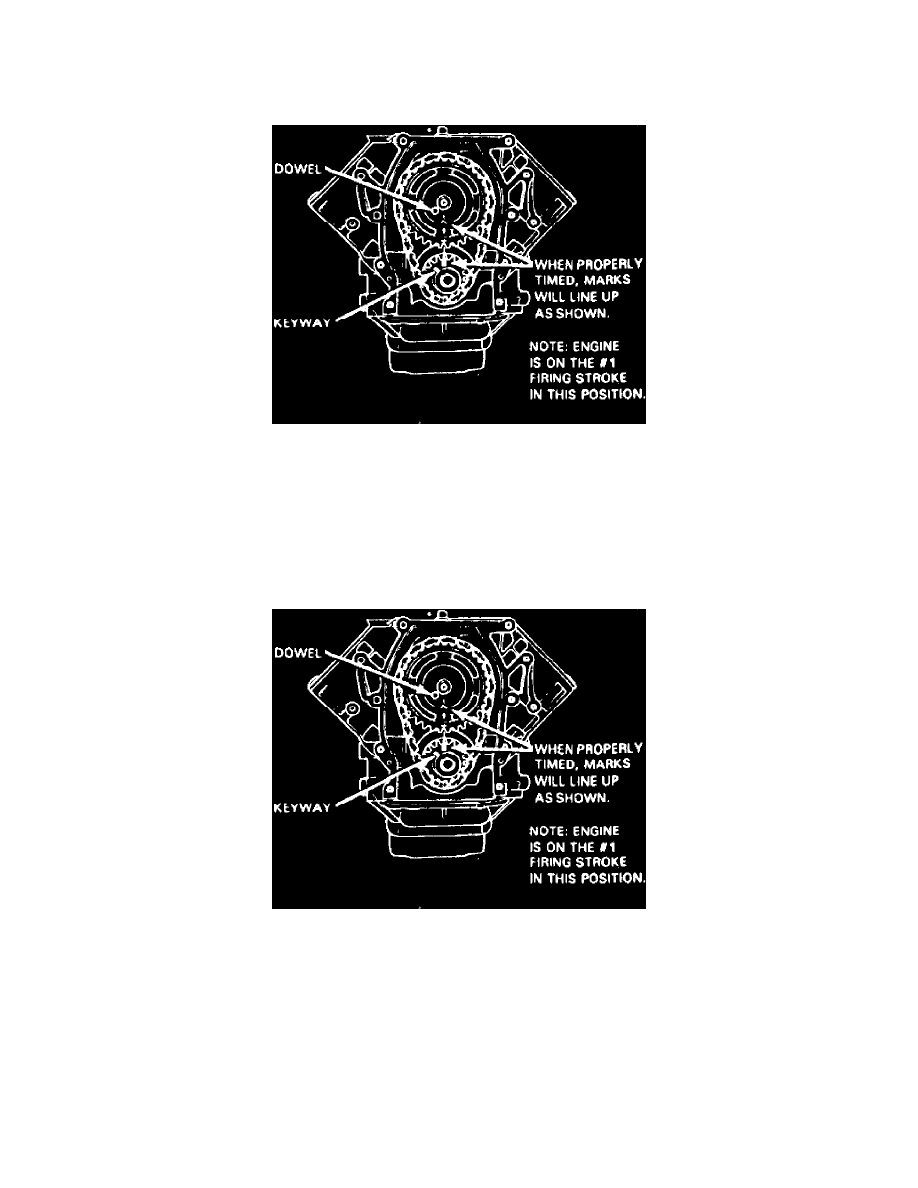
Timing gear location marks.
1. Remove engine front cover as previously described.
2. Remove oil slinger from crankshaft.
3. Rotate the engine until the timing mark relationship shown in the image.
4. Remove screw securing camshaft sprocket to camshaft.
5. Remove camshaft and crankshaft sprocket with chain attached.
Installation
Timing gear location marks.
1. Install timing chain over camshaft sprocket.
2. Rotate crankshaft until timing mark on crank sprocket is positioned straight up as shown in the image.
3. Install cam sprocket, crank sprocket and timing chain over crankshaft so that the timing mark relationship shown in the image.
4. Move the camshaft until the dowel pin mates with the index hole in the sprocket position as established in step 3.
5. Hold camshaft sprocket in position against end of camshaft and press sprocket on camshaft by hand, being sure index pin in camshaft is lined up
with index hole in sprocket.
6. Install screw securing camshaft sprocket to camshaft. Tighten screw to 50 Nm (35 ft. lbs.). It may be necessary to keep the engine from rotating
during the torquing procedure.
NOTE: Engine timing has been set so that cylinder 1 is in the firing (T.D.C.) position. When installing the distributor. set the rotor so that
cylinder 1 is in the firing position.