
Fleetwood Brougham V8-307 5.0L (1989)
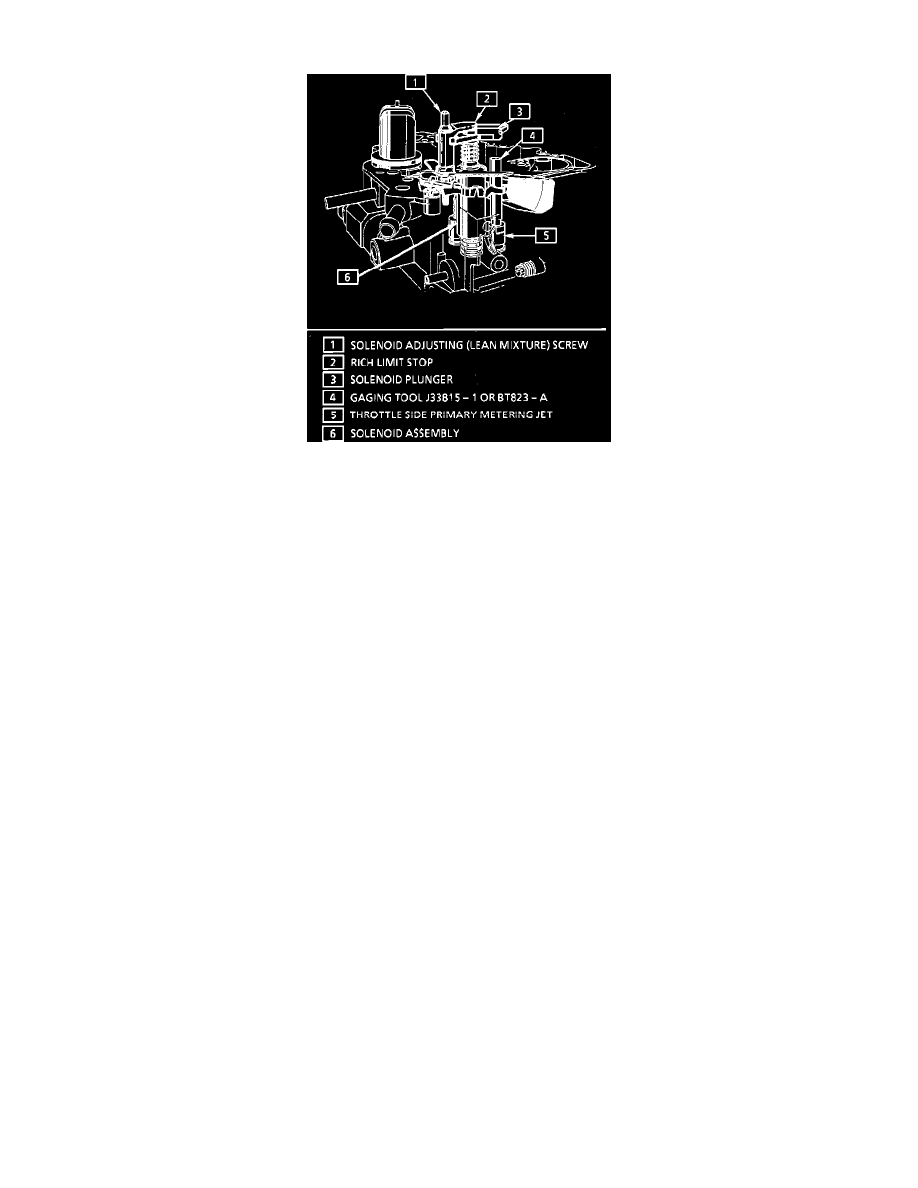
Mixture Control Solenoid: Adjustments
Mixture Control Adjustment
NOTE: Whenever air horn is removed the mixture control solenoid adjustment screw plug must be replaced because the plug prevents the adjustment
screw from turning.
1.
Remove air horn, gasket and solenoid electrical connector attaching screw. See FUEL AND IGNITION - CARBURETOR for air horn removal
procedure.
2.
Remove solenoid adjusting screw, rich limit stop, solenoid plunger, metering rods, springs and float bowl insert.
3.
Install mixture control solenoid gaging Tool J-33815-1 or BT-8253-A, (or equivalent), over the throttle side metering jet rod guide, and temporarily
reinstall the solenoid plunger into the solenoid body.
4.
Install the rich limit stop and solenoid adjustment screw about 6 threads.
5.
Hold the solenoid plunger DOWN with your finger. Using Tool J-28696-10 or BT-7928, (or equivalent), turn the adjusting screw until the plunger
just touches the gauge and solenoid stop.
6.
Remove finger from solenoid plunger.
7.
Note position of adjustment tool handle.
8.
Turn adjustment screw in until solenoid bottoms and record number of turns.
9.
Remove solenoid adjustment screw, rich limit stop, solenoid plunger, then the gauge.
10. Install float bowl insert, metering rods and springs using care to align the metering rods in the jets.
11. Install solenoid plunger, adjusting screw and rich limit stop.
12. Turn adjusting screw in until it bottoms and back out the number of turns recorded in step 8.
13. Install air horn, gasket and new adjustment screw plug and adjust the air bleed valve.