
Fleetwood FWD V8-252 4.1L (1986)
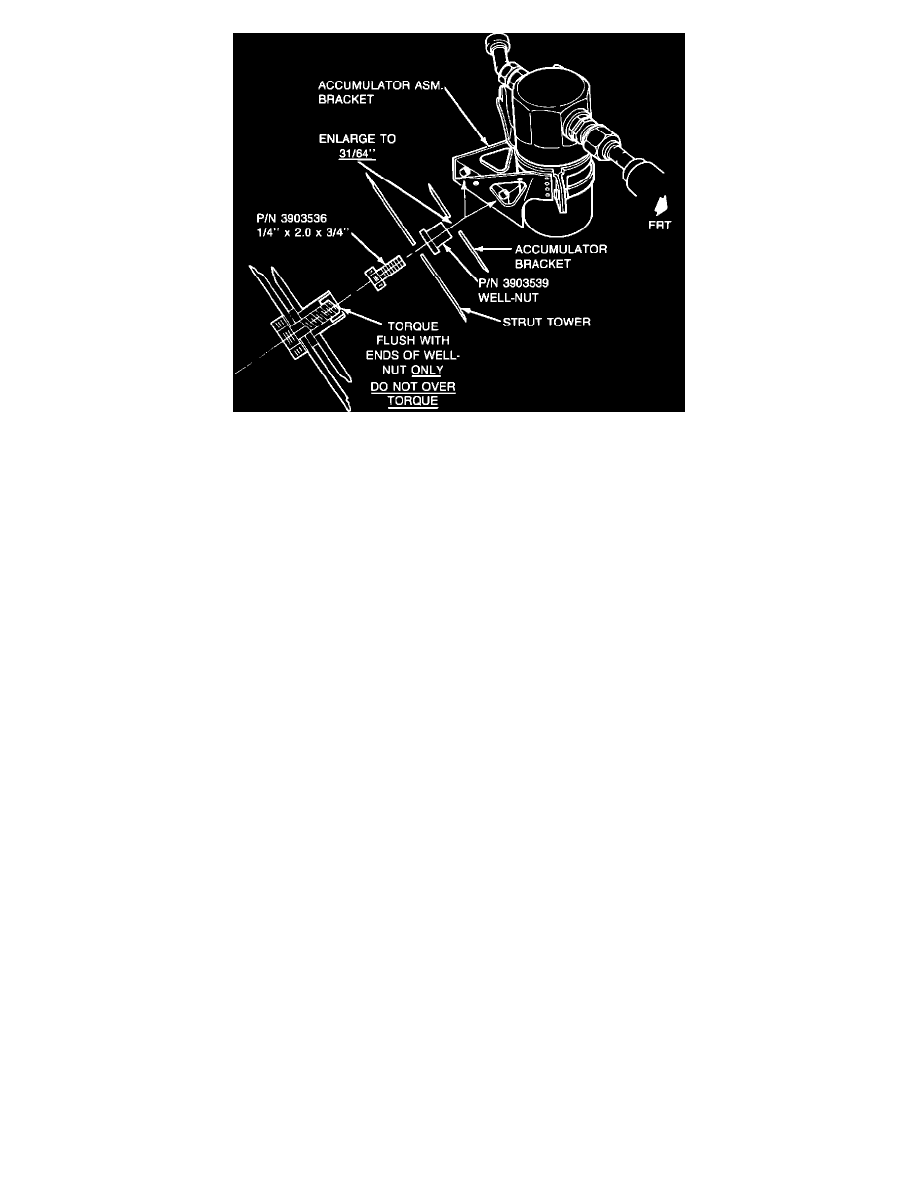
Figure 2 - Accumulator Assembly
b.
Install "well nuts" (P/N 3903539) in the enlarged holes in the accumulator bracket as shown in Figure 2. (The rubber shoulder of the "well
nut" must be to the strut tower of the bracket.)
c.
Reinstall the accumulator bracket using new bolts P/N 3903536. Tighten the bolt, using a hand ratchet and socket until the threaded end of
the bolt is just flush with the end of the "well nut". This will provide the proper loading on the "well nut" to isolate the bracket and
accumulator from the right strut tower. Do not over torque the rubber portion of the "well nut" or it will become ineffective as an isolating
unit.
2.
To Isolate the liquid line:
a.
If equipped, remove the front liquid line clip and discard.
b.
Remove liquid line portion of clip at strut tower if so equipped (early 1985 vehicles).
c.
Wrap the liquid line with closed cell foam rubber and relocate into the larger opening (toward the engine) of the "plastic" clip located under
the accumulator. Reform the liquid line so it does not contact any part of the vehicle including the right strut tower or clip.
3.
To Isolate the compressor hose:
If compressor hose assembly does not have a muffler mounted at the starter, install new compressor hose assembly, P/N 1634220, (includes larger,
baffled muffler). Use refrigerant oil on O-rings. A new starter stud (P/N 1634280) and nut (P/N 11507036) are required to attach the muffler to the
starter.
Ensure that the condenser and compressor hoses are not contacting the body.
For warranty purposes, use Operation Number T6128 at 1.4 hours (includes system recharge).