
Fleetwood FWD V8-252 4.1L (1986)
19.
Attach air supply to the air valve and dry the system with air for at least two minutes, or longer if moisture is visible exiting from the oil cooler line
discharge hose. Use an air chuck clip to secure the air chuck to the air valve for ease of operation.
CAUTION:
Excessive residual moisture can cause corrosion in the oil cooler or cooler pipes and can damage the transmission/transaxle. If
steps 20 through 23 cannot be completed at this time, rinse the oil cooler and cooler pipes with transmission fluid.
20.
Connect the cooler feed pipe to the transmission/transaxle (refer to Table 1).
21.
Reconnect the discharge hose to the cooler return pipe and place into an appropriate oil drain container.
22.
After filling the transmission/transaxle with Dexron II Automatic Transmission Fluid, start the engine and run for 30 seconds. This will remove
any residual moisture from the oil cooler and cooler pipes, protect all components from corrosion and check flow rate through the cooler. A
minimum of two quarts must be obtained during this 30 second run. If fluid flow is insufficient, check the fluid flow from the
transmission/transaxle by disconnecting the oil cooler feed line at the radiator end and restarting the engine. Do the following depending on the
flow rate observed:
Insufficient Feed Flow:
Inspect transmission/transaxle for cause.
Sufficient Feed Flow:
Inspect oil cooler return pipes and fittings for restrictions or leaks. Inspect the transmission/transaxle for cause. If
fluid flow from the return line is still inhibited, replace the oil cooler.
23.
Remove discharge hose, reconnect cooler return pipe to transmission/transaxle and refill unit to proper fluid level following the appropriate
Service Information Manual procedure.
Tool Cleaning - Each use.
24.
Disconnect the water supply hose from the tool.
25.
Bleed air pressure from the can, remove fill cap, return any unused solution to container, and rinse can with water. Do not store tool with solution
in tank.
Tooling Cleaning - Every third use.
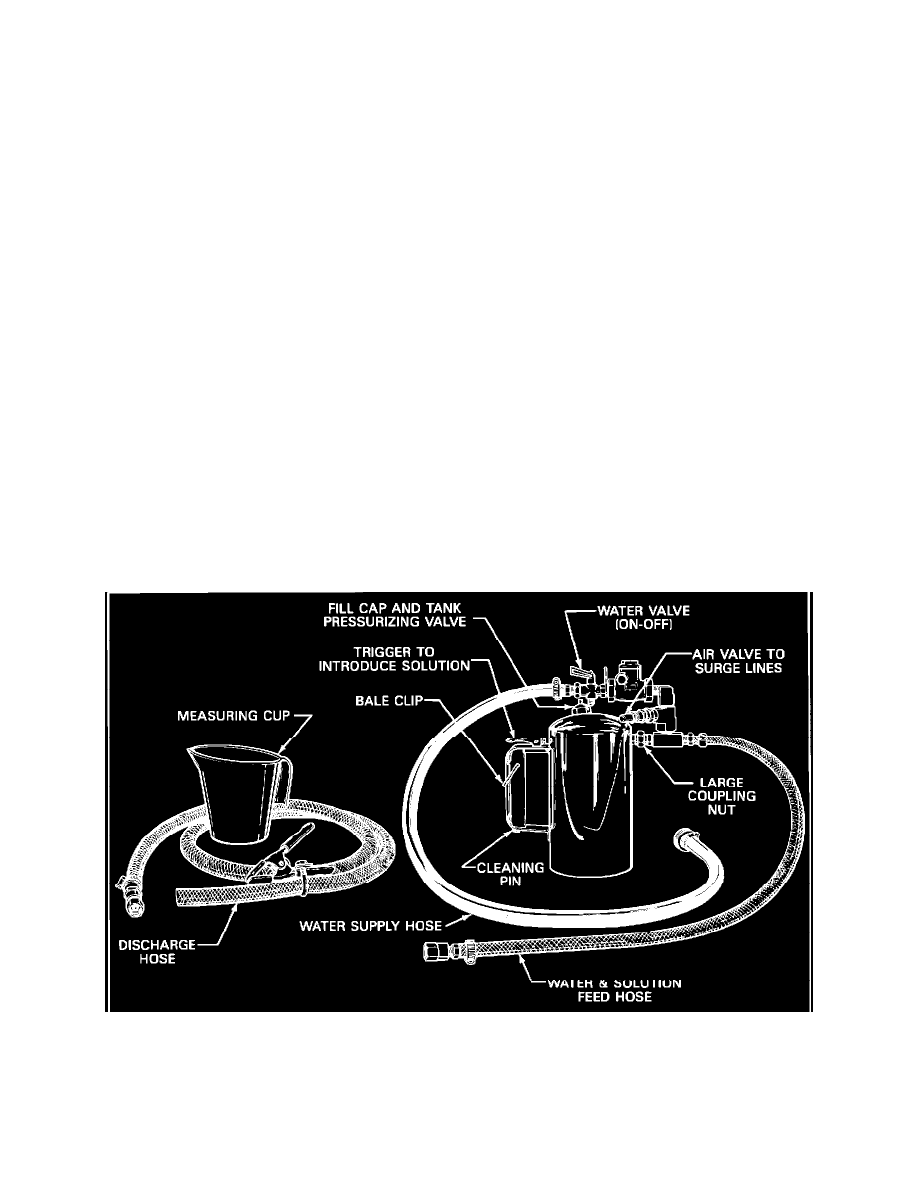
Figure 1 - Oil Cooler Flushing Tool
26.
Loosen large coupling nut and remove plumbing from tank (refer to Figure 1).
27.
Remove screen from plumbing and wash with water.
28.
Use the cleaning pin (refer to Figure 1) to remove any material in the solution orifice. Orifice is located in plumbing below screen.