Fleetwood FWD V8-300 4.9L (1993)

Molding and body panel both need corrosion protection after holes are drilled.
6.
Use Q-tips or small artist brush to apply zinc rich primer to the new holes and allow to dry.
7.
For additional corrosion protection, use Q-tips or small artist brush to apply (U.S. P/N 12345489 Anti-Corrosion Compound, Canada P/N 08892
3M Rust Fighter-1 or equivalent) to the new holes.
8.
Install retainer P/N 10121502 through the holes to secure the molding to the door. Cut off tip of retainer if it is too long.
9.
Install 3M # 06382 Scotch Mount Super Automotive Attachment Tape or equivalent along the top and bottom edge of the rub strip.
10.
Remove the release paper and install the rub strip to the molding starting at the front edge. Press firmly in place with a roll pin or equivalent.
Rear Quarter Molding
1.
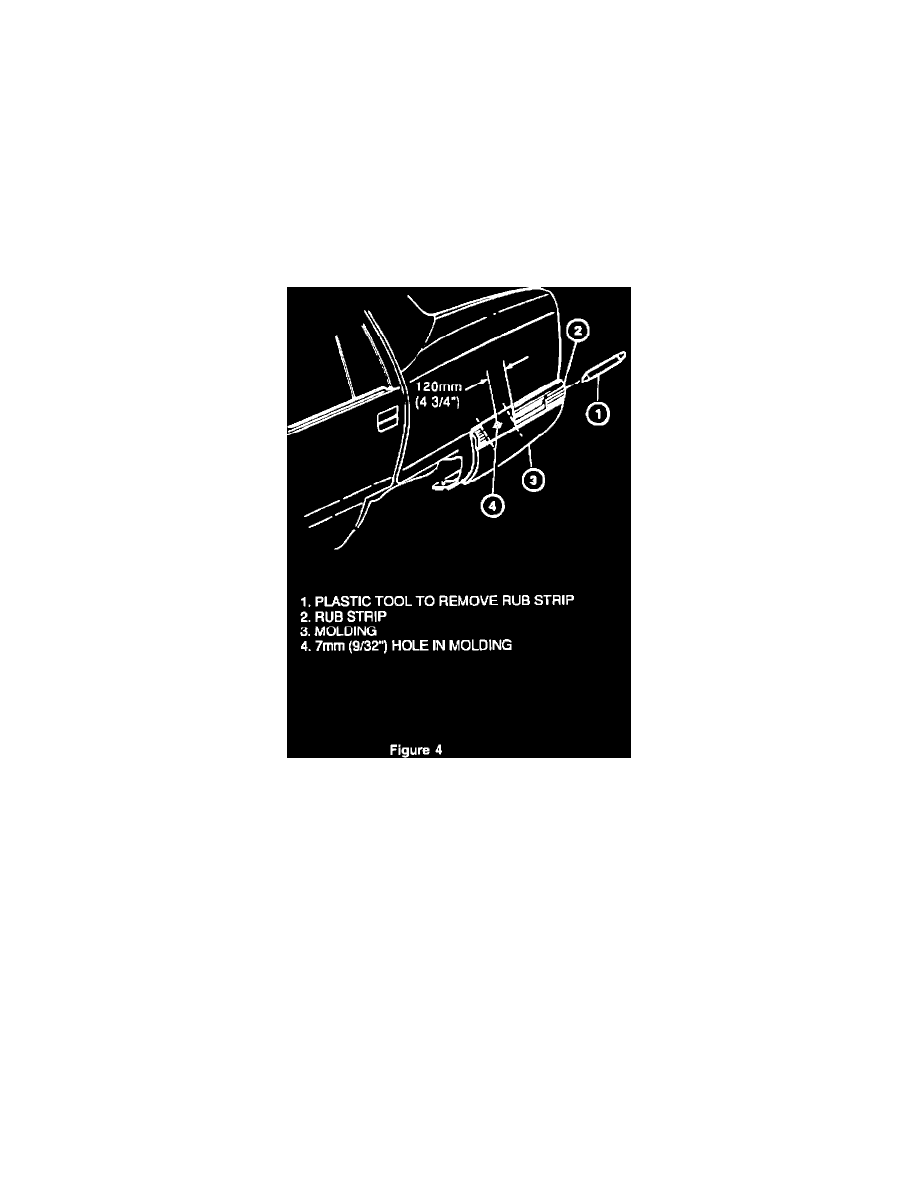
Use a flat plastic tool to pry behind the rub strip and remove the rub strip from the molding. Lay rub strip on clean dry shop towels to prevent
marring or scratching the surface. See Figure 4.
2.
Clean up old adhesive on rub strip and molding using 3M General Purpose Adhesive Cleaner # 08984 or equivalent and a narrow tool such as a
putty knife or equivalent with a sharp edge. Be careful not to damage other areas of the vehicle.
3.
Measure location for hole and center punch. See Figure 4. Use a 15 mm (1/2") drill stop and drill a 3 mm (1/8") hole through the molding and rear
quarter panel.
4.
Use a 15 mm (1/2") drill stop and drill a 7 mm (9/32") hole at the same location.
NOTE:
Molding and body panel both need corrosion protection after holes are drilled.
5.
Use Q-tips or small artist brush to apply zinc rich primer to the new holes and allow to dry. Access to quarter panel hole may be easier through the
trunk compartment after moving trunk trim.
6.
For additional corrosion protection, use Q-tips or small artist brush to apply (U.S. P/N 12345489 Anti-Corrosion Compound, Canada P/N 08892
3M Rust Fighter-1 or equivalent) to the new holes.
7.
Install retainer P/N 10121502 through the hole to secure the molding to the quarter panel. Re-install trunk trim if it was removed.
