
Fleetwood FWD V8-300 4.9L (1993)
When using a new terminal:
a.
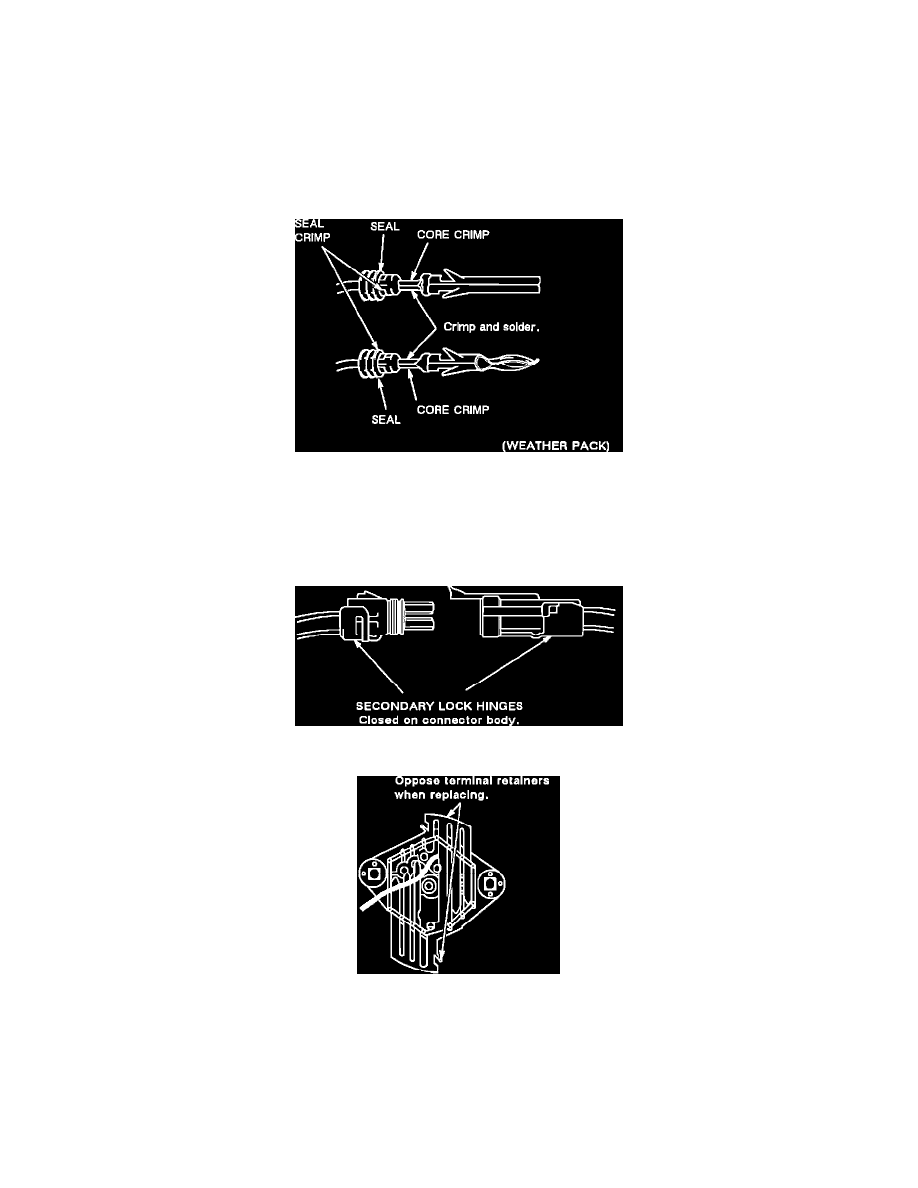
Slip cable seal away from terminal (if seal exist).
b.
Cut wire as close to terminal as possible.
c.
Slip a new cable seal onto wire (if necessary).
d.
Strip 5 mm (3/16") of insulation from wire.
e.
Crimp a new terminal to the wire.
f.
Solder with rosin core solder.
g.
Slide cable seal toward terminal (if equipped with a seal).
h.
Crimp cable seal and insulation (if equipped with a seal).
i.
Apply grease to connectors outside the passenger compartment where the connector originally was equipped with grease.
Figure 17
To re-use a terminal or lead assembly, see previous steps c through i for repairs. Be sure to keep cable seal (if equipped) on terminal side of splice.
5.
Insert lead from the back until it catches.
6.
Install TPA's, CPA's and/or secondary locks, if equipped (see Figures 18 & 19).
Figure 18
Figure 19
Repairing Connectors
The following general repair procedures can be used to repair most types of connectors. The repair procedures are divided into three general groups:
Push-to-Seat and Pull-to-Seat and Weather Pack.
^
See CONNECTOR TERMINAL I.D. to determine which type of connector is to be serviced.
^
Use the proper Pick(s) or Tool(s) that apply to the terminal.
^
The GM Terminal Repair Kit (J 38125-A) contains further information.