
Fleetwood FWD V8-300 4.9L (1993)
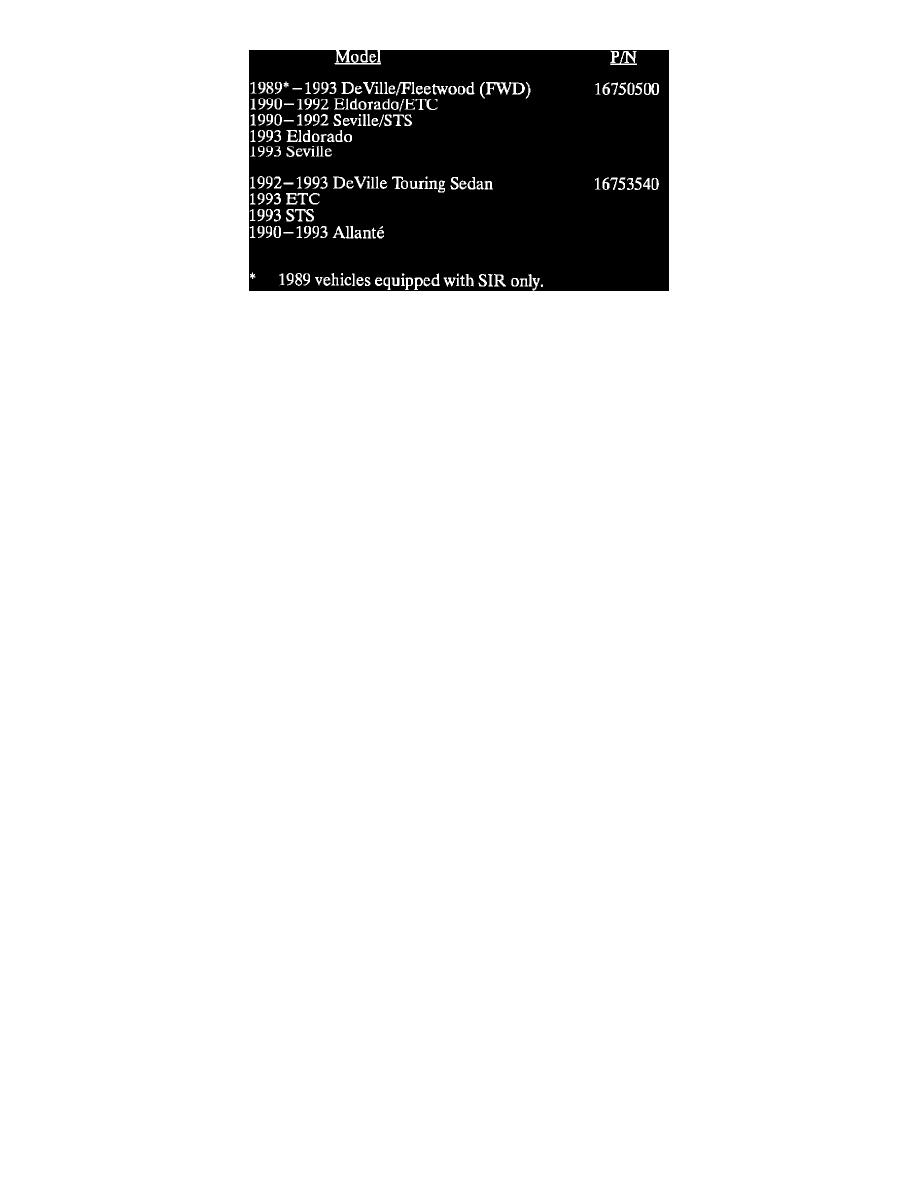
PART NUMBER APPLICATION CHART
NOTE:
Do not substitute any component parts from one horn contact assembly to another. Proper operation of the horn contact assembly requires that it
be replaced as a complete assembly.
9.
Align new horn contact assembly to steering wheel.
10.
Hand start two new spiral tap fasteners and gently tap with a hammer to set them. DO NOT attempt to drive the fasteners fully at this time.
11.
Fully seat the two fasteners using an arbor press, if available, making certain the fasteners are driven straight and fully seated. The horn contact
assembly should be tight against the center hub of the steering wheel.
If an arbor press is used to seat the fasteners, continue with step 16. If an arbor press is not available, continue with step 12.
12.
Place steering wheel with its back side down on top of a large socket so that the socket rim supports the metal insert of the steering wheel as close
to the fastener holes as possible.
13.
Have another technician stabilize the steering wheel on top of the socket by supporting the rim with two hands.
14.
Drive the two spiral tap fasteners with a hammer and hardened punch large enough to cover the spiral tap fastener head.
15.
Ensure that the fasteners are driven straight and fully seated. The horn contact assembly should be tight against the center hub of the the steering
wheel.
16.
Install steering wheel to steering column. Refer to Section 3F in the Service Information Manual.
17.
Install the SIR inflator module to the steering wheel. Refer to Section 3F in the Service Information Manual.
18.
Enable the SIR system. Refer to Section 9J in the Service Information Manual.
Parts are expected to be available on June 7, 1993.
For warranty purposes use Labor Operation E7015.