
Seville V8-4.9L VIN B (1995)
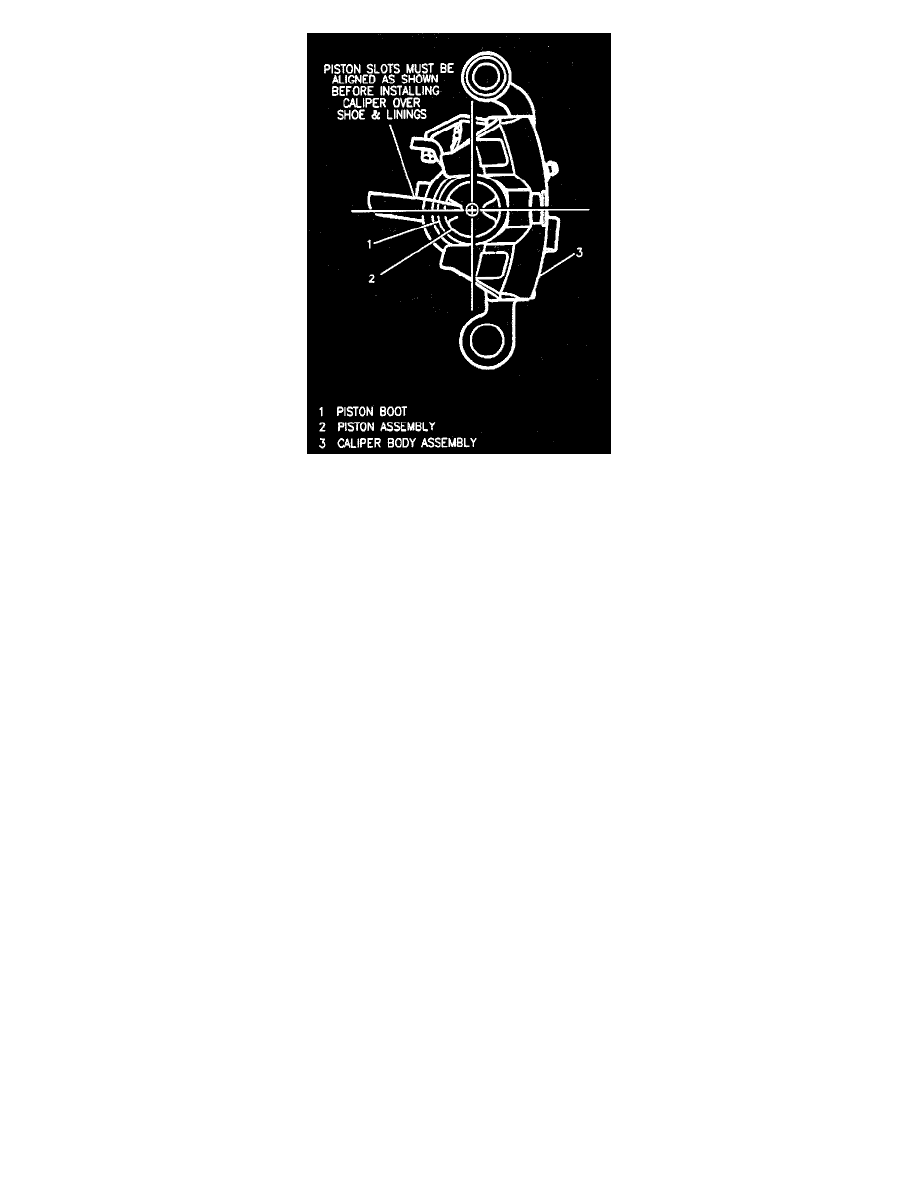
Important: After bottoming piston, lift inner edge of boot next to piston assembly and press out any trapped air. Boot must lay flat. Make sure slots
in end of piston are positioned as shown in figure before pivoting caliper body assembly down over pad and linings in caliper support. Use suitable
spanner type tool in piston slots to turn piston as necessary. Whenever installing new pad and linings, use new pad clips. These are provided in the
disc pad kit.
2. Install two pad clips in caliper support.
3. Install outboard and inboard pad and linings in caliper support. Wear sensor is on outboard pad and lining. Sensor is positioned downward at the
leading edge of the rotor during forward wheel rotation. Hold metal pad edge against spring end of clips in caliper support. Push pad in toward
hub, bending spring ends slightly, and engage pad notches with support abutments.
4. Pivot caliper body assembly down over pad and lining assemblies. Take care not to damage piston boot on inboard pad. Compress sleeve boot by
hand as caliper body moves into position to prevent boot damage.
Important: After caliper body assembly is in position, recheck installation of pad clips. If necessary, use a small screwdriver to reseat or center the
pad clips on the support abutments.
5. Install sleeve bolt. Torque to 27 Nm (20 lb.ft.).
6. Install cable support bracket (with cable attached) with bolt and washer. Torque to 43 Nm (32 lb.ft.). Remove wheel nuts securing rotor to hub.
7. Install wheels, aligning previous marks. Torque wheel nuts to 140 Nm (100 lb.ft.). Lower vehicle.
8. Apply approximately 778 N (175 lb) force to brake pedal (after bleeding, if necessary) three times to seat pad and linings against rotor.