
Seville STS V8-4.6L VIN 9 (1998)
Alignment: Service and Repair
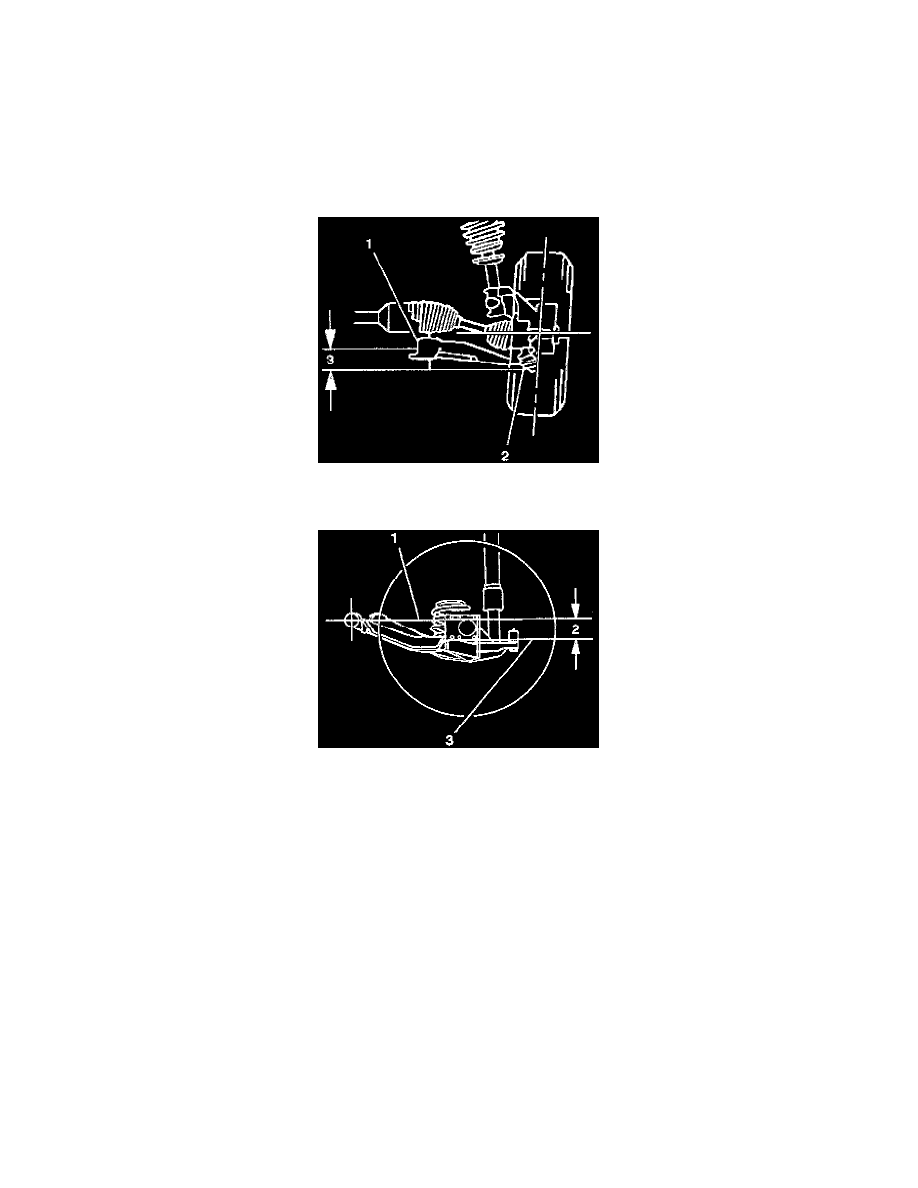
Ride/Trim Height Measurement and Adjustment
1. Park the vehicle on level ground.
2. Inspect the tire pressure. Ensure that all tires are inflated to the proper pressure.
3. Inspect the fuel level. Verify that the fuel tank is full.
4. Ensure that there is no extra weight in the passenger compartment or the trunk. The trunk must be empty except for the spare tire and the jack.
5. Ensure that the electronic level control is operating properly.
6. Place the front seat in the rear most position.
7. Bounce the vehicle three times at the front and at the rear in order to normalize the suspension.
8. Measure the distance between the lowest point on the ball joint housing, and the centerline of the control arm bolt. This distance (Z) should be 40
mm (1.57 inch) (With KS) and 30 mm (1.18 inch) (With KY).
9. Measure the distance from the bottom of the control arm wheel bearing face to the centerline of the outboard control arm bolt. This distance (D)
should be 86 mm (3.39 inch) (With KS) and 76 mm (2.99 inch) (With KY).
10. Measure the distance from the ground to the lower most portion of the front unibody frame. This distance (C) should be 179 mm (7.05 inch) (With
KS) and 169 mm (6.65 inch) (With KY)
11. Measure the distance from the ground to the lower most portion of the rear unibody frame. This distance (S) should be 229 mm (9.02 inch) (With
KS) and 218 mm (8.58 inch) (With KY)
12. If vehicle trim height is out of specifications, locate damaged or worn component and repair. For trim height specifications refer to TRIM
HEIGHT SPECIFICATIONS.