
SRX AWD V6-3.0L (2010)
Oil Pan: Service and Repair
Oil Pan Replacement
Special Tools
EN-46109 - Guide Pin Set
For equivalent regional tools, refer to Special Tools (See: Tools and Equipment/Special Tools).
Removal Procedure
1. Raise and support the vehicle. Refer to Lifting and Jacking the Vehicle (See: Maintenance/Vehicle Lifting/Service and Repair).
2. Drain the engine oil and remove the oil filter. Refer to Engine Oil and Oil Filter Replacement (LF1) (See: Engine Oil/Service and Repair)Engine
Oil and Oil Filter Replacement (LAU) (See: Oil Filter/Service and Repair).
3. Remove the catalytic converter. Refer to Catalytic Converter Replacement - Left Side (LF1) (See: Exhaust System/Catalytic Converter/Service
and Repair/Catalytic Converter Replacement - Left Side).
4. Remove the air conditioning (A/C) compressor bolts and reposition. Refer to Air Conditioning Compressor Replacement (LF1) (See: Heating
and Air Conditioning/Compressor HVAC/Service and Repair/Removal and Replacement)Air Conditioning Compressor Replacement (LAU) (
See: Heating and Air Conditioning/Compressor HVAC/Service and Repair/Removal and Replacement).
5. Remove the front cover. Refer to Engine Front Cover Replacement (See: Timing Components/Timing Cover/Service and Repair).
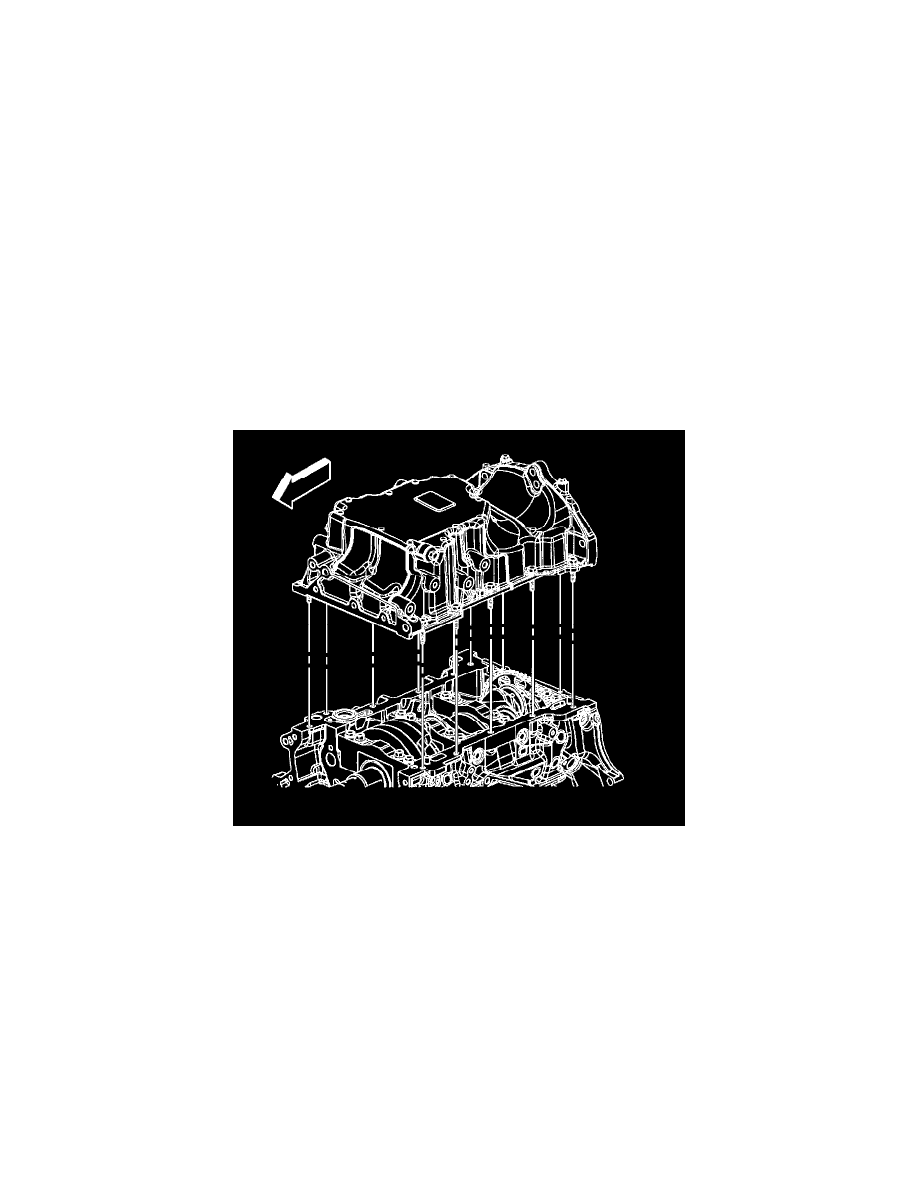
6. Remove the oil pan to transmission bolts.
7. Remove the oil pan bolts.
8. Remove the oil pan.
9. Clean the oil pan and the engine block gasket surface. Refer to Oil Pan Cleaning and Inspection (See: Service and Repair/Overhaul/88. Oil Pan
Cleaning and Inspection).
Installation Procedure