
SRX AWD V8-4.6L VIN A (2004)
4.
Remove the left side cargo tie down bezel fasteners.
5.
Remove the left side coat hook fastener.
6.
Pull downward on the headliner just enough to access the antenna module. Be careful not to crease the headliner.
7.
Disconnect the coax cables from the antenna module.
8.
Disconnect the electrical from the antenna module and side glass.
9.
Remove the antenna module from the mounting bracket.
10.
Install the antenna module to the mounting bracket.
11.
Connect the electrical to the antenna module and side glass.
12.
Connect the coax cables to the antenna module.
13.
Install the headliner back into position.
14.
Install the left side coat hook fastener.
15.
Install the left side cargo tie down bezel fasteners.
16.
Install the left body side rear upper garnish molding.
17.
Connect the electrical to the RPA tell tale indicator and install to the headliner. Push upward on the front of the RPA in order to secure the
retaining clips.
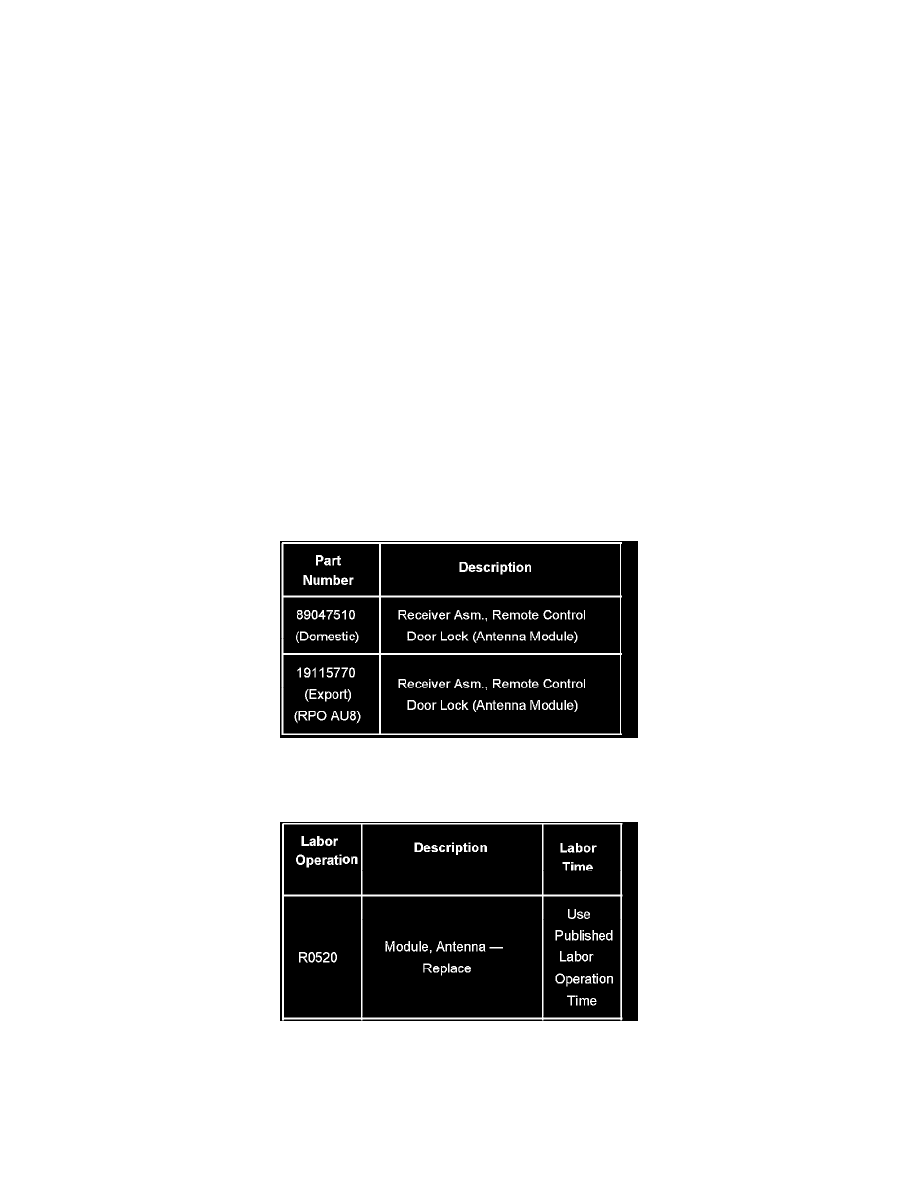
Parts Information
Warranty Information
For vehicles repaired under warranty, use the table.