
SRX AWD V8-4.6L VIN A (2004)
1. If replacing a section of the auxiliary rear suction line, the replacement line must be the same length as the original line.
2. Use a tubing cutter in order to cut the replacement line to length.
3. Install new O-rings to the auxiliary rear suction lines.
4. Install the auxiliary rear suction lines to the vehicle.
5. Connect the rear auxiliary A/C line to the front auxiliary front suction line.
NOTE: Refer to Fastener Notice in Service Precautions.
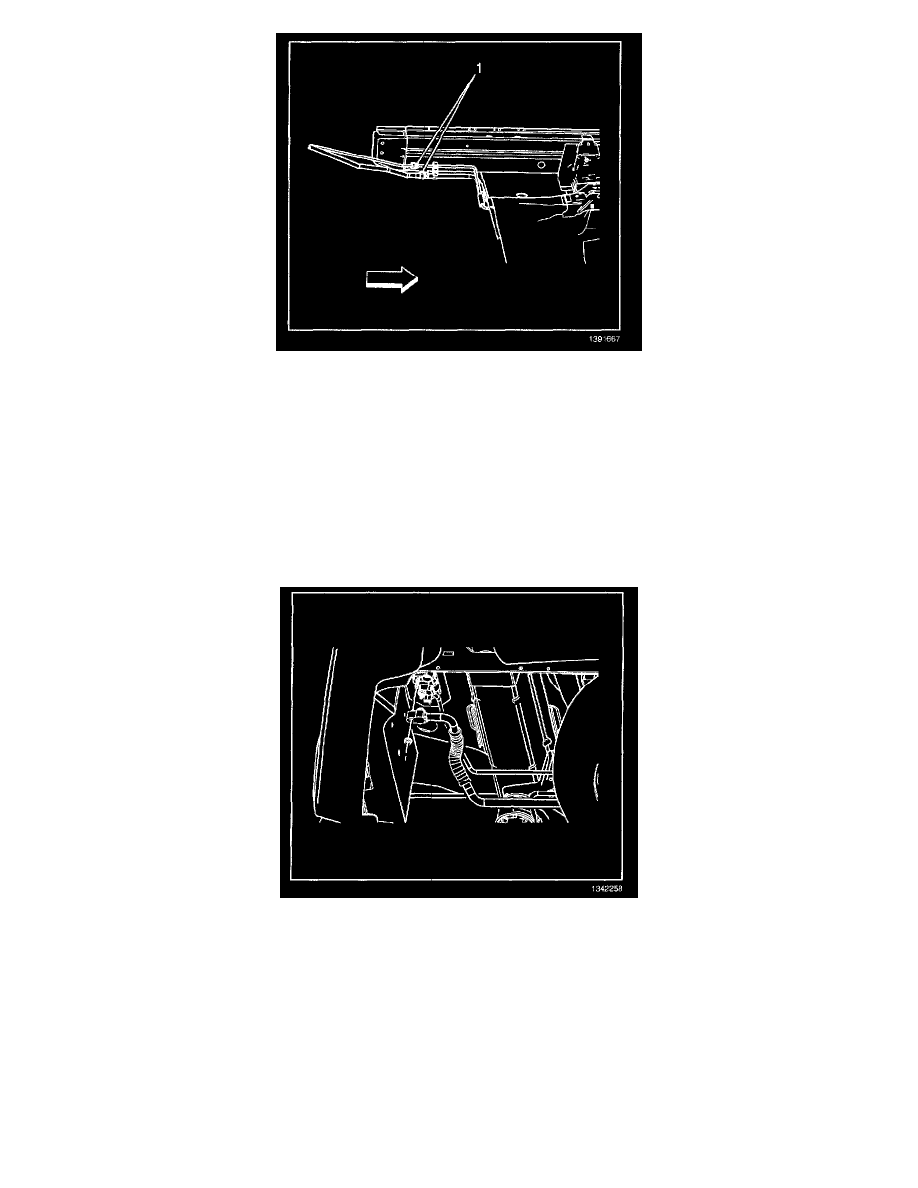
6. Tighten the auxiliary front suction line fitting (1).
Tighten
Tighten the fitting to 9 N.m (80 lb in).
7. Use the cleaning pad from the J 41425 in order to clean any burrs or grease from the auxiliary rear suction line ends. Be sure to clean at least 19
mm (0.75 in) from the line ends.
8. Use the LOK prep sealant in order to prep the line ends.
9. Apply one drop of the J 41425-3 sealing compound to the outside of each end of the line.
IMPORTANT: Use the 5/8 in connector to splice the forward and rearward auxiliary rear suction lines together.
10. Insert the line ends into the LOk fitting.
11. Rotate the LOK fitting one complete turn in order to evenly distribute the sealing compound around the lines.
12. Install the correct LOK fitting jaws into the J41425-1 tool.
13. Install the J 41425-1 tool over the LOK connectors. Verify that the LOK connector ends are positioned in the counter bores of the jaws.
IMPORTANT: The lines must be inserted fully into the connector to obtain a leak free joint.