
SRX RWD V8-4.6L VIN A (2006)
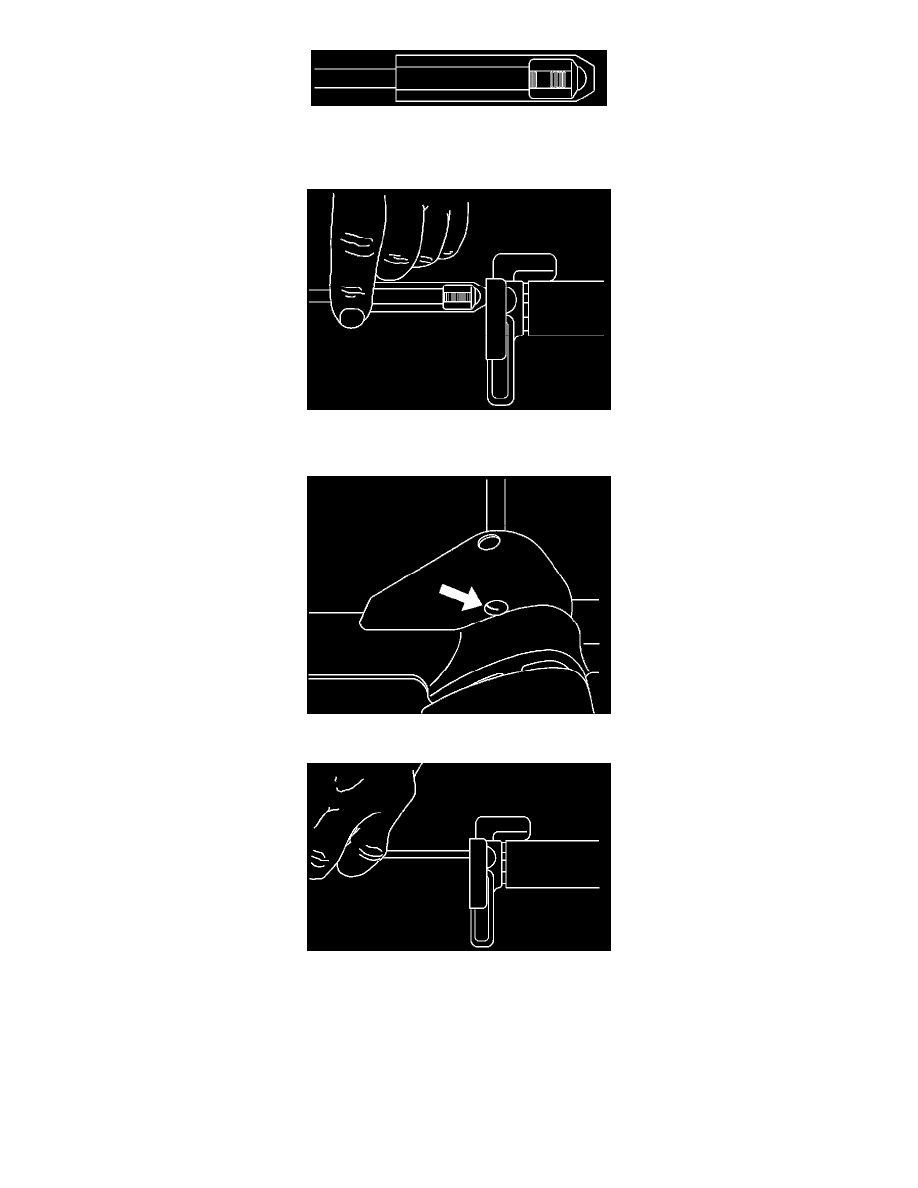
Install the insert using the supplied tool. This tool has a prewinder body to guide the insert prior to entrance into the tapped hole. Retract the mandrel and
place the insert into the well of the prewinder (tang end towards front of tool). Rotate the mandrel clockwise until the insert is fully engaged with driving
contour. Continue to rotate the mandrel until the insert is engaged in one or two threads of the prewinder tip. Refer to the illustration above.
Place the prewinder squarely over the hole. Refer to the illustration above. Rotate the mandrel until the HeliCoil insert is engaged in the tapped hole and
continue to rotate until the insert is located 1/4 to 1/2 turn below the work surface. Refer to the illustration above.
The tang on the back of the HeliCoil must be removed for proper bolt insertion. Refer to the illustration above.
Do not attempt to break the tang with pliers as this may damage the tapped hole.
To remove the tang, place the rod into the insert. Strike the rod sharply with a hammer. Refer to the illustration above. Touch-up the backside of the hole
if necessary.
Dealers are restricted to the purchase of one kit.
The Heli-Coil SRX repair kit should be purchased from H&P Technologies.
This kit contains enough inserts for 18 repairs. Please return the unused portion to parts for future use.