
SRX RWD V8-4.6L VIN A (2006)
Connect the EBCM electrical connector (1) to the EBCM (2).
8. Rotate the EBCM connector tab (2) rearward to the locked position.
9. Caution: The brake pipes must be fully installed to the brake pipe mounting retainers on the frame. Failure to properly retain the brake pipes may
cause the pipes to contact the frame and/or the transmission resulting in possible loss of brake fluid and personal injury.
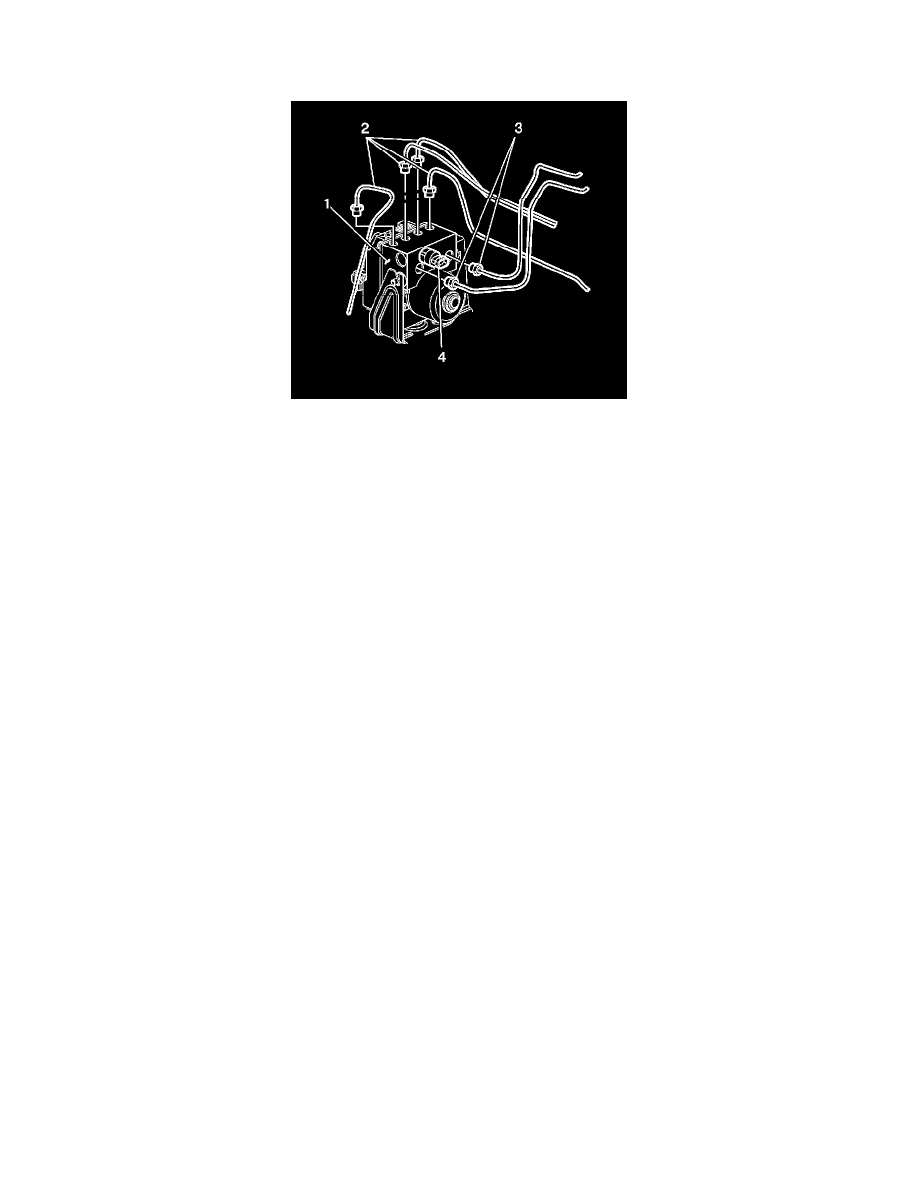
Caution: Make sure brake pipes are correctly connected to BPMV. If brake pipes are switched by mistake Inlet vs. Outlet, wheel lockup will
occur and personal injury may result.
Important: If a new BPMV is being installed, remove the shipping plugs from the valve openings.
Install the 4 wheel brake pipes (2) to the BPMV (1) using the locations recorded during the removal procedure.
^
Tighten the pipes to 27 Nm (20 ft. lbs.).
10. Install the washer solvent container bracket.
11. Install the wheelhouse liner.
12. Install the air deflector shield.
13. Lower the vehicle.
14. Install the 2 master cylinder brake pipes (3) to the BPMV (1) using the locations recorded during the removal procedure.
^
Tighten the pipes to 27 Nm (20 ft. lbs.).
15. If equipped with a brake fluid pressure sensor (4), connect the electrical connector.
16. Fill and bleed the hydraulic brake system.
17. Perform the Auto Bleed Procedure.
18. Perform the ABS Diagnostic System Check. Refer to Diagnostic System Check - Vehicle.