
SRX RWD V8-4.6L VIN A (2006)
Cornering Lamp: Service and Repair
HEADLAMP ASSEMBLY OR HEADLAMP BULB AND/OR CORNERING, SIDEMARKER, PARK, TURN SIGNAL BULB
REPLACEMENT
REMOVAL PROCEDURE
1. Open the hood.
2. Remove the push-pin retainers that secure the top of the upper fascia and grille assembly to the upper tie bar to allow the upper fascia and grille
assembly to flex forward.
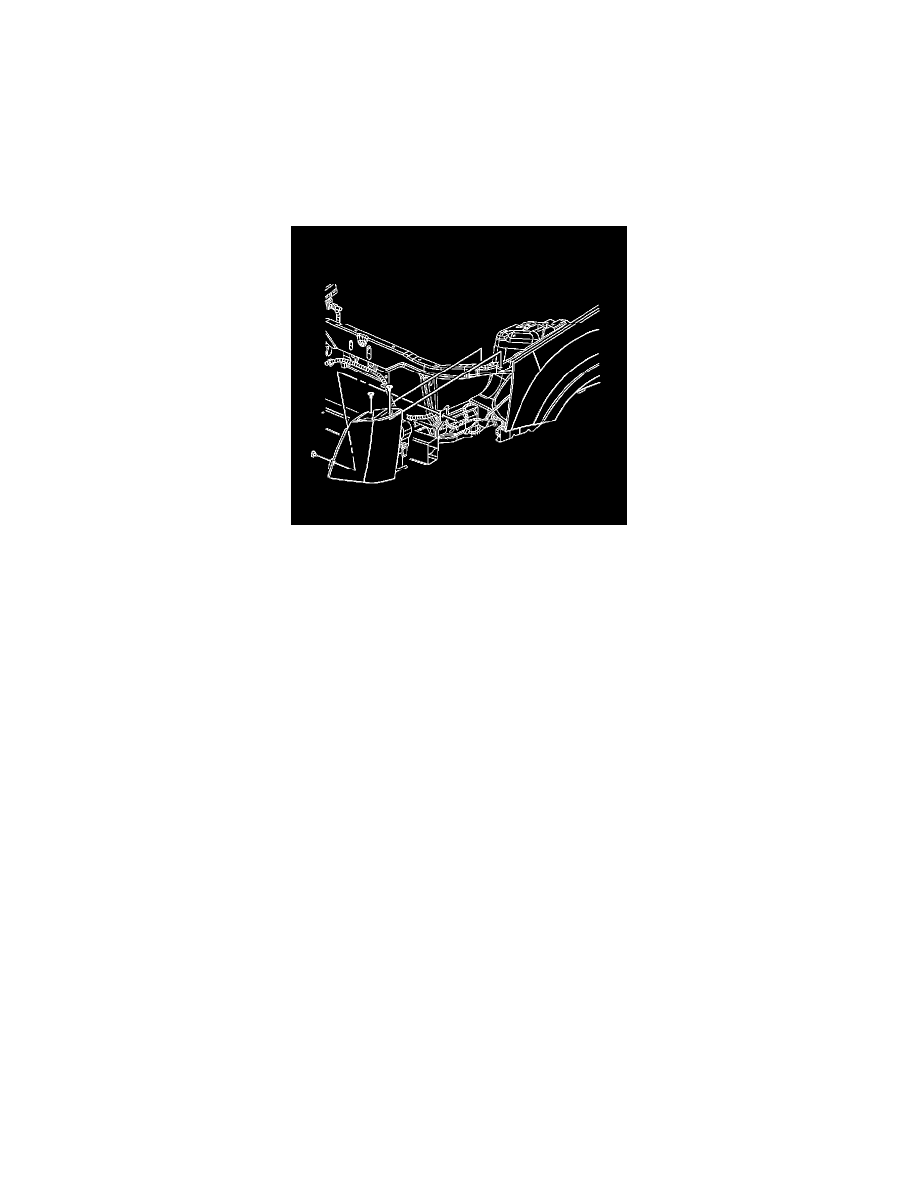
3. Remove the bolt and the push-pin retainer that secures the top of the headlamp assembly to the upper tie bar.
4. Gently pull the upper fascia and grille assembly forward only far enough to remove the bolt located at the bottom inboard side of the headlamp
assembly.
5. Pull the headlamp assembly straight out to disengage the snap-in retainer at the lower outboard back surface of the assembly. Turn the assembly so
that the front inboard corner clears the front fascia.
6. Pull the headlamp assembly out and away from the vehicle
7. Disconnect the headlamp electrical connector.
8. Remove the headlamp assembly from the vehicle.
9. Remove the headlamp bulb cover from the headlamp assembly.
10. Remove the headlamp bulb socket from the headlamp assembly.
CAUTION: Refer to Halogen Bulb Caution in Service Precautions.
11. Remove the headlamp bulb.
12. Remove the side marker bulb socket from the outer side of the headlamp assembly.
13. Remove the side marker bulb.
14. Remove the parking lamp bulb socket from the inner edge of the headlamp assembly.
15. Remove the parking lamp bulb.
INSTALLATION PROCEDURE
CAUTION: Refer to Halogen Bulb Caution in Service Precautions.
1. Install the headlamp bulb to the socket.
2. Install the headlamp bulb socket to the headlamp assembly.
3. Install the headlamp bulb cover to the headlamp assembly.
4. Install the side marker bulb to the socket.
5. Install the side marker bulb socket to the headlamp assembly.
6. Install the parking lamp bulb to the socket.
7. Install the parking lamp socket to the headlamp assembly.
8. Connect the headlamp electrical connector.
9. Install the headlamp assembly to the vehicle by placing it back into position so that the bolt holes align and the snap-in retainer located at the
outboard back surface of the headlamp assembly engages.
10. Gently pull the upper fascia and grille assembly forward only far enough to install the bolt located at the bottom inboard side of the headlamp
assembly.
NOTE: Refer to Fastener Notice in Service Precautions.