STS AWD V6-3.6L (2007)

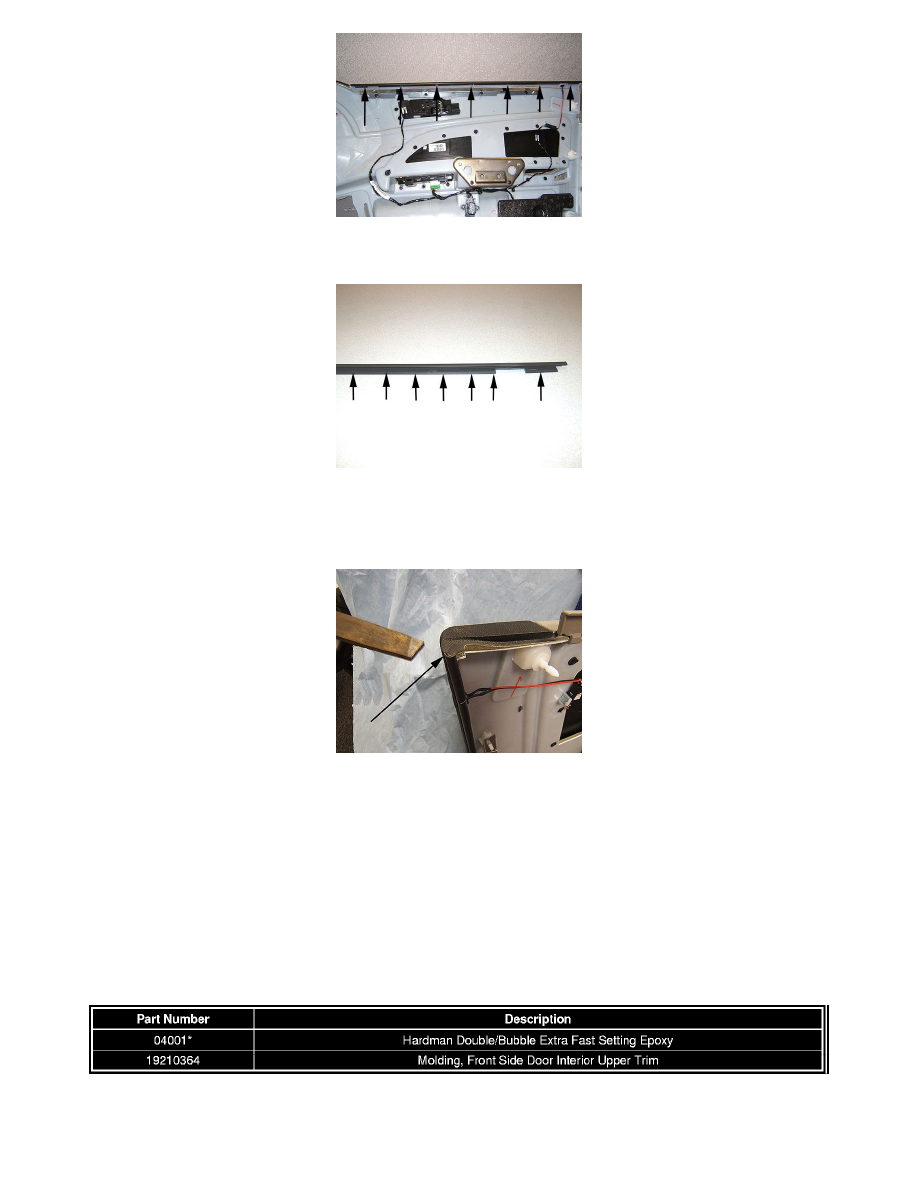
2. Locate the staples that retain the door upper trim panel molding to the inner trim panel.
3. Using a small screwdriver, remove the staples.
4. Apply a bead of epoxy adhesive, such as Hardman Double Bubble Extra Fast Setting Epoxy*, or the equivalent, to the full length of the
replacement trim panel upper molding. Apply the adhesive on the lower lip of the molding, taking care to ensure that no adhesive can squeeze out
on the top side of the molding and onto the outer trim panel fabric.
5. Install the molding onto the trim panel and allow the adhesive to cure per the adhesive manufacturer's instructions.
Important
If the new molding and the trim panel are not flush at the rear edge, the new molding may be damaged when the trim panel is reinstalled
on the door.
6. With the new molding installed on the trim panel, use a small file to level the rear end of the replacement molding with the rear edge of the trim
panel.
7. Reinstall the front side door trim panel. Refer to Front Side Door Trim Panel Replacement in SI.
* We believe this source and their products to be reliable. There may be additional manufacturers of such products/materials. General Motors does not
endorse, indicate any preference for, or assume any responsibility for the products or material from this firm or for any such items that may be available
from other sources.
Parts Information
* For product information contact : www.hardmanadhesives.com (international customers ONLY should contact [email protected])
Warranty Information
