
STS AWD V6-3.6L (2007)
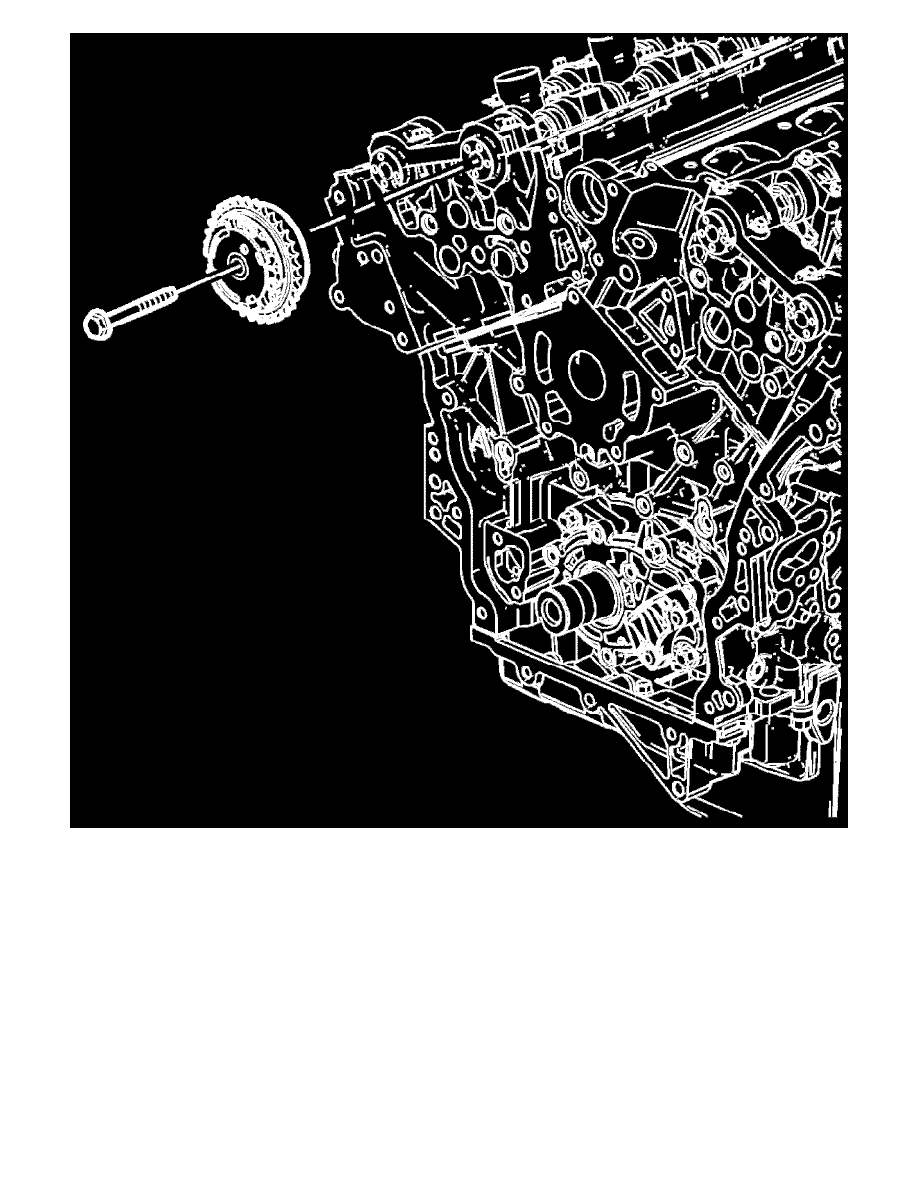
3. Locate the intake camshaft position actuator to the camshaft and loosely install the bolt.
Notice: A wrench must be used on the hex of the camshaft when loosening or tightening in order to prevent component damage. Failure to prevent
the torque reaction against the timing drive chain can lead to timing drive chain failure.
Important: Use an open-end wrench at the camshaft hex to prevent camshaft/engine rotation.
4. Tighten the camshaft position actuator bolt. See: Service and Repair/Overhaul/Repair Instructions/109. Camshaft Position Actuator Installation -
Right Side Intake
5. Install the right exhaust camshaft actuator. See: Camshaft Position Actuator Replacement - Bank 1 (Right Side) Exhaust
Second Design
CAMSHAFT POSITION ACTUATOR REPLACEMENT - BANK 1 (RIGHT SIDE) INTAKE - SECOND DESIGN
Removal Procedure