
STS AWD V8-4.6L VIN A (2006)
2. Make an indentation 25 mm (1.0 inch) from the bottom (4) of the tube (3) using a centerpunch.
3. Clamp the shock absorber in a vise horizontally with the shock absorber rod (1) completely extended.
4. Drill a hole in the shock absorber at the centerpunch (4) using a 5 mm (3/16 inch) drill bit. Gas or a gas/oil mixture will exhaust when the drill bit
penetrates the shock absorber. Use shop towels in order to contain the escaping oil.
5. Drill a second hole in the shock absorber at the centerpunch (2) using a 5 mm (3/16 inch) drill bit. Oil will exhaust when the drill bit penetrates the
shock absorber. Use shop towels in order to contain the escaping oil.
6. Remove the shock absorber from the vise. Hold the shock absorber over a drain pan horizontally with the holes down. Move the rod (1) in and out
of the tube (3) to completely drain the oil from the shock absorber.
Shock, Shock Component, and/or Spring Replacement
Shock, Shock Component, and/or Spring Replacement
Removal Procedure
1. Raise and support the vehicle. Refer to Vehicle Lifting.
Notice: Use care when handling the coil springs in order to avoid chipping or scratching the coating. Damage to the coating will result in
premature failure of the coil springs.
2. Remove the tire and wheel.
3. Remove the shock module from the vehicle.
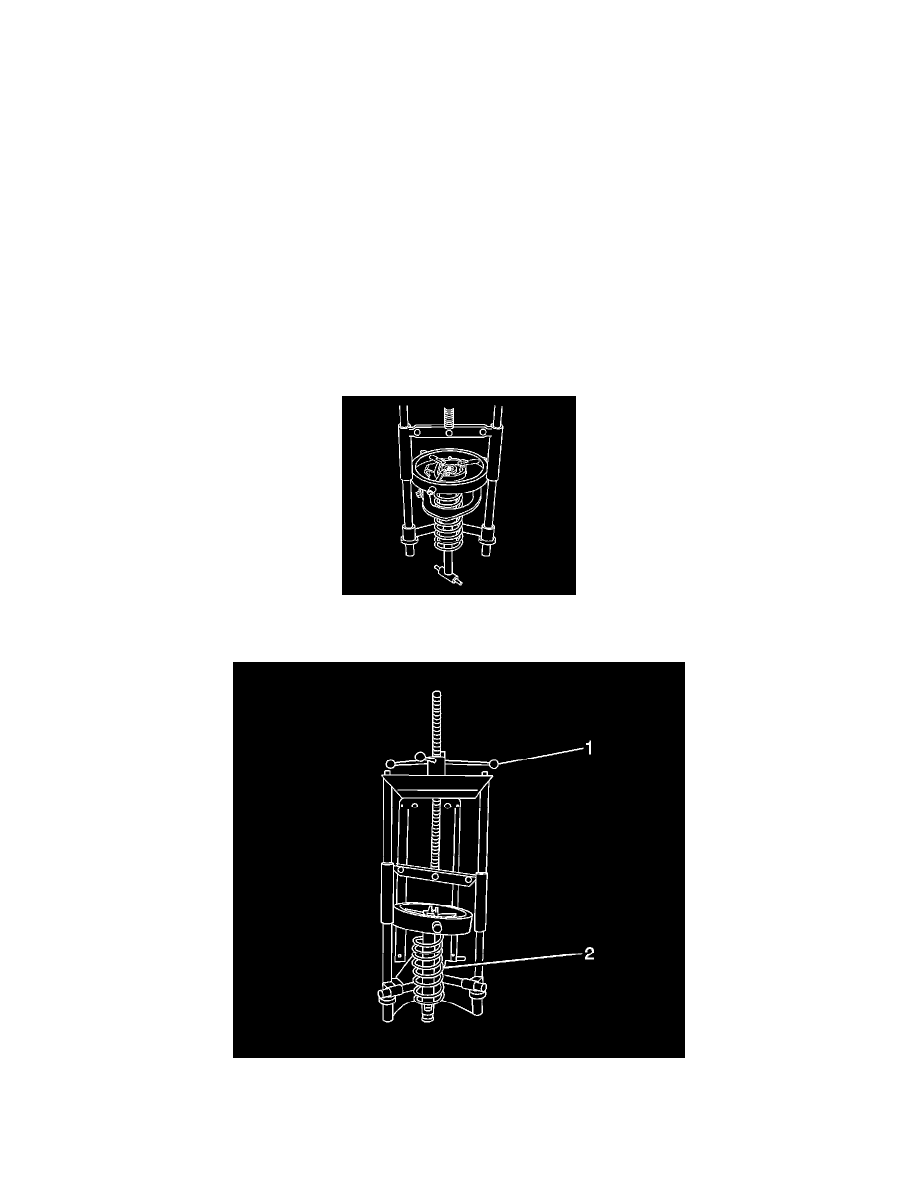
4. Install the shock module into the spring compressor.
5. Mark the upper control arm assembly and insulator for proper installation.
6. Turn the spring compressor forcing screw (1) until the coil spring (2) is compressed.
Important: The spring is compressed when the shock absorber moves freely.