
STS RWD V8-4.6L VIN A (2006)
9. Remove the right secondary camshaft drive chain tensioner, allowing the tensioner to expand as you remove it.
10. Clean and inspect the camshaft timing drive components. Refer to Camshaft Timing Drive Components Cleaning and Inspection .
Installation Procedure
1. Collapse the right secondary camshaft chain tensioner using the following procedure:
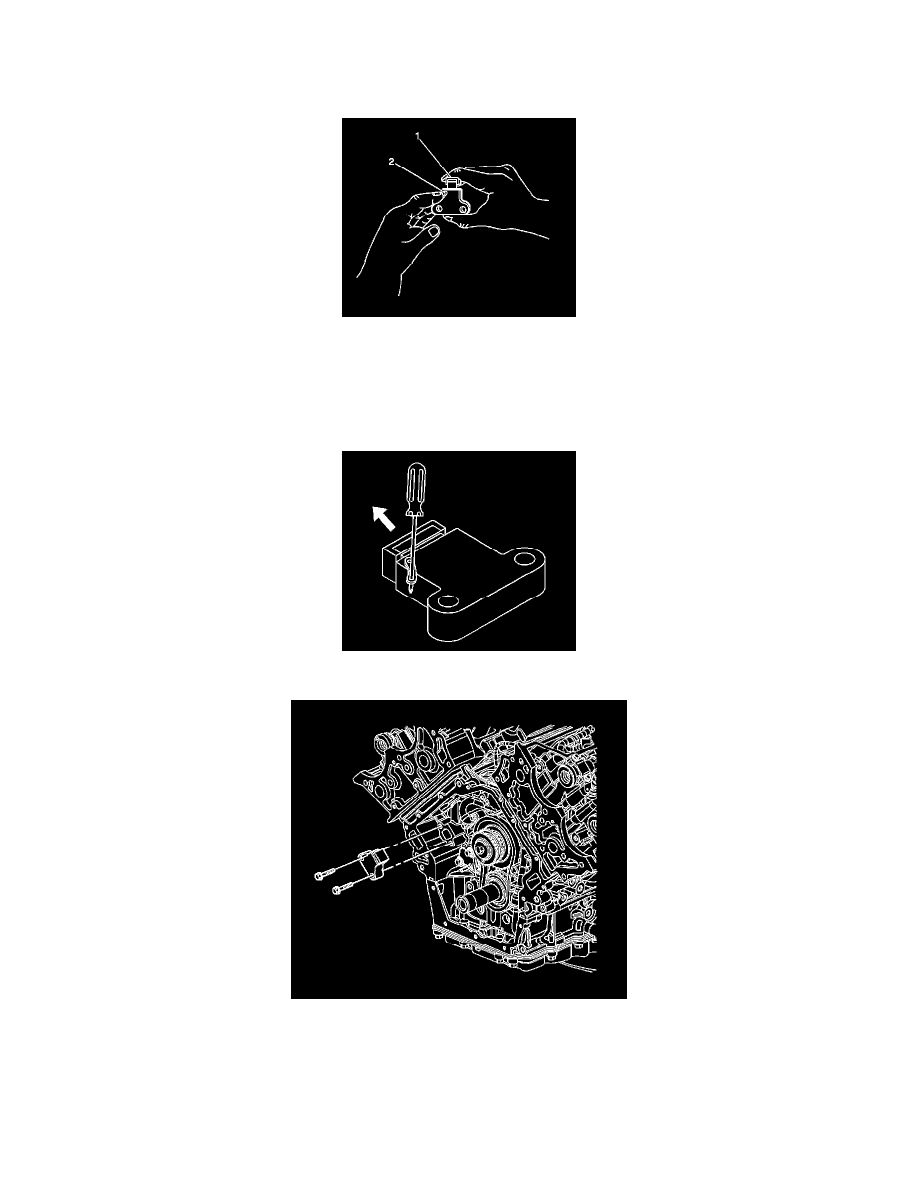
1. Rotate the ratchet release lever (2) counterclockwise and hold.
2. Collapse the tensioner shoe (1) and hold.
3. Release the ratchet lever (2).
2. Slowly release the pressure on the shoe (1), until the ratchet lever (2) moves to the first detent and a "click" is heard and felt.
3. Collapse the tensioner shoe (1) and hold.
4. Insert a pin through the hole in the release lever in order to lock the tensioner shoe in the collapsed position.
5. Notice: Refer to Fastener Notice in Service Precautions.
Important: Ensure the tensioner release lever is facing outward.
Install the right secondary camshaft drive chain tensioner and retaining bolts.
^
Tighten the secondary camshaft drive chain tensioner bolts to 25 Nm (18 ft. lbs.).
6. Remove the pin holding the tensioner to tighten any slack in the timing chain.