
Astro Van 2WD V6-4.3L VIN W (2001)
35.
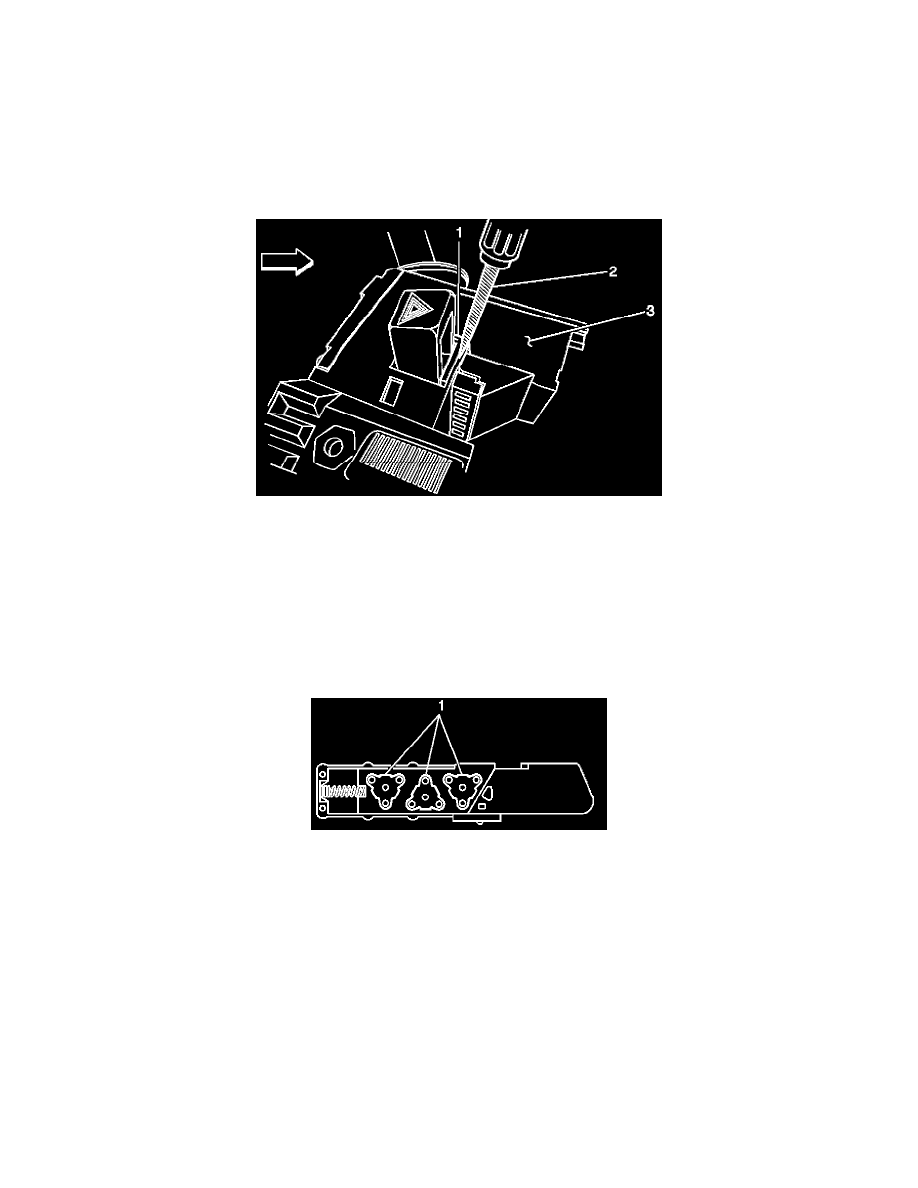
Inspect the part number (1) on the multifunction switch at the location shown in the illustration.
36.
If the part number is 26084051, 26084052, 26096834, 26096835, 26102157 or 26102158, no repair is required. Proceed to the section titled
"Reassemble Vehicle."
^
If there is NO part number or barcode on the switch, no repair is required. Proceed to the section titled "Reassemble Vehicle."
^
If the part number or barcode on the switch is 26091775 or 26091776, proceed to the next step and replace the hazard warning flasher switch
using part number 15177379.
Important:
Carefully review the above illustration to determine the exact location to insert the screwdriver in the next step.
37.
Insert a small, pocket-sized, flat bladed screwdriver (2) into the small space between the hazard warning flasher switch housing (1) and the
multifunction switch (3).
38.
Carefully tilt the screwdriver handle towards the instrument cluster. This will cause the blade of the screwdriver to pry open the space between the
hazard warning flasher switch housing and the multifunction switch.
39.
While the space is pried open, pull the hazard warning flasher switch out of the multifunction switch. Discard the hazard warning flasher switch.
Note:
Do not touch the three triangle-shaped electrical contacts (1) on the side of the switch when removing the protective packaging, handling, or
applying grease to the new hazard warning flasher switch in the next steps.
40.
Remove the rubber band and protective plastic wrapping from the new hazard warning flasher switch.
Important:
The electrical contacts on the new hazard warning flasher switch require a special lubricant, which is included in the kit. Only apply this
special lubricant as instructed in the next step. DO NOT use any other type of grease or lubricant.
41.
Open the container of special grease included in the kit and apply it to the surfaces of the three triangle-shaped electrical contacts (1) on the side of
the new hazard warning flasher switch. When properly applied, the surfaces of the three triangle-shaped electrical contacts must be completely
covered and there should be no grease left in the container. DO NOT put any grease in the opening that contains the small metal return spring.
42.
Insert the hazard warning flasher switch into the opening of the multifunction switch and press down until it locks into place.
43.
Remove any excess grease that may appear around the base of the hazard warning flasher switch. Proceed to the next section "Reassemble
Vehicle."