
Astro Van 2WD V6-4.3L VIN X (2002)
8. Perform the following steps in order to remove the pulley rotor and bearing assembly:
8.1.
Hold the J 41552 in position.
8.2.
Tighten the puller screw against the puller guide.
8.3.
Remove the pulley rotor and bearing assembly.
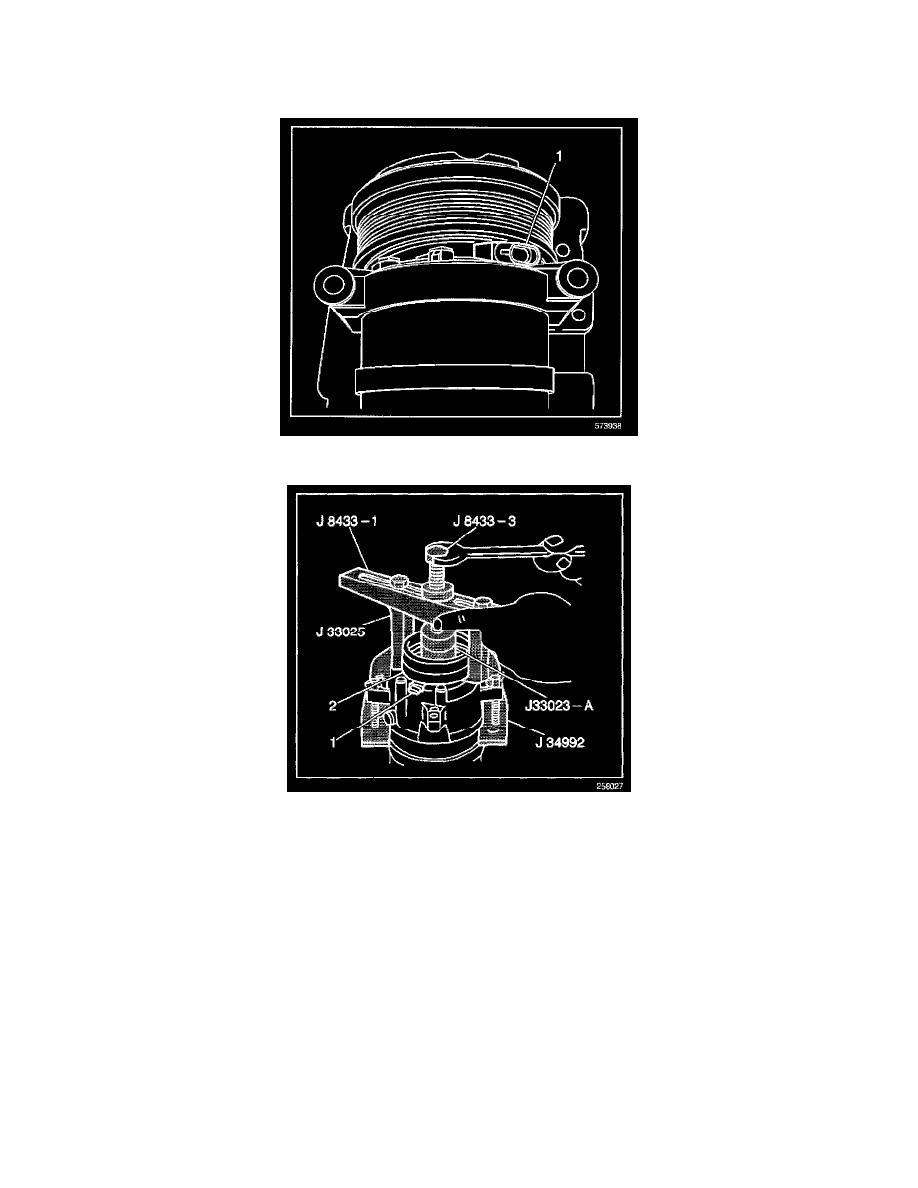
9. Mark the clutch coil terminal location (1) on the compressor front head.
10. Install the J 33023-A on the front head of the compressor.
11. Install the J 8433-1 and the J 33025.
12. Tighten the J 8433-3 against the puller pilot in order to remove the clutch coil (2).
13. Remove the clutch coil from the compressor.
INSTALLATION PROCEDURE