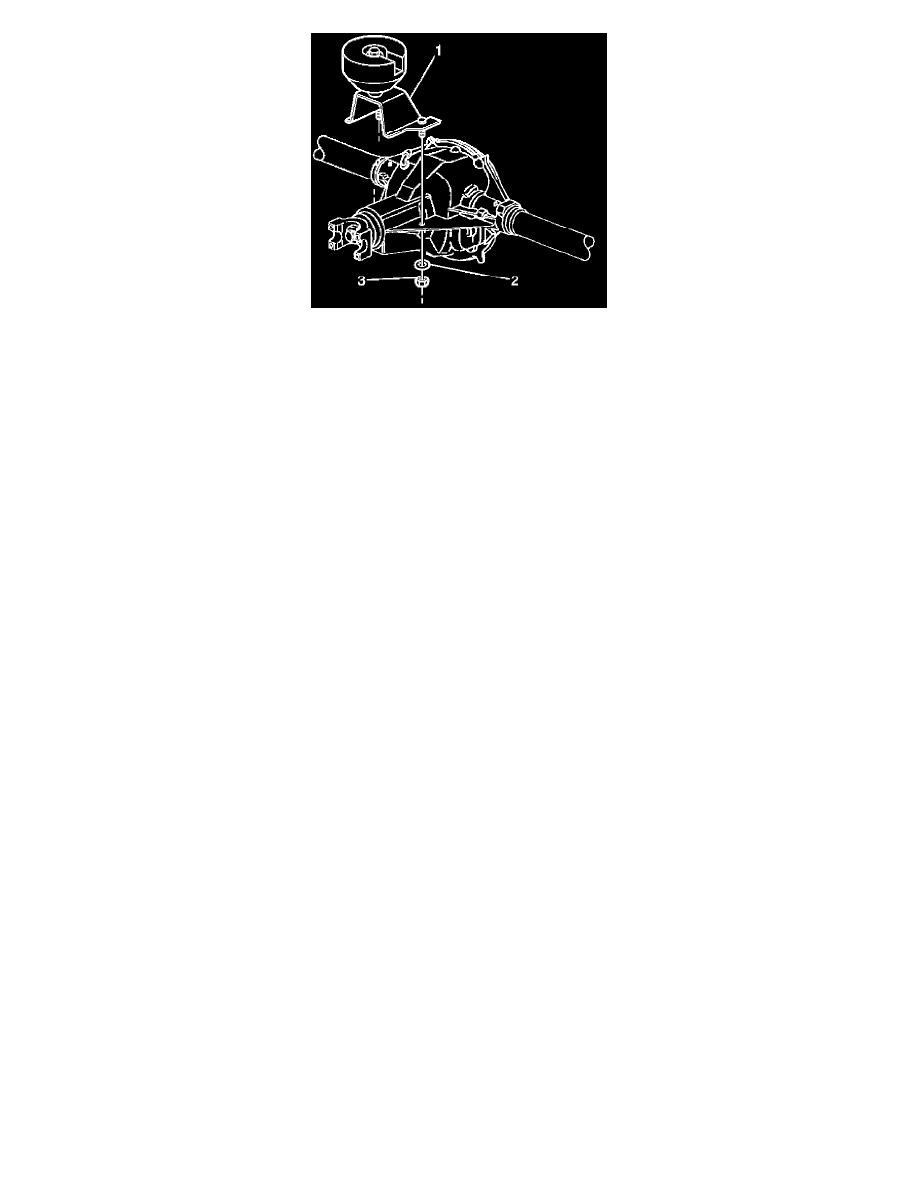
Astro Van 2WD V6-4.3L VIN X (2002)

6.
Install the rear axle pinion nose damper (1), P/N 15005880.
7.
Install the rear axle pinion nose damper washers (2), P/N 15614758, and the nuts (3), P/N 11516072.
Tighten
Tighten each nut to 37-53 N.m (27-39 lb ft).
8.
Rotate the driveshaft in order to verify that there is no contact between the driveshaft and the pinion nose damper.
9.
Test drive the vehicle. Inspect for contact between the driveshaft and the damper.
Rear Leaf Spring Damper Installation Procedure
Use Damper Kit, Rear Spring Vib., P/N 15042486, for this procedure.
1.
Raise the vehicle. Support the rear axle. Refer to the General Information subsection of the appropriate Service Manual for lifting and jacking
information.
2.
Remove the leaf spring. Refer to the Rear Suspension subsection of the appropriate Service Manual for leaf spring replacement procedures.
3.
Locate the rear spring clip closest to the shackle. This clip maintains the alignment of the rear spring plates # 1 and # 2.
Note:
Do not damage the top surfaces of the # 1 and # 2 spring plates. Damage may cause premature spring breakage.
4.
Insert a wood wedge, no metal or sharp objects, between rear spring plates # 1 and # 2, located forward of the clip. Allow enough clearance to
work around. This should maximize the gap between spring plates # 1 and # 2.
5.
Grind off or, using an 11 mm (0.44 in) drill bit, drill out the rivet head holding the clip to the # 2 spring plate.
6.
Remove the clip and the plastic clip liner from the spring assembly. Discard the spring clip only.
7.
Knock out any remaining rivet residue from spring plate # 2.
