
Astro Van AWD V6-4.3L VIN X (2003)
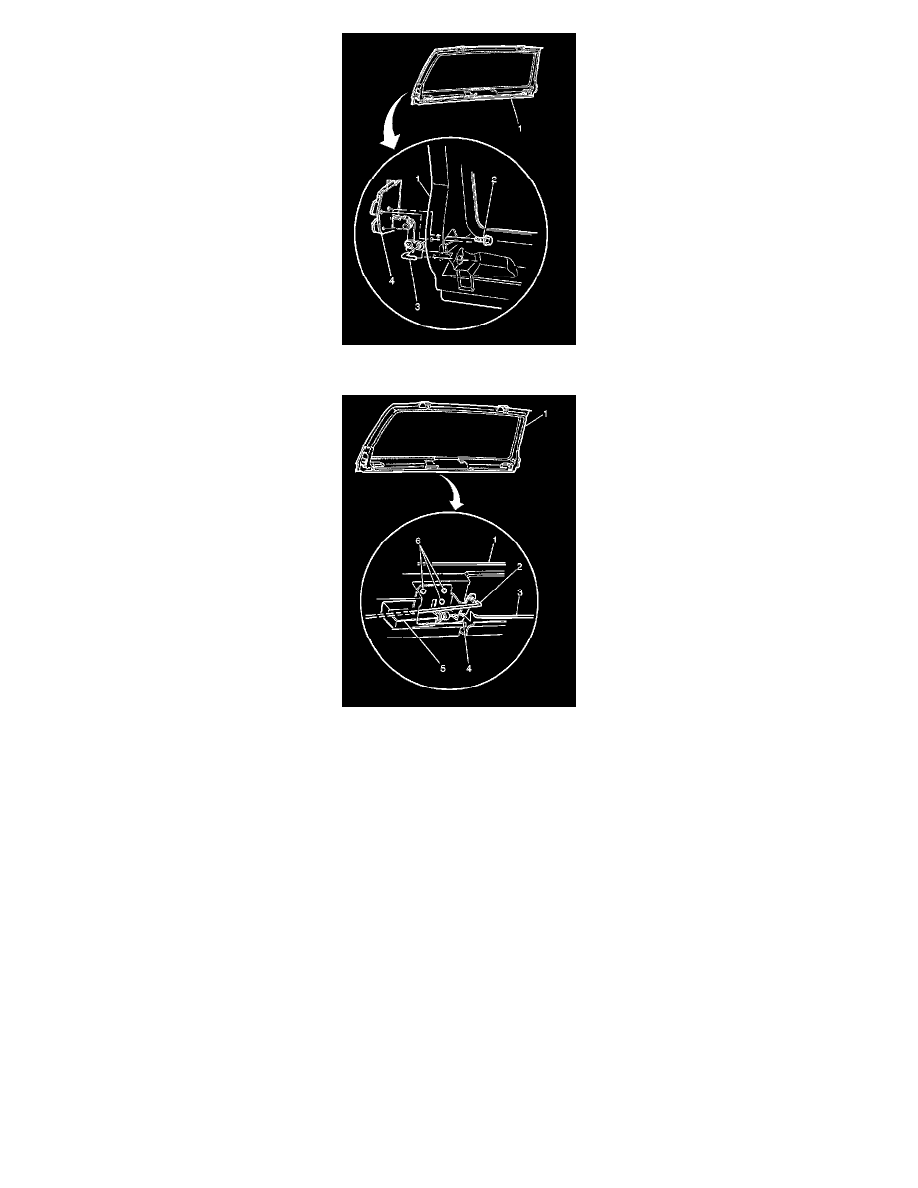
1. Install the latch (4) with the control rod to the liftgate (3).
Notice: Refer to Fastener Notice in Cautions and Notices.
Important: Install the new retainers whenever the control rods are removed.
2. Install the liftgate latch screws (6).
Tighten the liftgate latch screws to 10 N.m (88 lb in).
3. Use the following procedure in order to install the control rods to the actuator lever (2):
1. Push the actuator lever and the control rod together (2).
2. Push the control rod through the hole.
4. Install the liftgate garnish molding (1). Refer to Garnish Molding Replacement - Lift Gate (See: Interior Moulding / Trim/Trim Panel/Service and
Repair) .