
Astro Van AWD V6-4.3L VIN X (2003)
Compressor Clutch Hub: Service and Repair
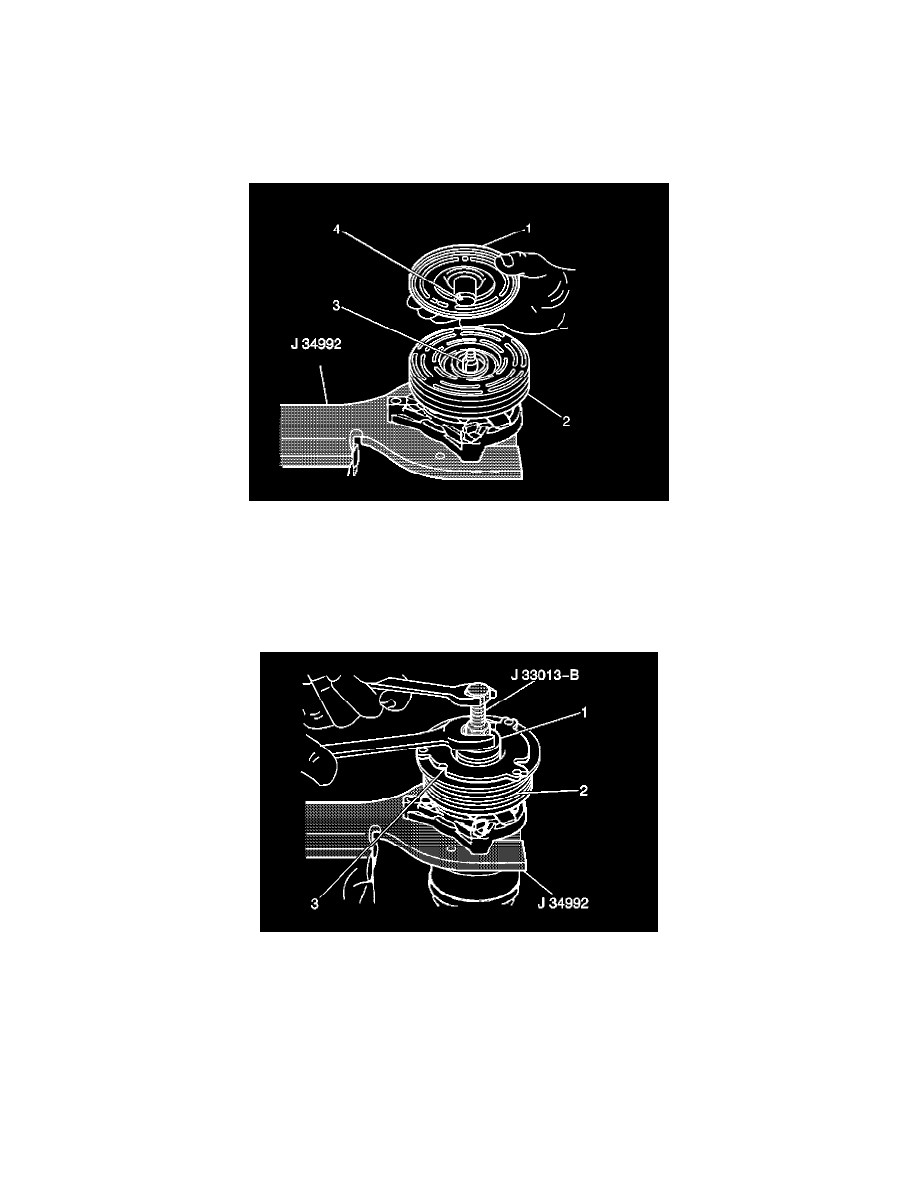
Compressor Clutch Plate/Hub Assembly Installation
COMPRESSOR CLUTCH PLATE/HUB ASSEMBLY INSTALL
TOOLS REQUIRED
J 33013-B Hub and Drive Plate Remover/Installer
1. Install the shaft key (4) into the hub key groove.Allow the key to project approximately 3.2 mm (0.125 in) out of the keyway (3). The shaft key
curves slightly in order to provide an interference fit in the hub key groove.
2. Clean the following components:
-
The clutch plate
-
The clutch rotor (2)
3. Align the shaft key (4) with the shaft keyway (3).
4. Place the clutch plate and the hub assembly (1) onto the compressor shaft.
5. Remove the forcing tip on the J 33013-B.
6. Reverse the body direction on the center screw.
7. Install the J 33013-B with the bearing.
8. Back off the body of the J 33013-B as necessary in order to permit the center screw to be threaded onto the end of the compressor shaft.
9. Hold the center screw with a wrench.
10. Tighten the hex portion of the J 33013-B body in order to press the hub onto the shaft.
11. Tighten the body several turns.
12. Remove the installer. Ensure that the shaft key remains in place in the keyway.
13. Install the clutch plate and hub assembly to the final position.Ensure that the air gap (2) between frictional surfaces of the clutch plate and clutch
rotor measures within 0.50-0.76 mm (0.20-0.30 in).
14. Remove the J 33013-B.