
Astro Van AWD V6-4.3L VIN X (2003)
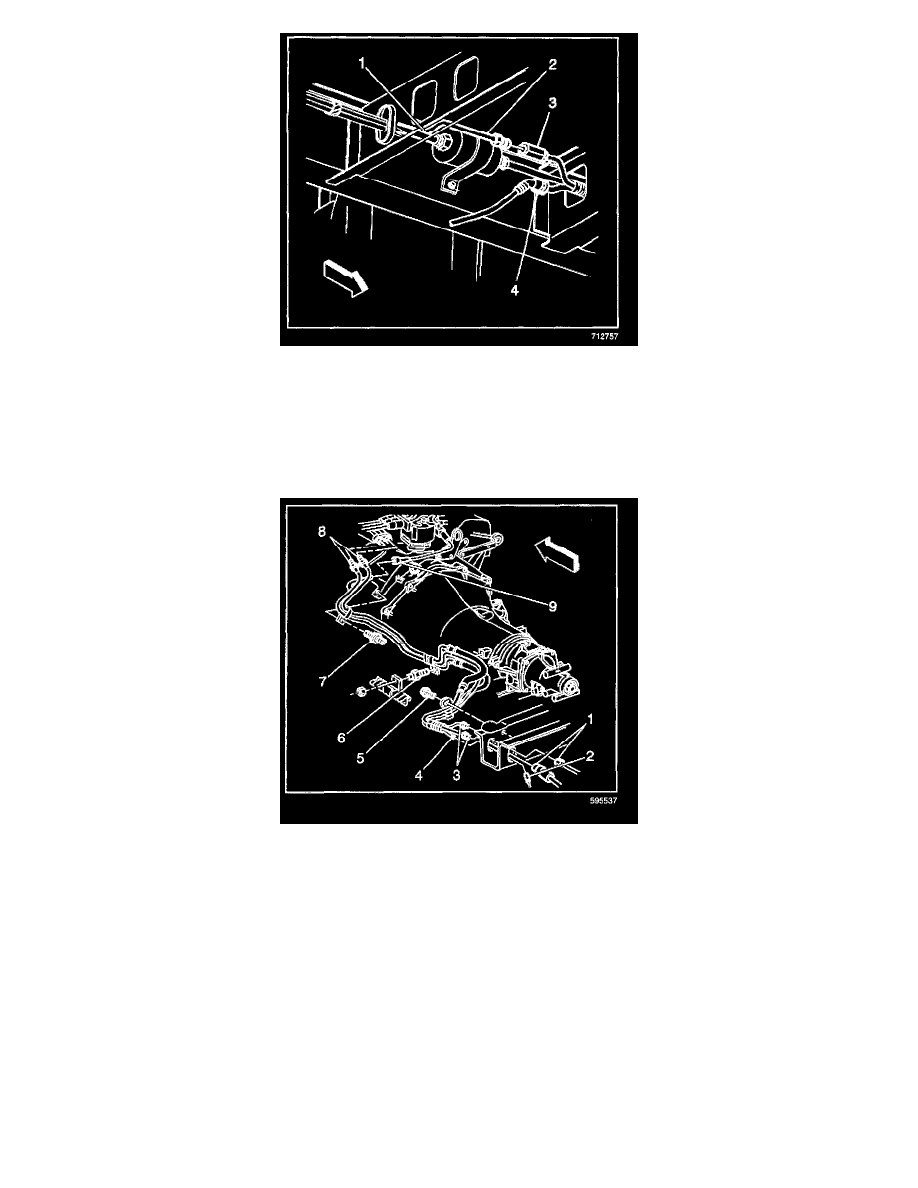
1. Connect the front chassis EVAP pipe to the rear chassis EVAP purge pipe (4).
IMPORTANT:
-
When replacing the fuel/EVAP pipes, always replace them with original equipment or parts that meet the GM specifications for those parts. The
replacement pipes must have the same type of fittings as the original pipes in order to ensure the integrity of the connection.
-
Do not use copper or aluminum tubing to replace steel tubing. Only tubing meeting the 124-M specification or its equivalent is capable of meeting
all pressure, corrosion and vibration characteristics necessary to ensure the durability standard required.
1. Install the EVAP pipe into the transmission bracket retainer.
2. Install the mounting stud (6).
NOTE: Refer to Fastener Notice in Service Precautions.
Tighten
Tighten the mounting stud to 33 N.m (24 lb ft).
3. Install the EVAP pipe into the cylinder head retainer.
4. Install the mounting stud (7).
Tighten
Tighten the mounting stud to 33 N.m (24 lb ft).
5. Install the EVAP pipe into the crossrail retainer.
6. Install the mounting bolt (5) to the crossrail.
Tighten