
Astro Van AWD V6-4.3L VIN X (2003)
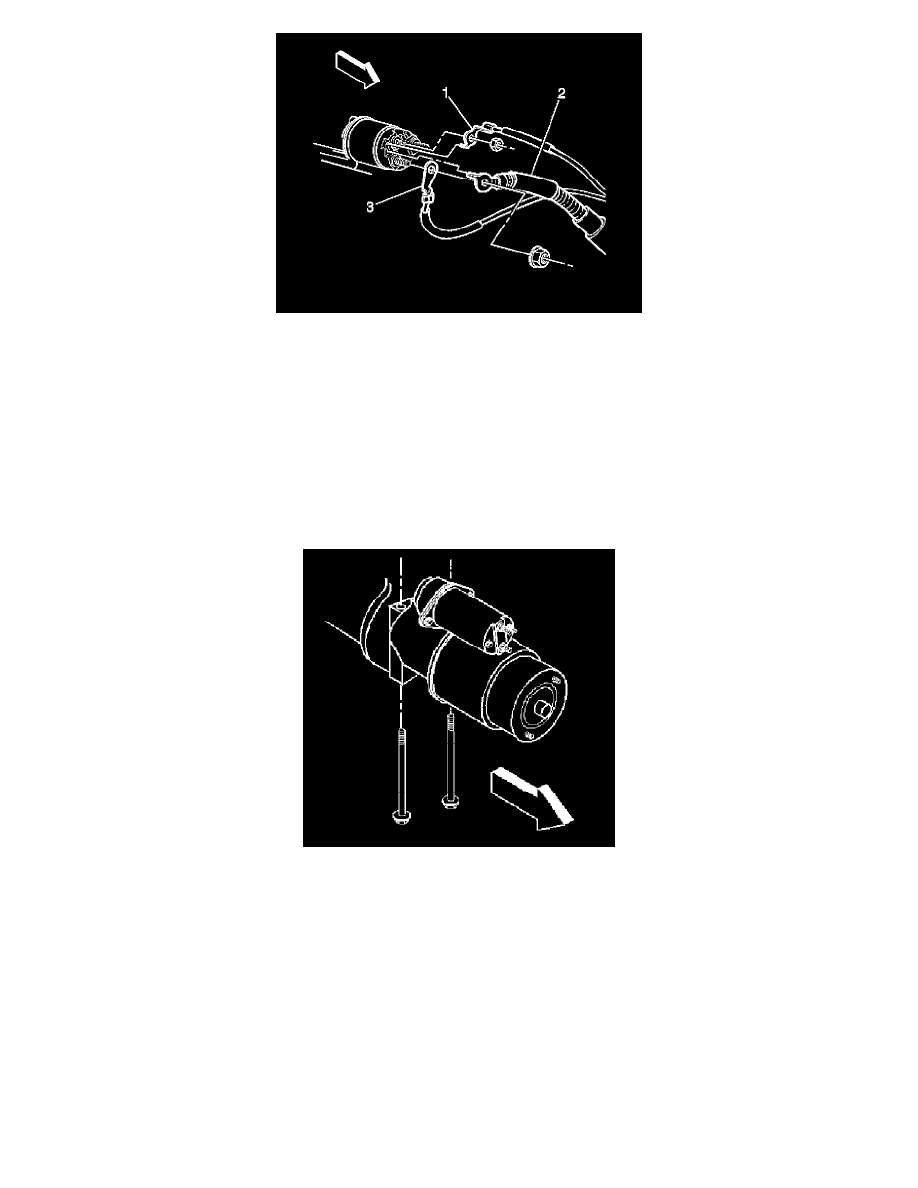
1. Connect the starter motor field leads to the starter motor as follows:
NOTE: Refer to Fastener Notice in Caution and Notices.
1.1.
Loosely install the starter enable relay lead (1) to the starter solenoid terminal.
Align the terminal retaining tab to the starter solenoid.
1.2.
Loosely install generator output (BAT) lead (3) and the battery positive cable (2) to the solenoid terminal.
Align the battery positive cable terminal retaining tab to the starter solenoid.
Tighten
-
Tighten the starter enable relay lead nut to 2 N.m (18 lb in).
-
Tighten the battery positive cable nut to 9 N.m (80 lb in).
1. Install the two starter motor mounting bolts and the shims (if necessary) through the starter to the engine.
Tighten
Tighten the bolts to 43 N.m (32 lb ft).
2. Lower the vehicle.
3. Connect the battery negative cable.