Astro Van L AWD V6-4.3L VIN W (1996)

Alignment: Service and Repair
Front Caster and Camber Adjustment
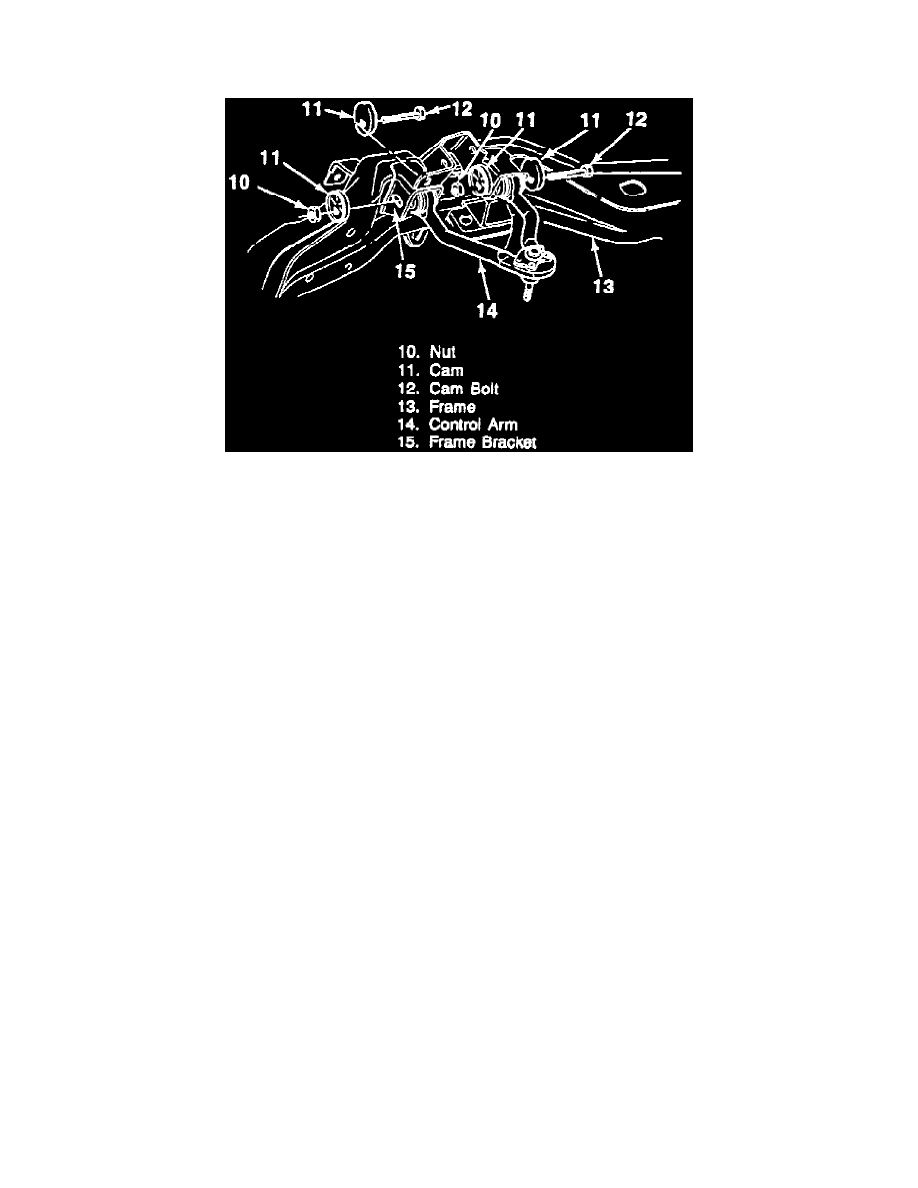
Fig. 2 Caster & Camber Adjustment.
Before checking and adjusting caster and camber angles, jounce front bumper at least three times, to allow vehicle to return to normal "trim
height". This will prevent false readings.
Caster and camber adjustments are made by rotating the offset cam bolt and cam in slotted frame bracket to reposition control arm Fig. 2. To adjust
caster and camber, loosen upper control arm-to-frame attaching bolts. Rotate cam by rotating cam bolt head.
CAMBER
1. Hold cam bolt Fig. 2 and loosen cam bolt nut.
2. Turn to obtain change equal to half of needed correction.
3. Keep cam bolt in this position to maintain setting.
4. Obtain remaining half of correction by repeating steps 1 through 3 to other cam bolt, turning cam lobe in same direction.
CASTER
1. Note camber reading. Hold front cam bolt Fig. 2, then loosen nut. Turn nut to obtain a change equal to 1/4 of desired caster change.
2. At front cam bolt, a positive camber change produces a positive caster change and a negative camber change produces a negative caster change.
Hold cam bolt in this position while tightening nut to maintain setting.
3. Hold rear cam bolt, then loosen nut and turn cam bolt to return camber to setting noted by turning cam lobe in opposite direction.
4. Check caster setting. If not correct repeat adjustment procedure.
5. Ensure cam bolt head is secure, then torque nut to 99 ft. lbs.
