
Astro Van L AWD V6-4.3L VIN W (1996)
INSTALL OR CONNECT
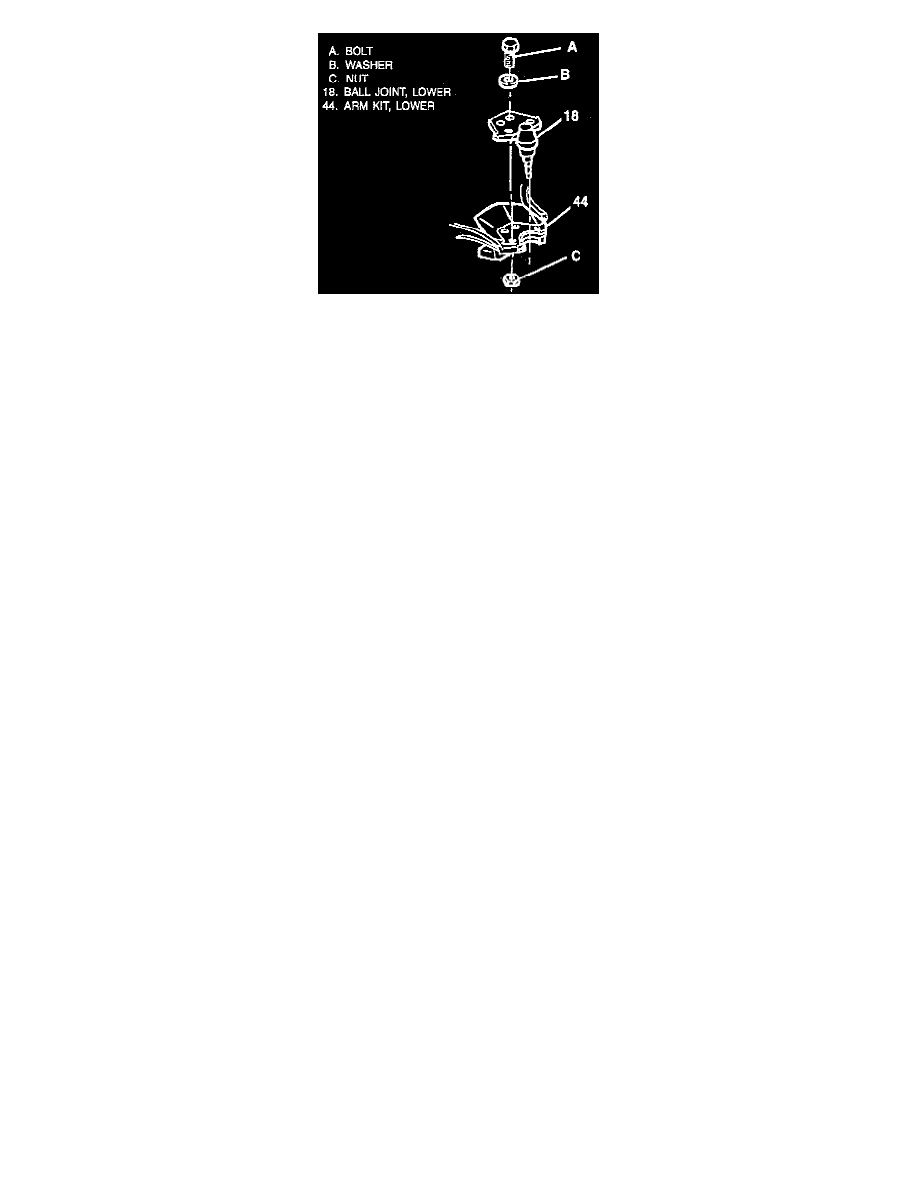
1. Ball joint to the control arm.
2. Bolts (A), flat washers (B), and nuts (C) to the ball joint. Tighten (c) to 30 Nm (22 ft. lbs.).
3. Ball joint to the knuckle.
-
Raise lower control arm with the hydraulic jack.
4. Nut.
-
Tighten
-
Nut to 128 Nm (95 ft. lbs.).
-
Nut must be tightened with the control arm at the "Z" height.
-
Tighten the nut to align the cotter pin. Do not tighten more than 1/6 turn.
5. New cotter pin (9).
-
Bend the pin ends against the nut.
6. Load the torsion bar, using J 36202.
-
Set the adjuster bolt at the mark made during disassembly.
7. Hub and bearing kit to knuckle.
8. Bolts. Tighten to 90 Nm (66 ft. lbs.).
9. Drive axle to the hub and bearing kit.
10. Washer and nut. Tighten to 200 Nm (147 ft. lbs.).
11. Inner tie rod end to the relay rod.
12. Inner tie rod end nut.
13. Front splash shield.
14. Front splash shield bolts.
15. Tire and wheel.
16. Wheel lug nuts.
-
Lower the vehicle.
-
Check the front wheel alignment.