
Astro Van M V6-262 4.3L VIN W CPI (1992)
1.
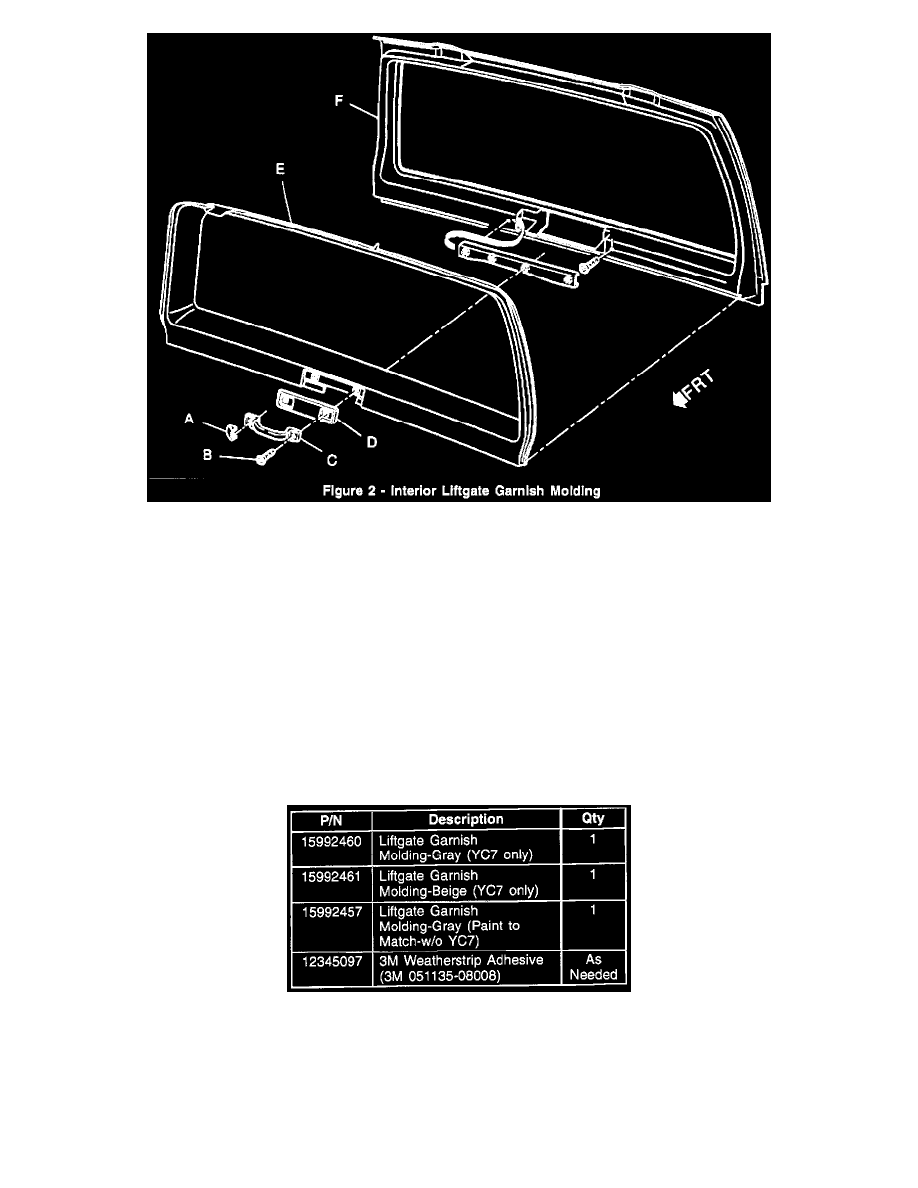
At the liftgate garnish molding, remove the interior handle screw covers (Figure 2, Item A).
2.
Remove the screws which secure the liftgate handle (Figure 2, Item B).
3.
Remove the liftgate handle (Figure 2, Item C) and escutcheon (Figure 2, Item D).
4.
Remove the screws which secure the liftgate garnish molding (Figure 2, Item E) to the liftgate assembly (Figure 2, Item F), and remove the
molding.
5.
Install the new liftgate garnish molding, tightening the garnish molding screws to 1.4 N-m (12 lb.in.).
6.
Reinstall the liftgate handle and escutcheon.
7.
Reinstall the screws which secure the liftgate handle and tighten to 6 N-m (53 lb.in.).
B.
Reinstall the interior handle screw covers.
Parts Information
Parts are currently available from GMSPO.