
Astro Van M V6-262 4.3L VIN Z (1994)
Oil Pan: Service and Repair
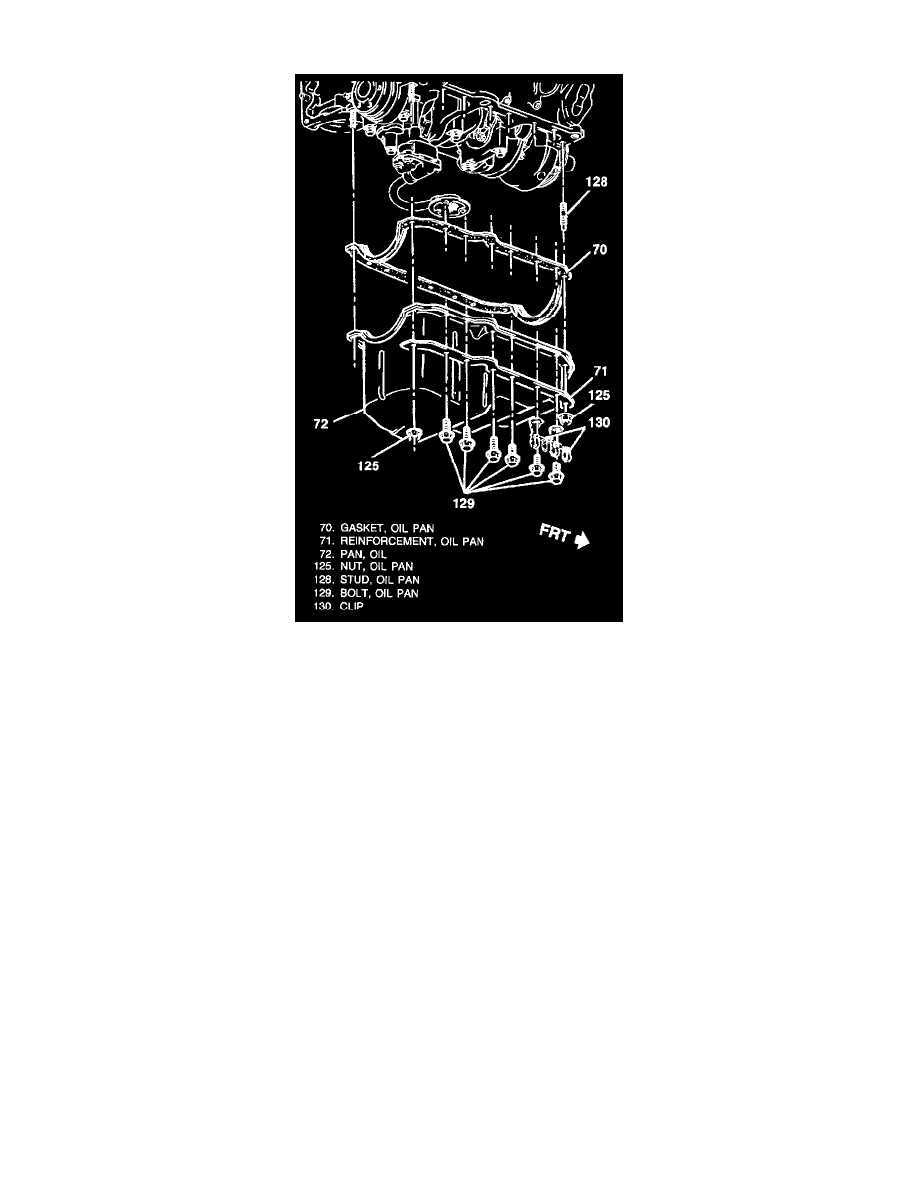
OIL PAN REPLACEMENT
A one-piece type oil pan gasket is used
Remove or Disconnect ( See Figure).
1. Negative battery cable.
-
Raise the vehicle and support with suitable safety stands.
-
Drain the engine oil.
2. Exhaust pipe at the exhaust manifolds.
3. Torque converter cover.
4. Starter.
5. Oil pan bolts, nuts, and reinforcements.
6. Oil pan and gasket.
Clean
-
Gasket surfaces on the engine and oil pan.
Inspect
-
Oil pan gasket for damage. Replace if necessary.
Install or Connect (See Figure).
-
Apply sealant (GM P/N 1052080 or 12346141) or equivalent to the front cover to block joint and to the rear crankshaft seal to block joint.
Apply the sealant for about 25 mm (1 inch) in both directions from each of the four corners.
1. Oil pan gasket to the oil pan.
2. Oil pan to the engine.
NOTICE: When fasteners are removed, always reinstall them at the same location from which they were removed. If a fastener needs to be replaced,
use the correct part number fastener for that application. If the correct part number fastener is not available, a fastener of equal size and strength (or
stronger) may be used. Fasteners that are not reused and those requiring thread locking compound will be called out. The correct torque value must be
used when installing fasteners that require it. If the above conditions are not followed, parts or system damage could result.
3. Oil pan bolts nuts and reinforcements.
Tighten Oil pan bolts to 11 N.m (100 lbs. in.).
-
Oil pan nuts at corners to 23 N.m (17 lbs. ft.).
4. Starter. Refer to Starting and Charging.