Astro Van M V6-262 4.3L VIN Z (1994)

Fuel Gauge Sender: Service and Repair
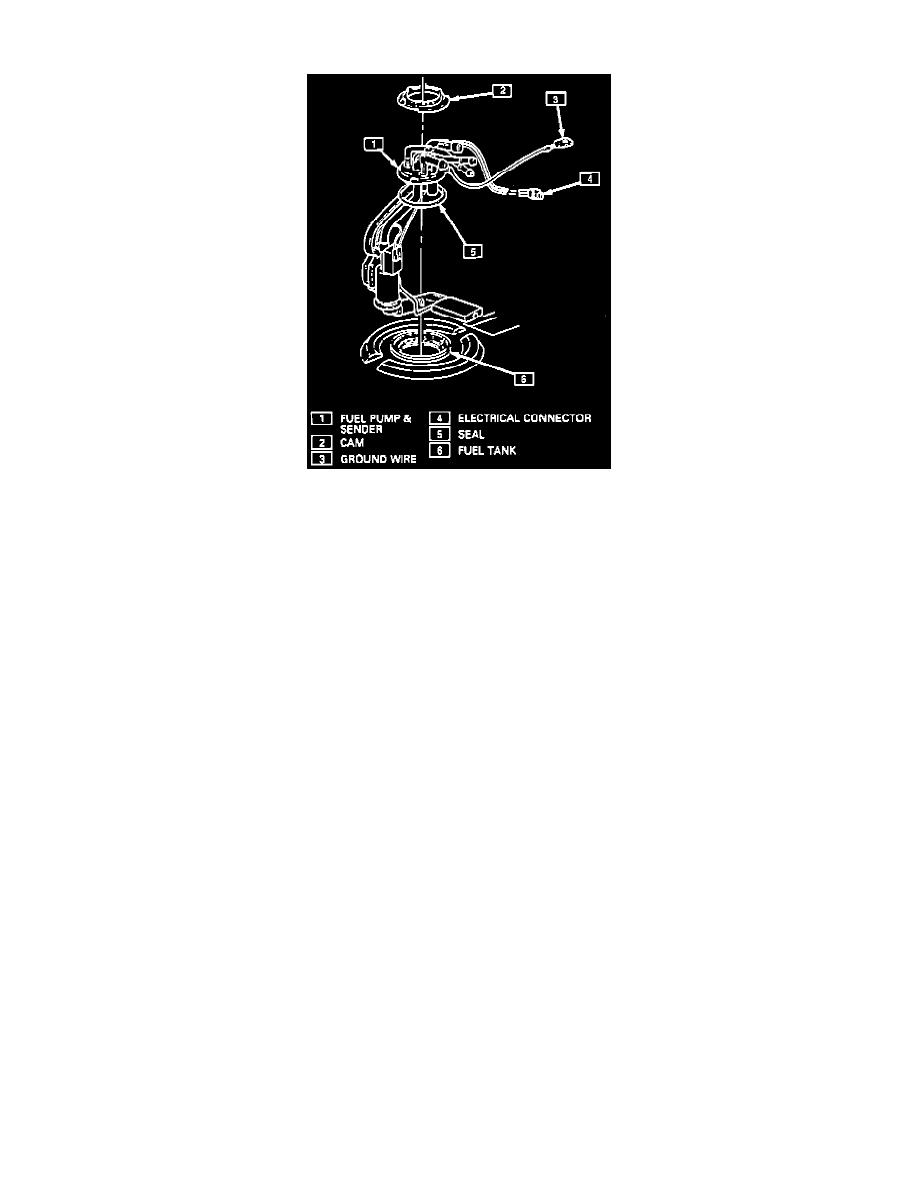
Fuel Pump And Sender Assembly (Typical)
REMOVAL:
1.
Disconnect negative battery cable.
2.
Raise vehicle.
3.
Remove fuel tank. Refer to FUEL TANK ASSEMBLY.
4.
Remove pump and sending unit assembly by turning cam lock counterclockwise using tool J-36608 or J-24187 or equivalent.
^
Pull fuel pump up into attaching hose while pulling outward from the bottom support.
^
Do not damage rubber insulator or strainer.
INSPECTION:
1.
Inspect fuel pump attaching hose for signs of deterioration.
2.
Inspect rubber sound insulation at bottom of pump for deterioration.
INSTALLATION:
1.
Install pump assembly into attaching hose.
NOTE: Care should be taken not to fold over or twist strainer when installing sending unit as this will restrict fuel flow.
2.
Install sending unit and fuel pump assembly into fuel tank. (Always use a new O-ring seal).
3.
Install cam lock assembly. Turn cam lock clockwise to lock it.
4.
Install fuel tank assembly.
5.
Connect negative battery cable.
6.
START vehicle and check for fuel leaks.
