
Astro Van M V6-262 4.3L VIN Z (1994)
Front Steering Knuckle: Service and Repair
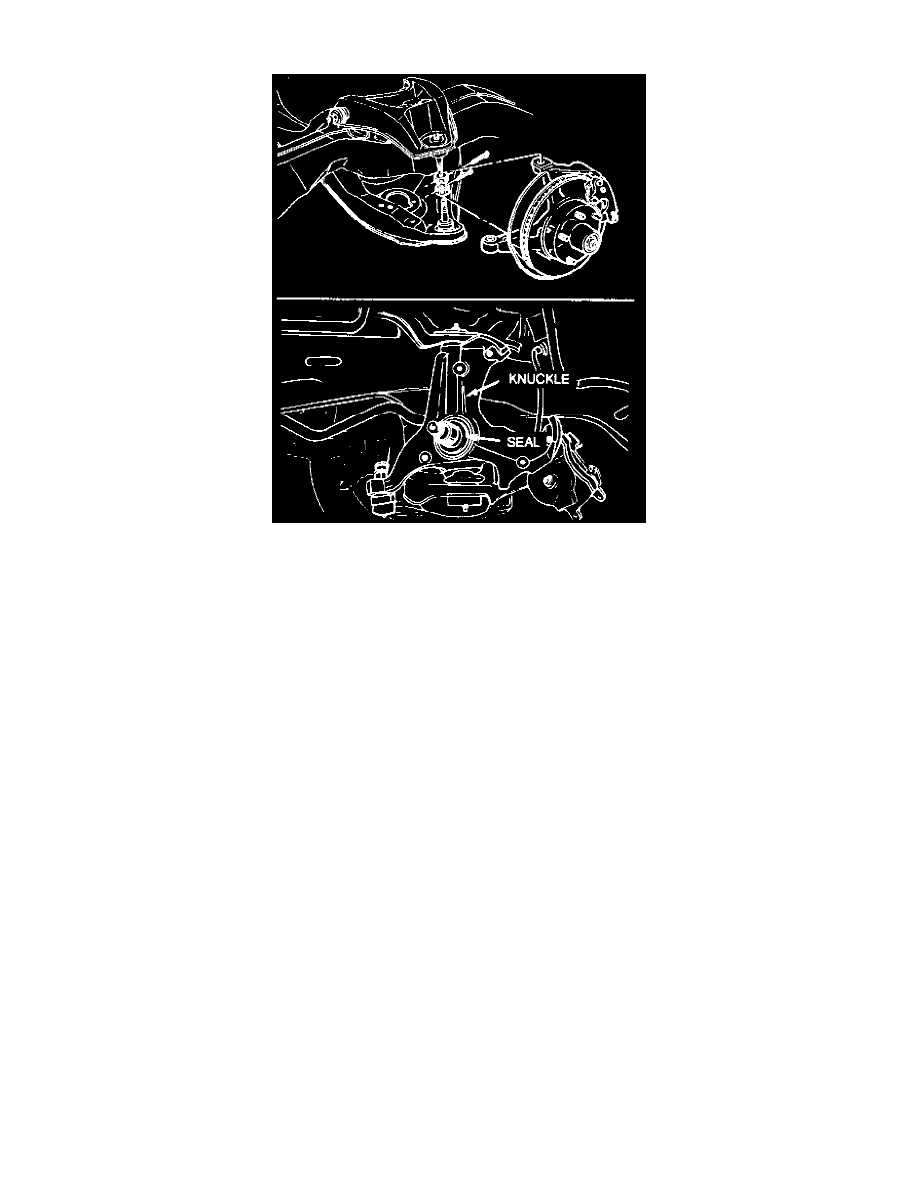
Fig. 17 Steering Knuckle Replacement
1. Raise front of vehicle and support with jack stands under front lift points, then remove wheel and tire assembly. Do not support vehicle under
lower control arm at this time, as vehicle may slip off stands during knuckle removal. Spring tension will also aid in breaking ball joint
studs loose from steering knuckle.
2. Remove brake caliper, then the brake and hub assembly.
3. Remove splash shield-to-steering knuckle attaching bolts.
4. Remove tie rod end from steering knuckle using tie rod end puller tool No. J-6627, or equivalent.
5. If steering knuckle is to be repaired or replaced, remove knuckle seal.
6. Remove ball joint studs from steering knuckle using ball joint remover tool No. J-23742, or equivalent.
7. Position a suitable jack under lower control arm near spring seat, then raise jack until it just supports control arm. Jack must remain in position
under control arm during removal and installation to hold spring and control arm in position.
8. Raise upper control arm to disengage upper ball joint stud from knuckle.
9. Remove steering knuckle from lower ball joint stud, Fig. 17.
10. After removal, inspect and clean tapered hole in steering knuckle. If hole is out of round or damaged in any way, then knuckle must be replaced.
11. Reverse procedure to install. Tighten upper ball joint nut, lower ball joint nut, splash shield attaching bolts and tie rod end to specifications.