
Avalanche 1500 4WD V8-5.3L (2007)
7. Remove the actuator insulator gasket.
8. If replacing the encoder motor, remove the locating pins from the old motor.
Installation Procedure
Important:
^
If the encoder motor is being replaced, ensure that the transfer case is in the neutral position. Manually shift the transfer case at the
actuator lever shaft, using a crescent wrench if necessary.
^
When installing the encoder motor, ensure that the encoder motor is indexed correctly and the motor is flat against the transfer case
before tightening the bolts.
^
A NEW encoder motor does NOT come with locating pins.
1. Install the locating pins to the NEW encoder motor.
2. Position a NEW actuator insulator gasket to the transfer case.
3. Install the encoder motor.
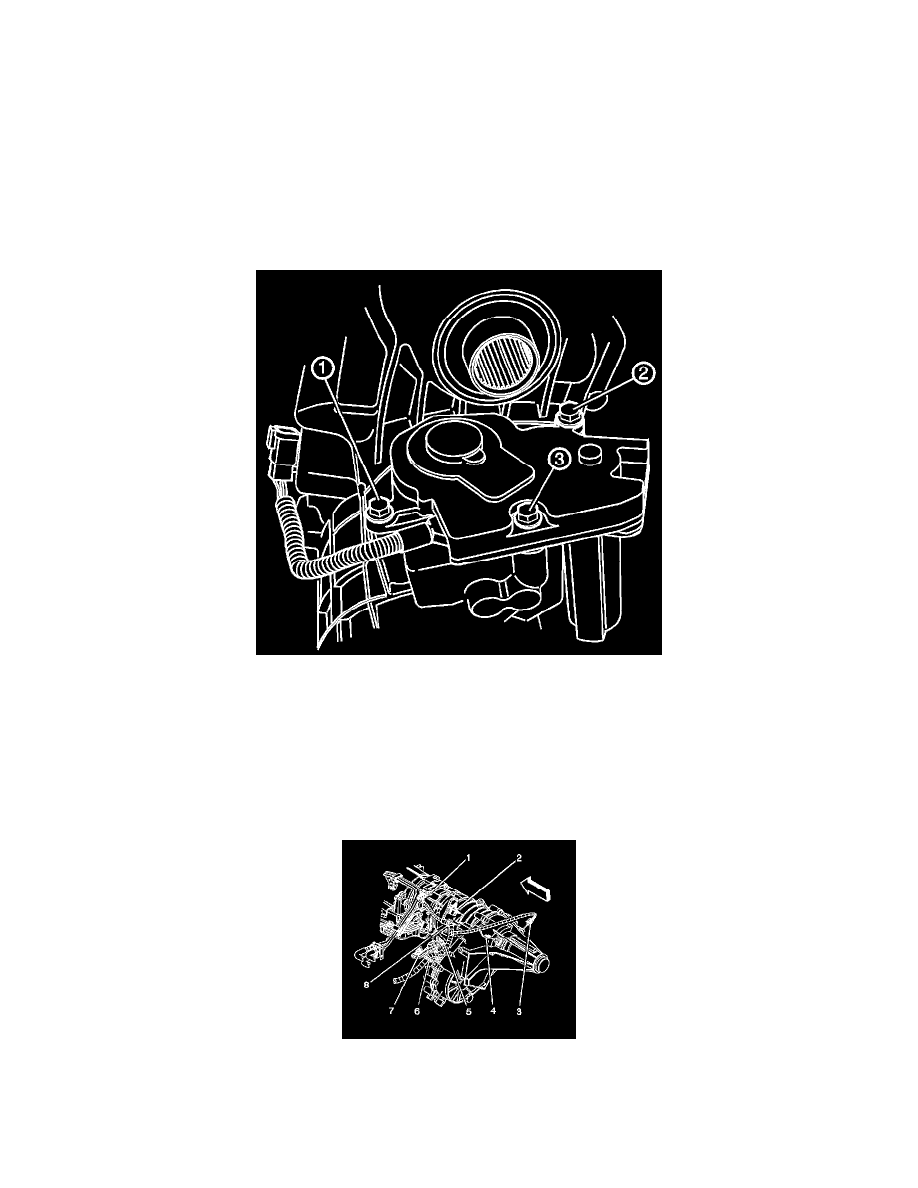
Notice: Refer to Fastener Notice.
4. Install encoder motor bolts.
Tighten the bolts, in the sequence shown, to 20 N.m (15 lb ft).
5. Connect the encoder motor electrical connector (7).
6. Connect the transfer case switch electrical connector (2).
7. Install the front propeller shaft.
8. Install the transfer case shield, if equipped.