
Avalanche 2500 2WD V8-8.1L VIN G (2002)
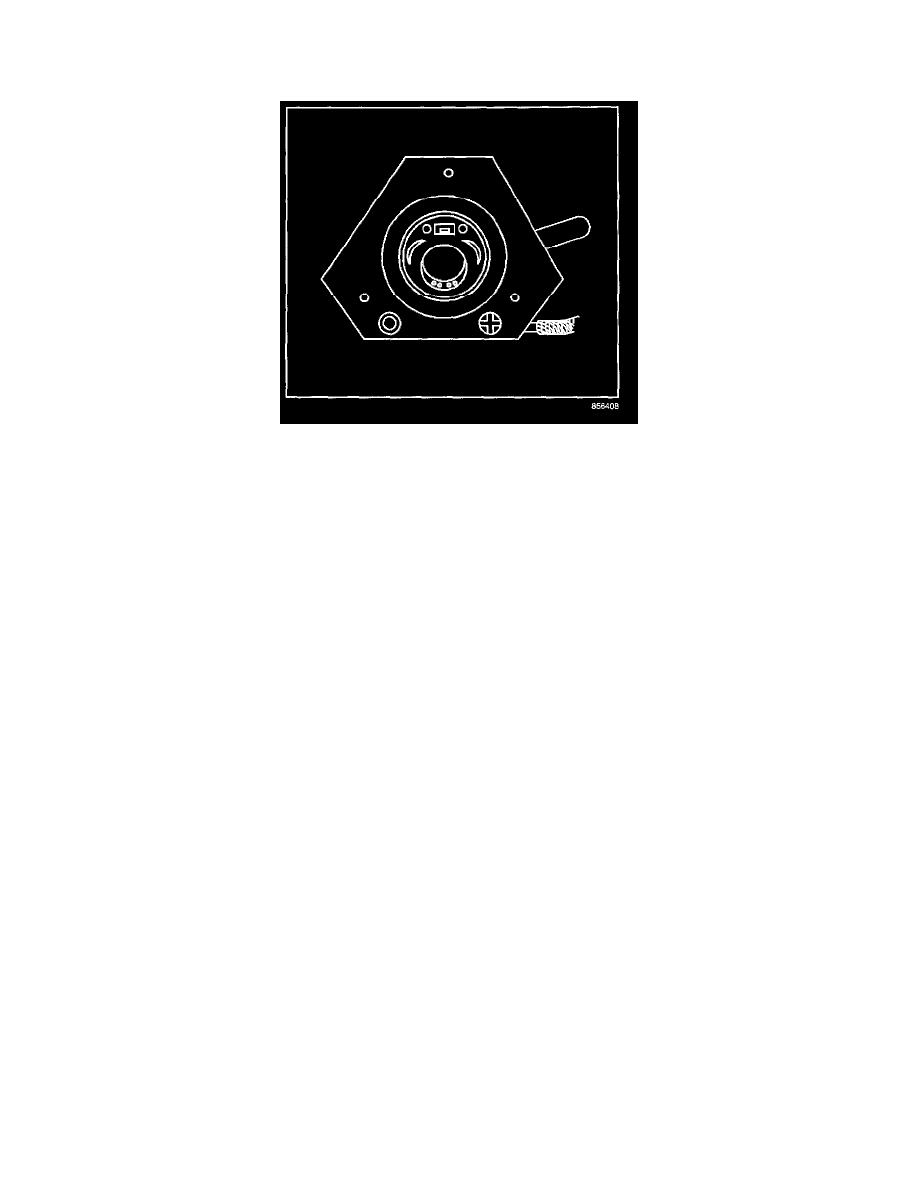
16.
Insert your finger into the filler neck opening. About 6.35 mm (0.25 in) below the spring door is a hump/bump, which extends all the way around
the interior diameter of the fuel filler neck.
Important:
Once the holes have been drilled, you should NOT be able to see the holes by simply removing the gas filler cap. The four holes should be
located under the silver metallic flap on the flange inside the filler neck from the 10 o'clock position to the 2 o'clock position. If you CAN see
the holes with the gas cap removed, the holes have been drilled in the wrong location.
17.
Referencing the above art and using a punch, place four evenly spaced punch marks (drill pilots) on the ridge under the fuel filler neck flap.
18.
With the 152 mm (6 in) long, 3.175 mm (0.125 in) (1/8 in) drill bit, carefully drill four holes. These holes must not go through the outside of the
fuel filler neck. As soon as you feel the drill break through the first level of metal, stop drilling.
19.
After all four holes have been drilled, feel into the opening for burrs from the drilling process. If burrs are felt, remove them with a suitable tool.
20.
Using compressed air, blow out all metal chips from the drilling process.
21.
Reinstall the fuel filler neck to the vehicle and secure with the 7 mm (0.28 in) screws.
Tighten
Tighten the screws to 2.3 N.m (20 lb in).
22.
Reinstall the fuel cap to the filler neck.
23.
Raise the vehicle.
24.
Insert the test hose, long end first, into the fuel filler hose to within 50 mm (2 in) of the 1st marked location,
Slowly and carefully continue inserting the test hose into the filler hose. You may feel a resistance where the fuel filler hose joins the "T" on top of
the tank. If so, turn the hose while inserting so that the hose slips over the end of the "T". About 12 mm (0.47 in) into the "T" is a valve (antisplash
back valve).
Continue to insert the test hose until you have reached the 2nd mark on the hose. If the test hose will not slide past the valve to the 2nd location the
rear auxiliary fuel tank must be replaced. Remove the test hose and continue with the next step.
25.
Reinstall the fuel filler neck ground strap to the frame bolt.
Tighten
Tighten the bolt to 9 N.m (80 lb in).
26.
Reinstall the rear axle vent tube retainer into its original location.
27.
Reinstall the fuel and vapor hoses to the fuel filler neck.