
Avalanche 4WD V8-5.3L (2011)
11. Remove the auxiliary A/C evaporator tubes from the vehicle.
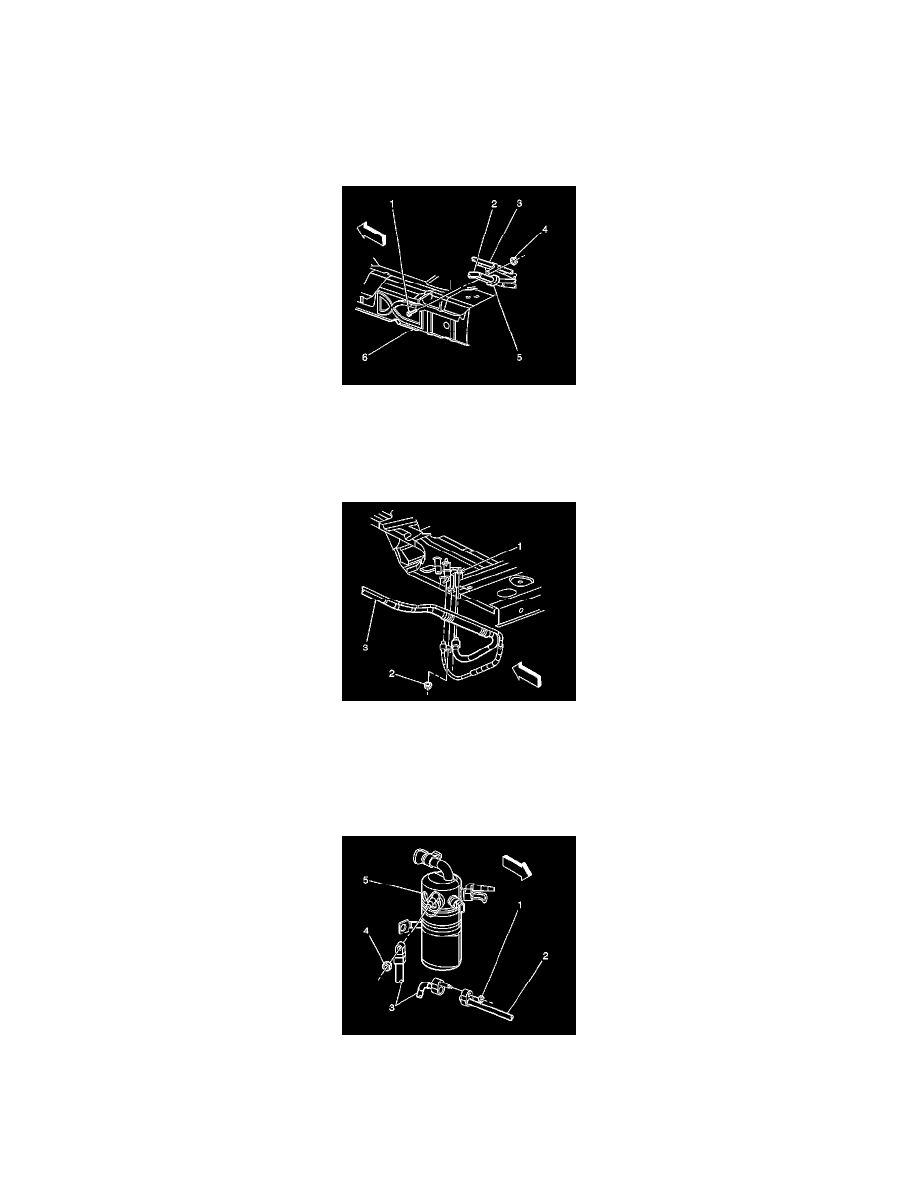
Installation Procedure
Note: The replacement A/C and heater pipes are shipped in two sections and spliced together upon installation. Refer to Auxiliary Heater and Air
Conditioning Pipe Repair See: Procedures.
1. Install the auxiliary A/C evaporator tubes to the vehicle.
2. Install the auxiliary A/C evaporator tubes (3) to the clamps (5).
Caution: Refer to Fastener Caution See: Service Precautions/Vehicle Damage Warnings/Fastener Caution.
3. Install the heater/A/C tubes retaining nut (4) to the stud (1) at the frame (6) and tighten to 7 Nm (62 lb in).
4. Install the auxiliary A/C evaporator tubes (2, 3) and the retaining nut to the auxiliary HVAC module and tighten to 16 Nm (12 lb ft).
5. Lower the vehicle.
6. Install the rear wheelhouse liner. Refer to Rear Wheelhouse Panel Liner Replacement .
7. Install the right assist step. Refer to Assist Step Replacement .
8. Install the front wheelhouse liner. Refer to Front Wheelhouse Liner Replacement - Right Side See: Body and Frame/Fender/Front Fender/Front
Fender Liner/Service and Repair/Front Wheelhouse Liner Replacement - Right Side.
9. Install the auxiliary A/C evaporator tubes (3) to the condenser tube (2) and the accumulator (5) using the nuts and tighten to 16 Nm (12 lb ft).
10. Recharge the refrigerant to the system. Refer to Refrigerant Recovery and Recharging .
11. Leak test the fittings of the component using the J 39400-A .
Discharge Hose Replacement