Avalanche 4WD V8-5.3L (2011)

Air Line: Service and Repair
Air Tube Repair
1. Locate the leaking area with soap and water or a stethoscope.
2. Before removing the air tube, perform the following procedures.
*
Turn the ignition ON, with the engine OFF.
*
Install a scan tool.
*
With the scan tool, exhaust the air from the system for at least 60 seconds.
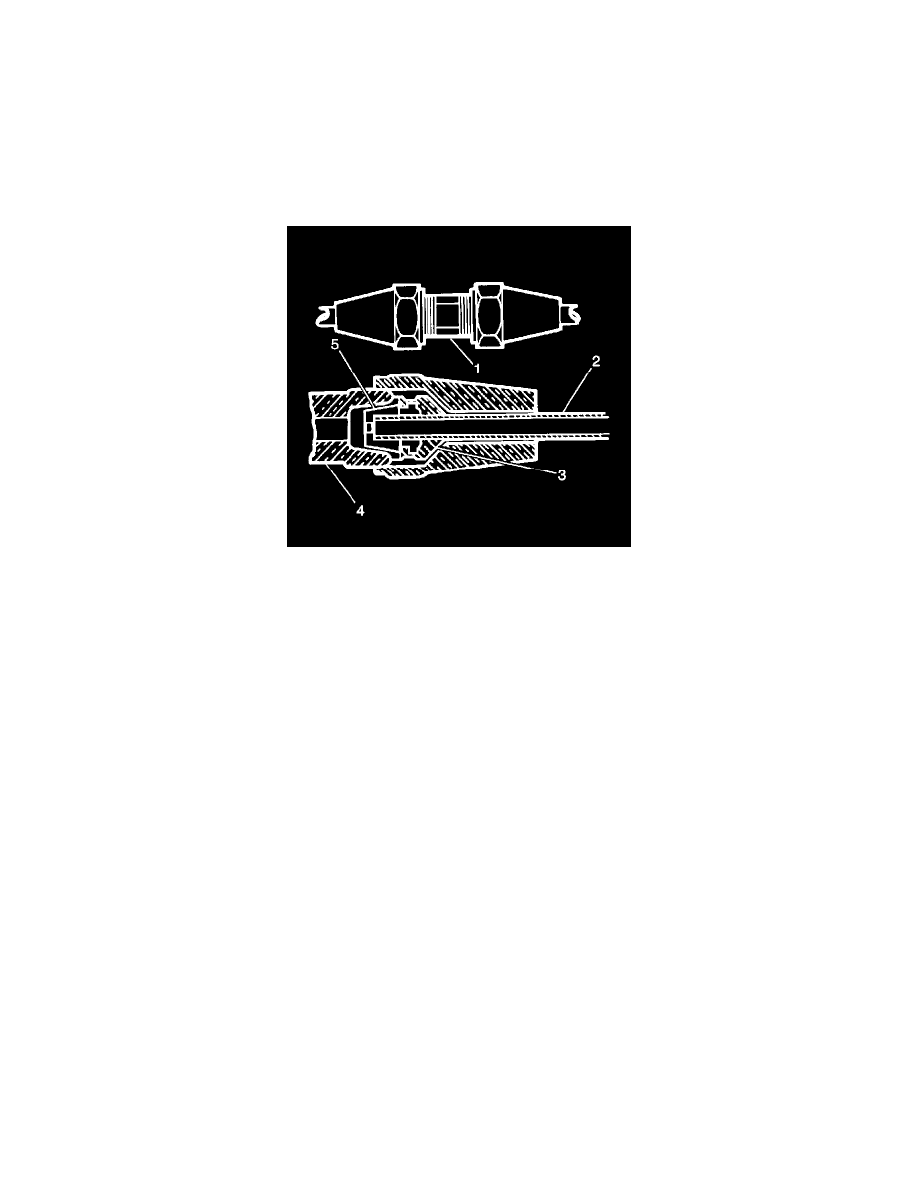
3. Cut and remove the leaking line (2) section.
4. Remove the plastic retainer pin from one of the nuts.
5. Slide the air line tube onto the nut until the line bottoms in the rubber seal (5).
Caution: Refer to Fastener Caution See: Service Precautions/Vehicle Damage Warnings/Fastener Caution.
6. Hold the air line tube in position.
Tighten the air line tube repair nut to 8 Nm (70 lb in).
7. Install the air line tube to the other end of the coupling.
8. Repeat Steps 3 through 5.
Note: Ensure that the repaired air line tube is secured in a location where the line is not pinched, or kinked, and will not contact the exhaust
system.
9. Install the air line tube to the vehicle.
10. Ensure that the vehicle is on level ground and perform the following steps.
*
Turn the ignition ON, with the engine OFF.
*
Install a scan tool.
*
With the scan tool, operate the air compressor for 30 seconds or until the rear of the vehicle begins to rise.
*
Remove the scan tool.
*
Cycle the ignition OFF, then back On, with the engine ON to allow the air suspension system to regain the desired rear suspension position.
