
Beretta L4-121 2.0L (1987)
Brake Shoe: Adjustments
The rear drum brakes, have self-adjusting shoe mechanisms that assure correct lining-to-drum clearances at all times. The automatic adjusters operate
only when the brakes are applied as the vehicle is moving rearward on Corsica models. On Beretta models, the automatic adjusters operate whenever the
service brakes are applied.
Although the brakes are self-adjusting, an initial adjustment is necessary after the brake shoes have been replaced, or when the length of the star wheel
adjuster has been changed during some other service operation.
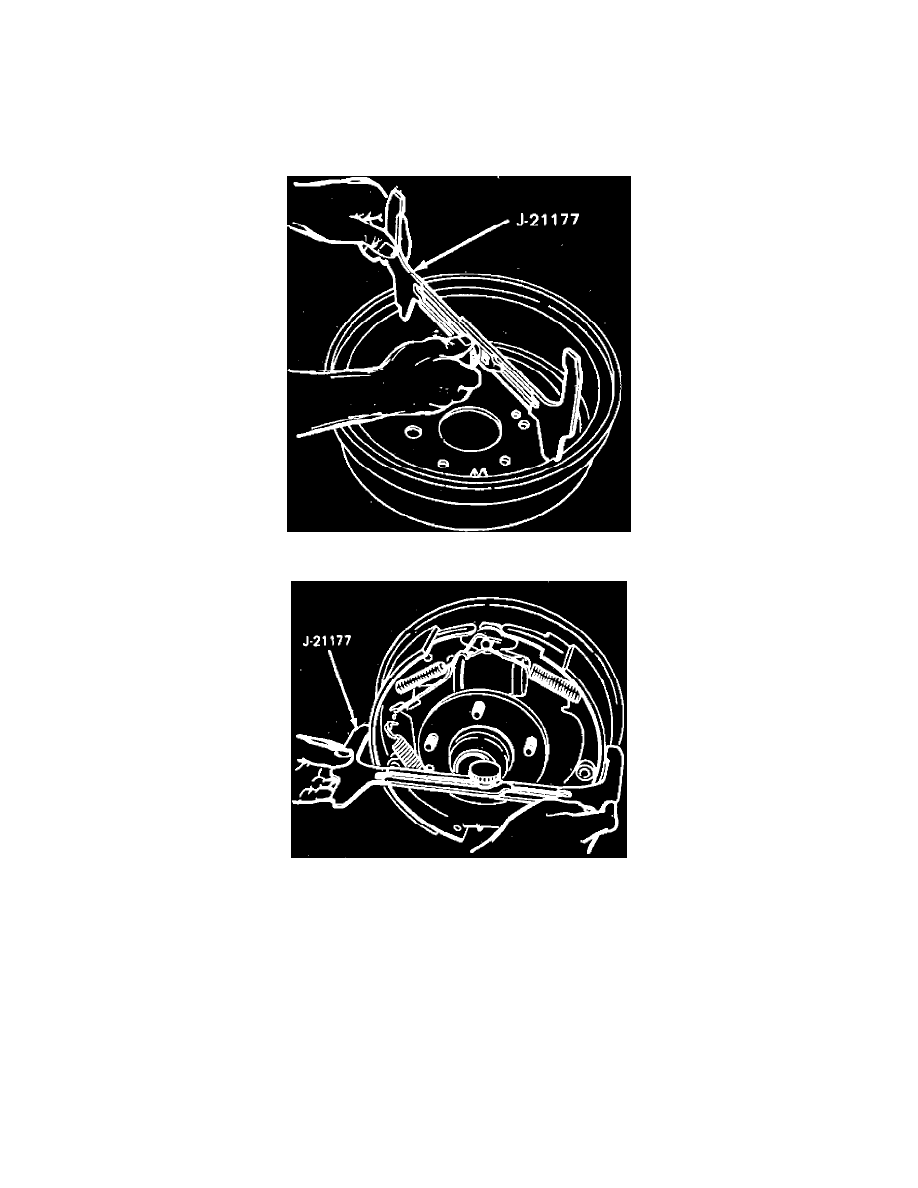
Fig. 6 Measuring brake drum inside diameter
Fig. 7 Adjusting brake shoe clearance
ADJUSTMENT
1.
Raise and support vehicle, then remove rear wheels and brake drums.
2.
Check to make sure that parking brake cable linkage and levers on secondary brake shoe are in ``free'' position.
3.
Using tool J-21177, measure brake drum inside diameter, Fig. 6.
4.
Turn brake adjusting screw to expand shoes to .050 inch less than diameter obtained on outside caliper portion of tool J-21177, Fig. 7.
5.
Adjust parking brake. Whenever rear drum brakes are serviced, the parking brake linkage cable at the equalizer must always be
readjusted to prevent possible damage to brake shoes.
6.
Install brake drums, wheels and tires and lower vehicle to floor.
7.
On Corsica models, drive vehicle alternately forward and backward, applying brakes moderately, to obtain satisfactory pedal height. On Beretta
models, drive vehicle and apply and release service brake 30---35 times with normal pedal force. Allow about one second between brake
applications until satisfactory pedal height is obtained.