
Beretta L4-138 2.3L DOHC QUAD 4 (1991)
Timing Chain: Fundamentals and Basics
Installation and Removal Hints and Tips
TIMING CHAIN REPLACEMENT HINTS AND TIPS
-
Always replace both the timing chain and sprocket as a combined unit.
-
A worn timing chain will not properly fit the teeth of a new sprocket and will result in a premature failure.
-
A new timing chain will rapidly wear away the teeth of an old sprocket.
-
Inspect the drive belts and replace if necessary.
-
Inspect the drive belt idler/tensioner pulleys for looseness and wobble. Replace any pulley which does not spin freely or has any wobble.
-
Rotate the engine to number 1 Top Dead Center prior to removing the timing chain.
NOTE: The alignment marks on the camshaft and crankshaft gears are positioned at number 1 Top Dead Center.
-
Do not turn the crankshaft or camshaft with the pulleys off. Using slip joint pliers or pipe wrenches to turn the crankshaft will damage the surface
and affect the press fit of the pulley.
-
Silicone sealant should be used very sparingly. Excessive sealant which squeezes out on the inside of the gasket can accumulate and restrict the oil
pump pickup screen or the coolant heater core.
-
Inspect the chain guides and tensioner foot and replace if excessively worn.
NOTE: Some wear is normal but if the chain guides are worn past 50% of their original thickness the guides may not last the life of the new
chain and should be replaced.
-
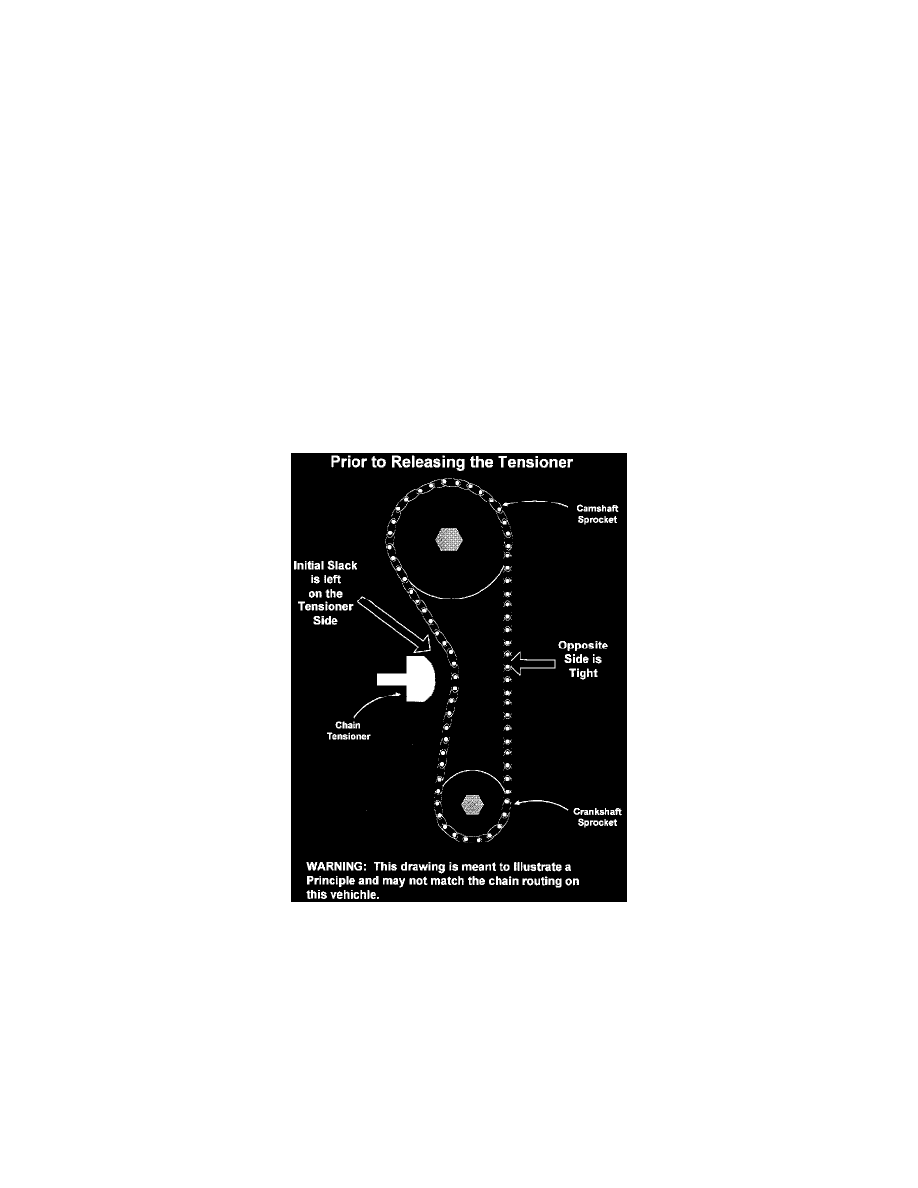
When installing the chain leave the initial slack on the tensioner side, the opposite side should be tight. If any slack is left on the side opposite of
the tensioner, upon initially rotating the engine the camshaft/crankshaft alignment will be incorrect.