
Beretta L4-138 2.3L DOHC QUAD 4 (1991)
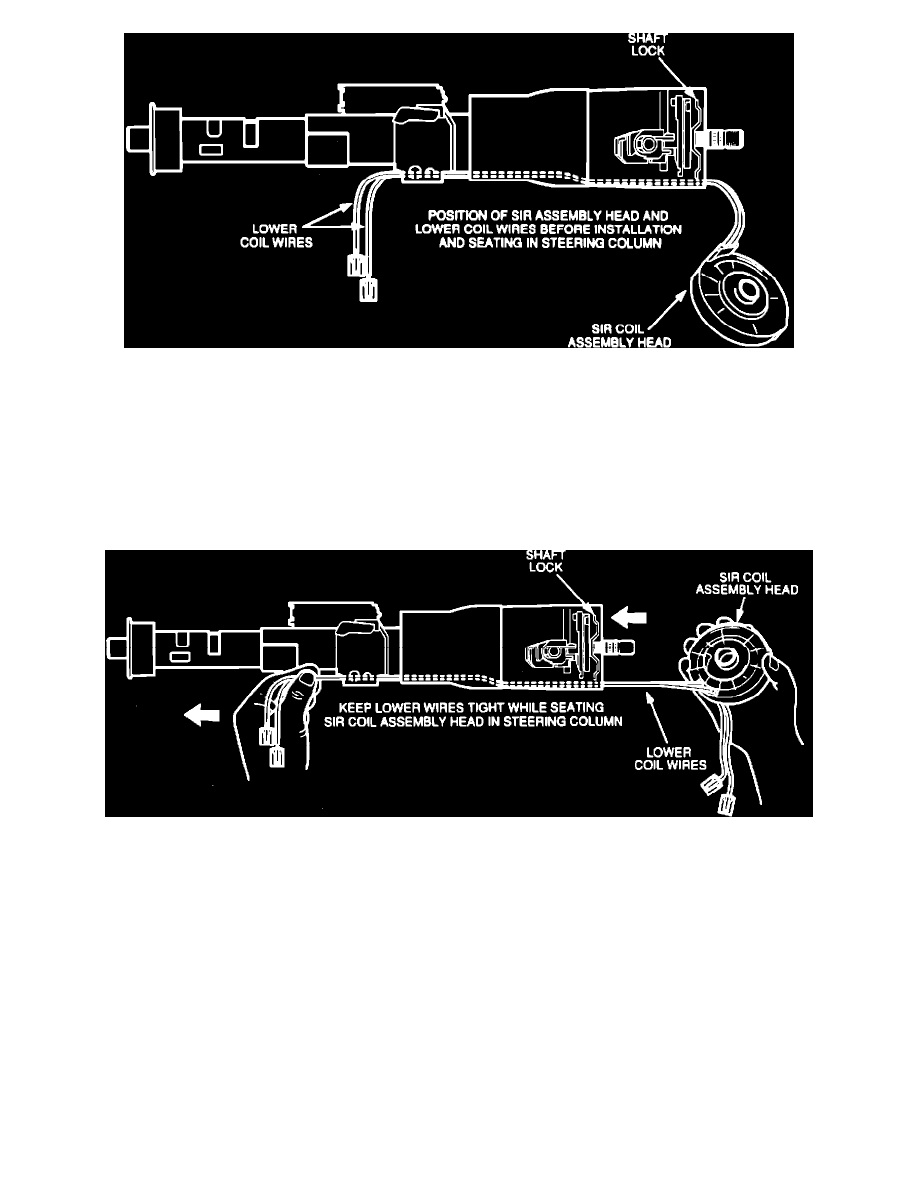
Figure 2 SIR Coil Assembly Before Seating
Begin this procedure with lower SIR coil wires routed through the column shift bowl exiting the I.P bracket on the jacket assembly (wire protector
removed) with the coil head hanging freely from the top of the column (See Figure 2).
Seat the SIR coil assembly as follows:
NOTE: SIR coil assemblies may be equipped with one or two sets of upper and lower coil wires depending on model.
1.
Grasp the ends of all the lower SIR coil wires below the I.P. bracket (See Figure 3).
Figure 3 SIR Coil Assembly Installation Procedure
2.
Grasp the SIR coil head with the other hand. Position the head assembly with the lower wires in the down position (See Figure 3).
3.
Stretch the SIR coil head and lower wires so that they are straight and tight with no slack.
4.
Pull on the lower wires to keep them straight while positioning the SIR coil head over the end of the upper steering shaft assembly.
5.
Continue to pull on the lower coil wires while moving the coil head down on the steering shaft.
6.
Align opening in SIR coil head with the horn tower.